icon tutorial, the first
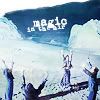
A couple people have asked me how I do bright coloring, like this icon here:

So I'm gonna show you, and it's super easy. I use Photoshop 7.0, and I'm sure these can be translated to PSP. I tend to be bad at explaining things, so hopefully this will be easy to follow. This can't be used for everything, so you will have to play around to find out what you like.
I'm starting out with this cap, also from "Chosen" (from the lovely people at Screencap Paradise). I'm assuming you already know how to crop, if you don't there are other tutorials out there to explain it.
After I crop, and resize to 100x100 pixels, I get this:

Duplicate it and set the top layer to "Screen". Merge these layers then go to Filters > Sharpen > Sharpen. I now have this:

Duplicate it, and set the top layer to "Soft Light". Do not merge these layers. I now have this:

In between the Background layer and the "Soft Light" layer, go to Layer > New Fill Layer > Solid Color, and pick a dark blue. I picked #020212:

Set this layer to "Exclusion", but I think it makes the sky washed out, so I erase the "Exclusion" layer from the sky. On top of the "Exclusion" layer (but still below the "Soft Light" layer), add a new "Solid Color" layer, this time I picked a lighter grey-blue #9FB8D6

Set this layer to "Color" and lower the opacity to 40%. I now have this:

I think it makes the icon look too cold, so I erase the "Color" layer from Buffy and the surrounding landscape, just leaving the gray-blue on the sky. I now have this:

And I'm finished. Now you can add text or brushes or textures if you want.
I also used this on these icons, with different, or some without coloring.


I hope this is helpful.
So I'm gonna show you, and it's super easy. I use Photoshop 7.0, and I'm sure these can be translated to PSP. I tend to be bad at explaining things, so hopefully this will be easy to follow. This can't be used for everything, so you will have to play around to find out what you like.
I'm starting out with this cap, also from "Chosen" (from the lovely people at Screencap Paradise). I'm assuming you already know how to crop, if you don't there are other tutorials out there to explain it.
After I crop, and resize to 100x100 pixels, I get this:
Duplicate it and set the top layer to "Screen". Merge these layers then go to Filters > Sharpen > Sharpen. I now have this:
Duplicate it, and set the top layer to "Soft Light". Do not merge these layers. I now have this:
In between the Background layer and the "Soft Light" layer, go to Layer > New Fill Layer > Solid Color, and pick a dark blue. I picked #020212:
Set this layer to "Exclusion", but I think it makes the sky washed out, so I erase the "Exclusion" layer from the sky. On top of the "Exclusion" layer (but still below the "Soft Light" layer), add a new "Solid Color" layer, this time I picked a lighter grey-blue #9FB8D6
Set this layer to "Color" and lower the opacity to 40%. I now have this:
I think it makes the icon look too cold, so I erase the "Color" layer from Buffy and the surrounding landscape, just leaving the gray-blue on the sky. I now have this:
And I'm finished. Now you can add text or brushes or textures if you want.
I also used this on these icons, with different, or some without coloring.
I hope this is helpful.