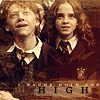
tutorial 04: some insight on my grunge style
i freaking broke down and wrote a tutorial. this is an INCREDIBLY simple one though. I usually take several more steps because i have to make bases , do more layers and lighten them up and perhaps use more gradients. but you'll kinda get the jist of how i make these new icons.
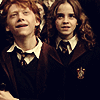
i started out with the picture of all the gryffindors looking up at harry riding his firebolt. however i wanted to make a r/h icon. so i took my selection tool, select the fixed aspect racio to 100x100. I did a selection of ron and then hermione. I pasted the ron ontop of hermione. Then i do my special blending masking thing! i love masking now. but anyway i'm not going to explain that because err i'd make the tutorial too long so go to touchstone's site. she has a great tutorial there. as far as I know only ps users can mask but psp users can use the spiffy eraser brush. ANYWAY, I do what i always do and duplicate the layer. On the duplicate, i desaturate it and set the layer to soft light.
i'm NOT going to put up the blend just because i want you guys to be able to make your own and not take mine. remember use my tips, but don't copy exactly! find a way to create your own style using my TIPS
now i do what i do to every single solitary icon i have. i'ts been in previous tutorials so i'm not going to do individual pics because eh takes up too much space.
first, make a new layer. fille it with #0C0B47 and set it to exclusion. But it's a bit too bright so i set changed the brightness of that layer to -28. now that's good. merge them now. make two new layers. fill both with #DCC7A6. set the layer above the base to color at 30% opacity and the one at the top to color burn at 30% opacity as well. merge all.
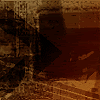
now this is the fun part. well this is one of my bases (which i'm going to make avilable sometime...not now. i need to make more). and i think to this one i actually put a gradient over one base and set it to something but anyway here it is
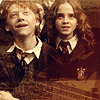
i pasted the r/h blend ontop of it and set the layer to screen.
for the font i used trajan a
for the small text it was set at 3pt and bold and at #FEE5B2
and for HOLD i set it at 8pt bold. both on crisp. at black. underneath that text layer i used the slection tool and created a little blob around HIGH and filled it with #FEE5B2, set it to lighten at 33% opacity.
tada. here it is

i started out with the picture of all the gryffindors looking up at harry riding his firebolt. however i wanted to make a r/h icon. so i took my selection tool, select the fixed aspect racio to 100x100. I did a selection of ron and then hermione. I pasted the ron ontop of hermione. Then i do my special blending masking thing! i love masking now. but anyway i'm not going to explain that because err i'd make the tutorial too long so go to touchstone's site. she has a great tutorial there. as far as I know only ps users can mask but psp users can use the spiffy eraser brush. ANYWAY, I do what i always do and duplicate the layer. On the duplicate, i desaturate it and set the layer to soft light.
i'm NOT going to put up the blend just because i want you guys to be able to make your own and not take mine. remember use my tips, but don't copy exactly! find a way to create your own style using my TIPS
now i do what i do to every single solitary icon i have. i'ts been in previous tutorials so i'm not going to do individual pics because eh takes up too much space.
first, make a new layer. fille it with #0C0B47 and set it to exclusion. But it's a bit too bright so i set changed the brightness of that layer to -28. now that's good. merge them now. make two new layers. fill both with #DCC7A6. set the layer above the base to color at 30% opacity and the one at the top to color burn at 30% opacity as well. merge all.

now this is the fun part. well this is one of my bases (which i'm going to make avilable sometime...not now. i need to make more). and i think to this one i actually put a gradient over one base and set it to something but anyway here it is

i pasted the r/h blend ontop of it and set the layer to screen.

for the font i used trajan a
for the small text it was set at 3pt and bold and at #FEE5B2
and for HOLD i set it at 8pt bold. both on crisp. at black. underneath that text layer i used the slection tool and created a little blob around HIGH and filled it with #FEE5B2, set it to lighten at 33% opacity.
tada. here it is
