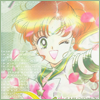
tutorial 02- Eternal Sailor Mercury
> >
Used Phtoshop CS, Still please comment!
:D Tutorial 2~! This time of featuring Mizuno Ami from the infamous Bishoujo Senshi Sailor Moon series. This tutorial I think can be used by other programs, its shorter then my last one and has less layers to boot. By the way, please do not copy this tutorial down to the letter, EXPERIMENT! That's what I did!
1. Find your image :O Preferably one with a white background or minimal bright out there colors. I found this image at Manga Style (which btw is an excellent source for all things relating to the manga version of the series).
Reference!
2. Since this a large image, I'm going to crop my image and then resize it to 400x400. It might seem weird, but from what I've done with other icons of this size, this is the better way to do this. At the end resize it to 100x100. (for this tutorial the images are 100x100 to help with loading/bandwidth/whateveritscallednow)
our 400x400 image
2b. By the way, if you don't like seeing the image so big OR you want to see how your final image will come out when you resize it, go to the magnifying glass on your tool bar and shrink it down to 25% or you can do the same at View > Zoom Out.
3. Now go to Image > Adjustments > Auto Levels, go to the same place and do Auto Contrast and Auto Color.
4. Gradient time! Use a white to medium blue gradient for Ami due to the color theme of her uniform. If anyone else is using this for other BSSM characters or anything else, just use a gradient that goes well with the character/person.
Gradient by ladylenne. Set your gradient to Soft Light 100%.
> >
5. Main background time :D Using a nice one from of colorfilter's base sets, I reduce the Fill to 67%. From there go to your Eraser, look up and find your mode and set it up to be Mode: Brush, Opacity: 75% and Flow: 100%. Erase the bg over your image.
> >
6. Almost done! Using another texture done by colorfilter but this time from the Texture sets. We are going to find one that has a more of a blue tinge to go alone with our image. Set it to Overlay 47%.
> >
7. :D last step before adding a border! I don't like how Mercury/Ami doesn't stand out as much as I want her to :/ Duplicate your base image and bring it to the top. Go to Filter > Sharpen > Unsharpen Mask. My settings are Amount: 100%, Radius: 100.0 and Threshold: 5 pixels.
Yea, I know it doesn't look right, but we aren't finished! I've set mine to Multiply, Opacity 64%, Fill 29%
> >
7b. Optional layer..thing. Make a New Layer, hit ctrl + shift + e. Select a color with the Eye Dropper. Edit > Stroke, select Inside and whatever width you want your border and you're done! Resize your image to 100x100 for lj standards and you're good to go.
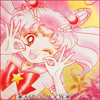
Others using this technique-

and

(i have more, but I'm not done with the full set XD)