My Third tutorial - Misty&May
Another tutorial. I know, the subjects aren't so usual. But after have seen the last special about Pokemon I almost sure to have found my new ship: Misty&May. Look at my icons, isn't clear? XD
Go from this to
I used Photoshop CS 8.0
1. Take your base, crop, and resize 100x100, sharpen once

2. Create a new layer, fill with #050E2D and set to Exclusion opacity 100%

3. Another layer, fill with #B5BA6A and set to Darken 60%
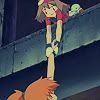
4. Fill with #FFDFE4 and set Soft Light 100%. Duplicate once.
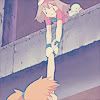
5. Duplicate your icon base and drag to the top. Set to Soft light 60%

6. Apply this texture (by
gender) and set to Color Burn 100%

7. Apply this texture (by
colorfilter) and set to Screen 100%
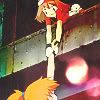
8. Merge All (Layer -> Merge All)
9. Apply this texture (by
colorfilter and modify by me) under the image, Normal 100%. Set May&Misty's layer to Overlay 100%.
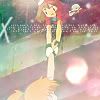
10. Duplicate the image once. The layer must remain to Overlay 100%
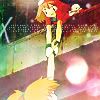
11. Duplicate again, and set to Soft Light 100%. Erase everything except Misty, May and their arms. This level works to adjust the darkness of the subject of your icon.
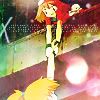
12. Add some text. If you want, you can add a Drop Shadow effect (It's simply to do : double Click on the text layer, and check Drop Shasow.. play with settings!)

Done!
Hope to be useful for you ;)
Go from this to

I used Photoshop CS 8.0
1. Take your base, crop, and resize 100x100, sharpen once

2. Create a new layer, fill with #050E2D and set to Exclusion opacity 100%

3. Another layer, fill with #B5BA6A and set to Darken 60%

4. Fill with #FFDFE4 and set Soft Light 100%. Duplicate once.

5. Duplicate your icon base and drag to the top. Set to Soft light 60%

6. Apply this texture (by

gender) and set to Color Burn 100%

7. Apply this texture (by

colorfilter) and set to Screen 100%

8. Merge All (Layer -> Merge All)
9. Apply this texture (by

colorfilter and modify by me) under the image, Normal 100%. Set May&Misty's layer to Overlay 100%.

10. Duplicate the image once. The layer must remain to Overlay 100%

11. Duplicate again, and set to Soft Light 100%. Erase everything except Misty, May and their arms. This level works to adjust the darkness of the subject of your icon.

12. Add some text. If you want, you can add a Drop Shadow effect (It's simply to do : double Click on the text layer, and check Drop Shasow.. play with settings!)

Done!
Hope to be useful for you ;)