Tutorial #2 (for PS7)
Elaine wants to know my sekrats :[
How to turn this to
Crop the picture, then Filter -> Sharpen once, then Filter -> Unsharp Mask (Amount: 100%, Radius: 8 pixels, Threshold: 44 levels)

Duplicate the base and set layer to multiply at 100%.

Duplicate the base and set to soft light at 100%. On this layer, go to Image -> Adjustments -> Hue/Saturation and at edit: Master, shift the Satuation meter towards -55.

Duplicate the base and set to hard light at 68%.

Duplicate the base again and set to soft light at 100%. Go to the Hue/Saturation menu again and fiddle around with the Hue, Saturation and Lightness meters on Edit: Master until the image looks something like this (the closest I got was Hue: -175, Saturation: +86, Lightness: -48):

Because this icon is a PB made for a character meant to have brown eyes, create a new layer, flood fill with #6A3C0B and set layer on Hue at 100%. Erase everything except the eyes.

Create a new layer and go to Select -> All, then Edit -> Stroke. Set at 2 px in #FFFFFF, Inside. Then create a new layer and go to Select -> All, then Edit -> Stroke. Set at 1 px in #000000, Inside.

Create a new layer and use this gradient by crumblingwalls and set to soft light at 100%.

->
Create a new layer and use this gradient by I forget if someone recognises this one tell me please and set to soft light at 74%.

->
Create a new layer and use this gradient by crublingwalls and set to lighten at 100%.

->
Duplicate the base and set to soft light at 100%. Go to the Hue/Saturation menu and fiddle around with the settings until the icon looks like this (again, closest I got was Hue: -82, Saturation: +9, Lightness: +11):

Duplicate the Hue layer for the eyes.

Create a new layer and use this gradient by crumblingwalls and set to lighten at 70%.

->
Create a new layer and use this gradient by crumblingwalls and set to overlay at 25%

->
Use this texture by reyesphile and set to screen at 100%. Use the smudge tool at 50% strength to get off the bits covering her face and the top left corner.
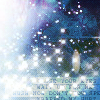
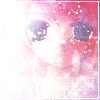
->
->
The larger text is in Times New Roman 6pt, kerning at 300, colour #CF9B9B, anti alias on sharp, opacity 73%. The smaller text is Garamond 1pt, kerning 1000, everyhint else the same as the larger text.

Create a new layer, flood fill with #000000 and set on soft light. Fiddle around with opacity until the icon is as dark or light as you want. I settled for around 35%.

Layer -> Merge Visible and we're done :D
How to turn this to

Crop the picture, then Filter -> Sharpen once, then Filter -> Unsharp Mask (Amount: 100%, Radius: 8 pixels, Threshold: 44 levels)

Duplicate the base and set layer to multiply at 100%.

Duplicate the base and set to soft light at 100%. On this layer, go to Image -> Adjustments -> Hue/Saturation and at edit: Master, shift the Satuation meter towards -55.

Duplicate the base and set to hard light at 68%.

Duplicate the base again and set to soft light at 100%. Go to the Hue/Saturation menu again and fiddle around with the Hue, Saturation and Lightness meters on Edit: Master until the image looks something like this (the closest I got was Hue: -175, Saturation: +86, Lightness: -48):

Because this icon is a PB made for a character meant to have brown eyes, create a new layer, flood fill with #6A3C0B and set layer on Hue at 100%. Erase everything except the eyes.

Create a new layer and go to Select -> All, then Edit -> Stroke. Set at 2 px in #FFFFFF, Inside. Then create a new layer and go to Select -> All, then Edit -> Stroke. Set at 1 px in #000000, Inside.

Create a new layer and use this gradient by crumblingwalls and set to soft light at 100%.

->

Create a new layer and use this gradient by I forget if someone recognises this one tell me please and set to soft light at 74%.

->

Create a new layer and use this gradient by crublingwalls and set to lighten at 100%.

->

Duplicate the base and set to soft light at 100%. Go to the Hue/Saturation menu and fiddle around with the settings until the icon looks like this (again, closest I got was Hue: -82, Saturation: +9, Lightness: +11):

Duplicate the Hue layer for the eyes.

Create a new layer and use this gradient by crumblingwalls and set to lighten at 70%.

->

Create a new layer and use this gradient by crumblingwalls and set to overlay at 25%

->

Use this texture by reyesphile and set to screen at 100%. Use the smudge tool at 50% strength to get off the bits covering her face and the top left corner.

->

->

The larger text is in Times New Roman 6pt, kerning at 300, colour #CF9B9B, anti alias on sharp, opacity 73%. The smaller text is Garamond 1pt, kerning 1000, everyhint else the same as the larger text.

Create a new layer, flood fill with #000000 and set on soft light. Fiddle around with opacity until the icon is as dark or light as you want. I settled for around 35%.

Layer -> Merge Visible and we're done :D