You're never gonna get away from me
numbly_breaking asked for a tutorial, so here we go...
From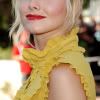
to
1. This is the base (You don't have to duplicate it or to set it to screen. I kept the original pic.) :

2. Add the CURVES :
The values are :
RGB (cap.) -- Input : 106 Output : 150
Red (cap.) -- Input : 115 Output : 137
Green (here I have 3 points : cap.)
... first point - Input : 53 Output : 148
... second point - Input : 114 Output : 130
... third point - Input : 164 Output : 181
Blue (cap.)-- Input : 82 Output : 142
Set the curves to soft light.
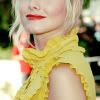
3. Take this texture and set it to color burn 100%.
Then duplicate the same texture and set it to color burn too but reduce the opacity to 50%.
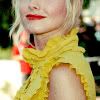
4. Add this texture by perforada and set it to screen 100%.
5. Create a new SELECTIVE COLOR layer.
The values are :
Reds
Cyan: -100
Magenta: 0
Yellow: +100
Black: 0
Yellows
Cyan: +100
Magenta: 0
Yellow: -55
Black: 0
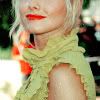
6. Now create a new COLOR BALANCE layer.
The "tone balance" is set to Midtones. The "color level" values are : 50 25 50
7. This time add this other texture also made by perforada and set it to screen. Then set the opacity to 36%.
8. Now of course you can do whatever you want... I wrote "Kristen" and used the font called "Assign" at 24px.
And... we're done !!! :)

numbly_breaking also asked a tutorial for this one :

1. The base :

Duplicate the base twice. Set the first duplicated layer to overlay 30% and the second layer to screen 30%.

Steps 2, 3, 4, 5, 6 and 7 are exactly the same as the ones for the tutorial above.
TA-DA :
If you have any questions, you know what to do. ;)
From

to
1. This is the base (You don't have to duplicate it or to set it to screen. I kept the original pic.) :

2. Add the CURVES :
The values are :
RGB (cap.) -- Input : 106 Output : 150
Red (cap.) -- Input : 115 Output : 137
Green (here I have 3 points : cap.)
... first point - Input : 53 Output : 148
... second point - Input : 114 Output : 130
... third point - Input : 164 Output : 181
Blue (cap.)-- Input : 82 Output : 142
Set the curves to soft light.

3. Take this texture and set it to color burn 100%.
Then duplicate the same texture and set it to color burn too but reduce the opacity to 50%.

4. Add this texture by perforada and set it to screen 100%.
5. Create a new SELECTIVE COLOR layer.
The values are :
Reds
Cyan: -100
Magenta: 0
Yellow: +100
Black: 0
Yellows
Cyan: +100
Magenta: 0
Yellow: -55
Black: 0

6. Now create a new COLOR BALANCE layer.
The "tone balance" is set to Midtones. The "color level" values are : 50 25 50

7. This time add this other texture also made by perforada and set it to screen. Then set the opacity to 36%.

8. Now of course you can do whatever you want... I wrote "Kristen" and used the font called "Assign" at 24px.
And... we're done !!! :)
numbly_breaking also asked a tutorial for this one :
1. The base :

Duplicate the base twice. Set the first duplicated layer to overlay 30% and the second layer to screen 30%.

Steps 2, 3, 4, 5, 6 and 7 are exactly the same as the ones for the tutorial above.
TA-DA :

If you have any questions, you know what to do. ;)