Tutorial 7 - The Grey Havens
Making 
from
This icon was made with GIMP 2.2, but can be easily translated to any other program.
I started off with a cap from RotK. I cropped and resized to get this:
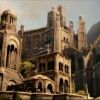
I then opened the Levels dialog (Layer>>Colors>>Levels) and twiddled with it a bit to brighten my base. This is what I got:

I sharpened the base (Filters>>Enhance>>Sharpen) at a strength of 50. This is what I got:
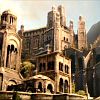
I duplicated the base, and desaturated (Layer>>Colors>>Desaturate) to get this:
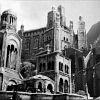
Duplicate the original coloured and tweaked base and bring it to the top. Set it to Soft Light at 100. This is what I got:
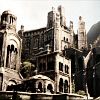
Now, I took a light texture (I'm not sure who it's by), desaturated it and fiddled with it a bit to get this:
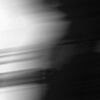
I duplicated it thrice. I set the first (bottom) copy to Screen at 100, and the other two copies to Soft Light at 100 and 40 respectively. My image looked like this:
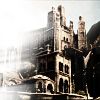
Now, I took this light texture:
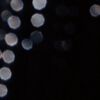
(by colorfilter), and set it to Addition at 100. (I hear that PS and PSP don't have 'Addition' - in that case, a Linear Dodge or Screen layer would work.) This is what I got:
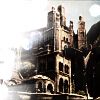
I flood-filled a new layer with white and set to Soft Light:
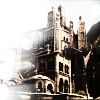
Now for the colouring bit. I took this gradient by adoralyna, from her Unusual Gradients 2 set:
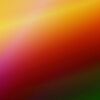
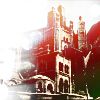
I set it to Lighten Only (Lighten in PS/PSP) at 100:
Now, I cut out a small part from the coloured base (black denotes transparency) and positioned it:
My icon looks like this now:
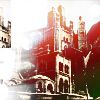
I cut out another part of the base:
I DESATURATED it and left it at Normal:
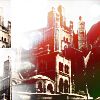
Now, I cut out a small part of my gradient:

I set it to Multiply at 100:
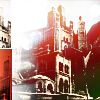
I duplicated the layer, flipped it vertically and set it to Soft Light at 50:
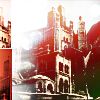
Now, I made a combination of a couple of _joni's brushes:
I set that to Multiply at 100:
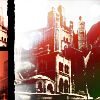
Then, I took this gradient on a new layer:

I added a layer mask (Layer>>Mask>>Add Layer Mask) and filled it with this gradient:

I set that layer to Difference at 100:
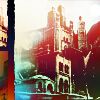
I added a brush by _joni in the top corner:
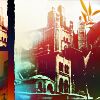
I added this brush (by teh_indy, I think):
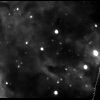
I set it to Soft Light and duplicated the layer a couple of times:
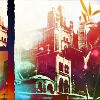
I added a tiny text brush by saihara, and there, I'm done.
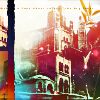
This icon can be used nominated, or whatever, but please credit noldo_icons. Comments and criticism are appreciated; I'd also love to see what you did with this.

from

This icon was made with GIMP 2.2, but can be easily translated to any other program.
I started off with a cap from RotK. I cropped and resized to get this:

I then opened the Levels dialog (Layer>>Colors>>Levels) and twiddled with it a bit to brighten my base. This is what I got:

I sharpened the base (Filters>>Enhance>>Sharpen) at a strength of 50. This is what I got:

I duplicated the base, and desaturated (Layer>>Colors>>Desaturate) to get this:

Duplicate the original coloured and tweaked base and bring it to the top. Set it to Soft Light at 100. This is what I got:

Now, I took a light texture (I'm not sure who it's by), desaturated it and fiddled with it a bit to get this:

I duplicated it thrice. I set the first (bottom) copy to Screen at 100, and the other two copies to Soft Light at 100 and 40 respectively. My image looked like this:

Now, I took this light texture:

(by colorfilter), and set it to Addition at 100. (I hear that PS and PSP don't have 'Addition' - in that case, a Linear Dodge or Screen layer would work.) This is what I got:

I flood-filled a new layer with white and set to Soft Light:

Now for the colouring bit. I took this gradient by adoralyna, from her Unusual Gradients 2 set:

I set it to Lighten Only (Lighten in PS/PSP) at 100:

Now, I cut out a small part from the coloured base (black denotes transparency) and positioned it:

My icon looks like this now:

I cut out another part of the base:

I DESATURATED it and left it at Normal:

Now, I cut out a small part of my gradient:

I set it to Multiply at 100:

I duplicated the layer, flipped it vertically and set it to Soft Light at 50:

Now, I made a combination of a couple of _joni's brushes:

I set that to Multiply at 100:

Then, I took this gradient on a new layer:

I added a layer mask (Layer>>Mask>>Add Layer Mask) and filled it with this gradient:

I set that layer to Difference at 100:

I added a brush by _joni in the top corner:

I added this brush (by teh_indy, I think):

I set it to Soft Light and duplicated the layer a couple of times:

I added a tiny text brush by saihara, and there, I'm done.

This icon can be used nominated, or whatever, but please credit noldo_icons. Comments and criticism are appreciated; I'd also love to see what you did with this.