Falling petals tutorial
-IMPORTED FROM MY OLD ICON JOURNAL-
Make
or
Falling petals
Yay! I love falling petals since I see dozens of spring blossoms everywhere right now. So pretty ^_^
Falling petals 1: For colored icons

example icon:
using 4 frames
or 7 frames (animation file below)
If you want your icon to be under 40 kbs, use this one since it has less frames. animation is much faster than falling petals 2, but it still works great I think.
I won't go into details since there are already many tutorials out there on animation, here's a brief one for Imageready:
1) Open the petals animation in imageready
2) Open your finished icon and copy. (You can also select the icon and hit ctrl-c)
3) Paste the icon on the bottom-most layer of the animation. (go to the 2-up view to see your icon in the gif state)
4) On the optimized window, set preset to: GIF 128 Dithered
You're done! :D
Falling petals 2: For b&w or icons with minimum coloring

example icon: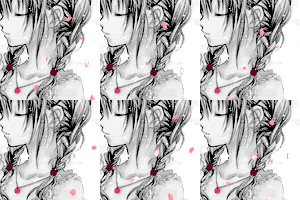
using 7 frames
This animation has more frames, so it's much better for b&w icons if you wanna keep it under 40kbs.
How to use in imageready:
1) Folow steps 1-4 from falling petals 1 tutorial
2) Since the image is black and white, you can set colors to 32. The option is at the optimize window >> Color Table>> Color. Set the colors to 32. If the image looks distorted, put a higher number.
Other variations:

<--10 frames
<--6 frames
<--3 frames
<--12 frames
Additional tutorial: How to further reduce file size
If after decreasing frames/ colors, nothing works. Try this. On the optimize window, there's a little button on the right with a small arrow within, click >> Optimize to File size >> 40kb. Sometimes it works, but sometimes it totally distorts your icon. Well, just have fun and experiment.
You can also rotate, change the colors of the blossoms and whatnot. Just experiment! Other Examples:


If you want to try making your own blossoms, here's a really short and brief tutorial:
Use stock images of petals. Cut out one petal and set as a new layer, duplicate and change directions. Lay out your petals in the direction you want it to flow, and hide a few layers as you move along.
and very soon you get something like this:
(It looks slightly strange when transparent. Add it to an image and you get:

x Comments appreciated
x Credits are lovely
x Any questions? Simply ask.
x Watch this community for more updates!
Make
or

Falling petals
Yay! I love falling petals since I see dozens of spring blossoms everywhere right now. So pretty ^_^
Falling petals 1: For colored icons

example icon:

using 4 frames

or 7 frames (animation file below)
If you want your icon to be under 40 kbs, use this one since it has less frames. animation is much faster than falling petals 2, but it still works great I think.
I won't go into details since there are already many tutorials out there on animation, here's a brief one for Imageready:
1) Open the petals animation in imageready
2) Open your finished icon and copy. (You can also select the icon and hit ctrl-c)
3) Paste the icon on the bottom-most layer of the animation. (go to the 2-up view to see your icon in the gif state)
4) On the optimized window, set preset to: GIF 128 Dithered
You're done! :D
Falling petals 2: For b&w or icons with minimum coloring

example icon:

using 7 frames
This animation has more frames, so it's much better for b&w icons if you wanna keep it under 40kbs.
How to use in imageready:
1) Folow steps 1-4 from falling petals 1 tutorial
2) Since the image is black and white, you can set colors to 32. The option is at the optimize window >> Color Table>> Color. Set the colors to 32. If the image looks distorted, put a higher number.
Other variations:

<--10 frames

<--6 frames

<--3 frames

<--12 frames
Additional tutorial: How to further reduce file size
If after decreasing frames/ colors, nothing works. Try this. On the optimize window, there's a little button on the right with a small arrow within, click >> Optimize to File size >> 40kb. Sometimes it works, but sometimes it totally distorts your icon. Well, just have fun and experiment.
You can also rotate, change the colors of the blossoms and whatnot. Just experiment! Other Examples:

If you want to try making your own blossoms, here's a really short and brief tutorial:
Use stock images of petals. Cut out one petal and set as a new layer, duplicate and change directions. Lay out your petals in the direction you want it to flow, and hide a few layers as you move along.
and very soon you get something like this:

(It looks slightly strange when transparent. Add it to an image and you get:

x Comments appreciated
x Credits are lovely
x Any questions? Simply ask.
x Watch this community for more updates!