Icon tutorial//Photoshop CS3 and 100x100 paper textures
ibdreamy wanted to know how to get the "notebook effect".
So I came up with the following tutorial.

to
001.
Find an image
Create new a 100x100 sized file
Drag your image into that section
Press Ctrl+T and use the transform tools to resize your image
002.

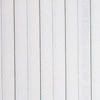
Drag this texture to the side of your icon
003.

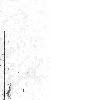
Place this texture on a new layer and then set it to multiply
Move both of the textures so the line up
004.

Create a Black and white gradient map adjustment layer and set it to softlight
005.

Create a selective colour layer with the following settings
Reds: -100cyan +100yellow
Yellows: +100cyan +100yellow
Whites: -100yellow
Neutrals: -12cyan
006.

Now make a colour balance layer with the following settings
MIDTONES: -32 -29 -14
SHADOWS: +4 -12 -15
HIGHLIGHTS: 0 0 +13
007.

Place this texture on multiply
008.
Add Text. I used the typeface P22 Stanyan Bold @ a point size of 15.08 and tilted it.
And that's it!
I hope you found that useful.
And just below are some paper textures to try out.
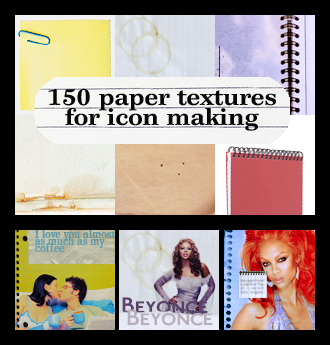
Download @ box.net
You can find all of my textures here.
So I came up with the following tutorial.
to
001.
Find an image
Create new a 100x100 sized file
Drag your image into that section
Press Ctrl+T and use the transform tools to resize your image
002.
Drag this texture to the side of your icon
003.
Place this texture on a new layer and then set it to multiply
Move both of the textures so the line up
004.
Create a Black and white gradient map adjustment layer and set it to softlight
005.
Create a selective colour layer with the following settings
Reds: -100cyan +100yellow
Yellows: +100cyan +100yellow
Whites: -100yellow
Neutrals: -12cyan
006.
Now make a colour balance layer with the following settings
MIDTONES: -32 -29 -14
SHADOWS: +4 -12 -15
HIGHLIGHTS: 0 0 +13
007.
Place this texture on multiply
008.
Add Text. I used the typeface P22 Stanyan Bold @ a point size of 15.08 and tilted it.
And that's it!
I hope you found that useful.
And just below are some paper textures to try out.
Download @ box.net
You can find all of my textures here.