Tutorial (08)
How to make 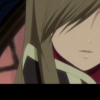
to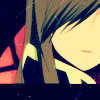
using PSP8. Translatable.
1) Sharpen your base if need be.
2) Duplicate your base three times. Set the first one (closest to the base) to screen 100%, and both the second and third ones to softlight 100%.
3) Make a new layer. Fill it with a dark blue (#000962) and set it to exclusion 70%.
4) Make a new layer. Fill it with a light blue (#A8FEFD) and set it to burn 100%.
5) Make a new layer. Fill it with a light red (#FFA7A9) and set it to softlight 100%.
6) Use this texture (by peoplemachines) and set it to screen 100%.
7) Duplicate your base and bring it to the top. Set it to softlight 100%.
8) Make a new Hue/Saturation/Lightness layer. Input these settings:
Hue: 0
Saturation: 30
Lightness: 0
9) Make a new Brightness/Contrast layer, and set it to normal 20%. Input these settings:
Brightness: 10
Contrast: 10
10) Make a new Color Balance layer. Input these settings:
Midtones: 17 -15 -20
Shadows: -30 0 25
Highlights: 0 0 0
11) Make a new layer. Fill it with a very dark blue (#030427) and set it to exclusion 50%.
Play around with the opacity if your icon is too dark or too light. Please don't copy exactly. Thanks for reading :)
Icons made using this tutorial
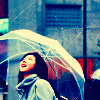
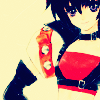
Like what you see? Why don't you friend me!

to

using PSP8. Translatable.
1) Sharpen your base if need be.
2) Duplicate your base three times. Set the first one (closest to the base) to screen 100%, and both the second and third ones to softlight 100%.
3) Make a new layer. Fill it with a dark blue (#000962) and set it to exclusion 70%.
4) Make a new layer. Fill it with a light blue (#A8FEFD) and set it to burn 100%.
5) Make a new layer. Fill it with a light red (#FFA7A9) and set it to softlight 100%.
6) Use this texture (by peoplemachines) and set it to screen 100%.
7) Duplicate your base and bring it to the top. Set it to softlight 100%.
8) Make a new Hue/Saturation/Lightness layer. Input these settings:
Hue: 0
Saturation: 30
Lightness: 0
9) Make a new Brightness/Contrast layer, and set it to normal 20%. Input these settings:
Brightness: 10
Contrast: 10
10) Make a new Color Balance layer. Input these settings:
Midtones: 17 -15 -20
Shadows: -30 0 25
Highlights: 0 0 0
11) Make a new layer. Fill it with a very dark blue (#030427) and set it to exclusion 50%.
Play around with the opacity if your icon is too dark or too light. Please don't copy exactly. Thanks for reading :)
Icons made using this tutorial


Like what you see? Why don't you friend me!