Tutorial #1
Going from 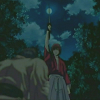
to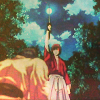
So you got a dark picture that you want to make into an icon. Here is one way to make it brighter and bring out some of the colors.
As a disclaimer, I am no icon-making expert, so keep that in mind... LOL.
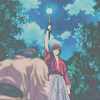
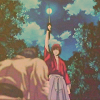
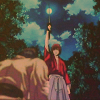
Our subject today will be my future imaginary husband the loveable Kenshin from Rurouni Kenshin!

Step One: Crop the picture that you want to use to 100x100 and sharpen it.
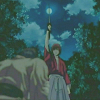
Step Two: Duplicate it and set the duplicated layer to SCREEN at 84%.
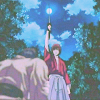
Step Three: Take this:
and set it to OVERLAY at 100%.
Step Four: Take this:
and set it to EXCLUSION at 46%.

Step Five: Take this:
and set it to SOFT LIGHT at 68%.
Step Six: Take this gradient by fraoch_icons:
and set it to SOFT LIGHT at 64%.
Step Seven: Go back to your original layer and duplicate it, then place it on top of all the other layers. Desaturate it and then use the Gaussian Blur at 3.0. Then set this layer to SOFT LIGHT at 100%.

Step Eight: Take this texture by wreckage_icons:
and set it to OVERLAY at 100%.
And that's it! If you want to add borders, text, whatever... go right on ahead, but I sort of liked this particular icon without any of that!
If you found this useful, let me know! And post any results you might have! This tutorial probably won't work with all icons, but who knows!
to
So you got a dark picture that you want to make into an icon. Here is one way to make it brighter and bring out some of the colors.
As a disclaimer, I am no icon-making expert, so keep that in mind... LOL.
Our subject today will be my future imaginary husband the loveable Kenshin from Rurouni Kenshin!
Step One: Crop the picture that you want to use to 100x100 and sharpen it.
Step Two: Duplicate it and set the duplicated layer to SCREEN at 84%.
Step Three: Take this:
and set it to OVERLAY at 100%.
Step Four: Take this:
and set it to EXCLUSION at 46%.
Step Five: Take this:
and set it to SOFT LIGHT at 68%.
Step Six: Take this gradient by fraoch_icons:
and set it to SOFT LIGHT at 64%.
Step Seven: Go back to your original layer and duplicate it, then place it on top of all the other layers. Desaturate it and then use the Gaussian Blur at 3.0. Then set this layer to SOFT LIGHT at 100%.
Step Eight: Take this texture by wreckage_icons:
and set it to OVERLAY at 100%.
And that's it! If you want to add borders, text, whatever... go right on ahead, but I sort of liked this particular icon without any of that!
If you found this useful, let me know! And post any results you might have! This tutorial probably won't work with all icons, but who knows!