CATE BLANCHETT TUTO!
It´s tooooooo easy! I don´t know if it´s translatable!
PS CS2
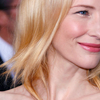
From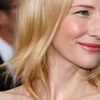
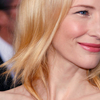
to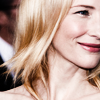
RULES:
- DO NOT HOTLINK!
- Wanna use my icons? Credit
papyds
- Comment if you want! But please let me know if you liked the tutorial! *constructive criticism, please!*
- Textless avvys aren´t bases! Don´t edit them!
- Feel free to friend me!
- Dont share the avvys/tutorial as yours. It´s MY WORK, huh?
1 - Open your pic (crop 100x100) and do whatever you want to make it lighter (you can add curves layer, variations, etc). >>
2 - I added a screen layer, opacity 25%.
>>
3 - Add a color balance layer
My settings:
Midtones: -14/ -10 /15
>>
4 - Add a hue/saturation layer:
Just play with the saturation!
Master: +31
Reds: -25
>>
5 - Create a new layer and fill with #eab75f (tan color) and set this layer to multiply, opacity 15%
>>
6 - Merge All layers
* You can use another tutorial to try this variation! I have a lot of them here and here. I used this tut and worked very welll!! :D
7 - Now you have to set your pic to black and with. Do you have a lot of ways to do that! I add a gradient map layer (Layer > New adjustment layer > Gradient map).
Remeber to click "D" to set your toolbar color to B&W!
>>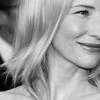
8 - Now duplicate your base and drag to the top. Set it to overlay, opacity 100%
>>
doneee!! I hope you like it!
Other exemple>>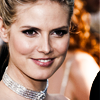
REMEMBER: YOU´LL HAVE TO PLAY WITH THE SETTINGS!! THIS TUT DON´T WORK WITH ALL PICS.
Pic by
always2nl
I´M TAKING REQUESTS!
MORE GOLDEN GLOBE ICONS HERE
MY TUTORIAL LIST
FULL ICON TUTORIAL
AWARD LIST
PS CS2
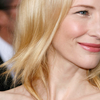
From
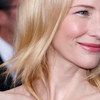
to
RULES:
- DO NOT HOTLINK!
- Wanna use my icons? Credit
papyds
- Comment if you want! But please let me know if you liked the tutorial! *constructive criticism, please!*
- Textless avvys aren´t bases! Don´t edit them!
- Feel free to friend me!
- Dont share the avvys/tutorial as yours. It´s MY WORK, huh?
1 - Open your pic (crop 100x100) and do whatever you want to make it lighter (you can add curves layer, variations, etc). >>
2 - I added a screen layer, opacity 25%.
>>
3 - Add a color balance layer
My settings:
Midtones: -14/ -10 /15
>>
4 - Add a hue/saturation layer:
Just play with the saturation!
Master: +31
Reds: -25
>>
5 - Create a new layer and fill with #eab75f (tan color) and set this layer to multiply, opacity 15%
>>
6 - Merge All layers
* You can use another tutorial to try this variation! I have a lot of them here and here. I used this tut and worked very welll!! :D
7 - Now you have to set your pic to black and with. Do you have a lot of ways to do that! I add a gradient map layer (Layer > New adjustment layer > Gradient map).
Remeber to click "D" to set your toolbar color to B&W!
>>
8 - Now duplicate your base and drag to the top. Set it to overlay, opacity 100%
>>
doneee!! I hope you like it!
Other exemple>>
REMEMBER: YOU´LL HAVE TO PLAY WITH THE SETTINGS!! THIS TUT DON´T WORK WITH ALL PICS.
Pic by
always2nl
I´M TAKING REQUESTS!
MORE GOLDEN GLOBE ICONS HERE
MY TUTORIAL LIST
FULL ICON TUTORIAL
AWARD LIST