How to make Mask Brushes for large graphics
This tutorial will teach you how to:
+ make an image into a brush in Photoshop
+ and how to use the "feather" option
...among other things.
This tutorial is dedicated to photoholic62 who taught me the first thing I learned about Photoshop. :)
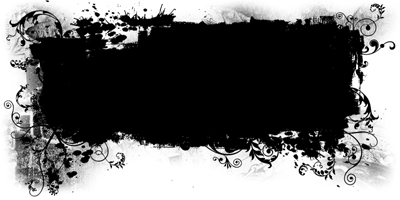
I was going to try and duplicate one of the mask brushes I posted recently, but decided instead to just start from scratch to write this tutorial on how I make my mask brushes. We are going to make the Mask Brush below.
Click on the thumbnail to see the actual size of the mask

I apologize to you veteran Photoshop users. This tutorial is very detailed so that people who are new to using Photoshop will be able to follow it. And I am Ms. Wordy McWord evidently. :)
Stock images are your friends. The first thing I do when I'm thinking about making some Masks is I go hunting for stock images. www.stock.xchnge.com is a good place because the stock photos there are huge.
These are the stock images we will be using for this mask. I have already reduced them to the size I used them as in this tutorial.
Solid Black Rectangle
Ink Splotch
Grungy Wall Texture
images from stock.xchnge
Let's get started.
Part 1: The main part of your mask.
The first thing I do is decide how big I want my mask to be. This time I wanted a mask suitable for a header 800 x 400 pixels. So I opened up a new canvas File>New with a white background at 72 pixels in the demensions I decided upon. Then I grab my stock image that is the solid black rectangle and I start chopping it up. NOTE: You can use the solid black rectangle as is without cropping if you like, but I don't want my mask this tall so I'm cropping it
IMPORTANT: remember the steps to making a brush because you are going to do this throughout the tutorial
Make your first crop and then set it as a brush. Edit>define brush preset>click OK The reason for making it into a brush is so that you will be able to put things behind it. You'll see what I mean later in the tut.
Click to see The first crop
Go to your new 800x400 canvas and make a new layer. Stamp the brush you just made onto your new layer in black. Click to see the example image
Now go back to your original solid black rectangle. I'm going to assume that you know how to get it back to the way it originally looked. If not comment and I'll add an explanation to the tutorial
I cropped it and made brushes, two more times.
Crop 2
Do the same thing you did with the first crop you made from the solid black rectangle. Make it into a brush. Go to your new canvas and make another new layer. Stamp crop 2 onto the new layer.
Repeat for Crop 3. Now your new canvas should look like this.
Click to see All three cropped layers on your new canvas
There are two reasons for putting everything on a new layer. One is so that you can move them around if you want and the second is so that you can put things underneath them or between them.
Part 2: Those nifty Ink Splotches
Get your ink splotch and reduce it to the size you want it. Make it into a brush. You should be very familiar with how to make brushes by now.
Highlight your white background in your new canvas. Make a new layer. That's right, it should be underneath your solid black layers.
Stamp your ink blot in black. Once you've got it stamped on the new layer you can move it around and get it postioned where you think it looks best. I stamped it three times making a new layer each time. Then I moved and flipped them around.
Here's what I ended up with:
Click to see Mask with Ink Splots
Part 3: Grunge background
Open the Grungy Wall Texture. First thing you need to do is desaturate it. Image>adjustments>Hue/Saturation. Slide the middle saturation lever all the way to the left till it says -100. Click OK. Your texture should be shades of black, white and grey now.
Highlight the white background layer in your new canvas. Go back to the grungy texture you just desaturated and drag it onto your new canvas. It should now be below all your other layers.
Line it up the way you want it. Make sure your texture layer is highlighted/selected. Click on your Polygonal Lasso Tool
and make a selection all around your mask. If you've never used the Polygonal Lasso Tool before it takes a little getting used to. Try clicking your right mouse button everytime you make a turn.
Click to see what my selection looks like
Now go to Select>Inverse. Your selection will now be reversed.
Next go to Select>Feather. In the Feather Selection dialog box set the Feather Radius to about 10 to 20 pixels. I set mine to 20 pixels for this tutorial. You'll see your selection soften a little. Now on your keyboard tap the delete key.
Go to Select>Deselect to get rid of the moving ant lines. Now you should have something like this.
Click to see the grungy texture after it's been feathered
See those flat straight lines in my grungy background? You want to avoid those. So either make your selection closer to your solid black rectangle and further away from the edge or you can do what I do. I take a soft round brush and lightly erase those flat edges.
Part 4: Working with Fonts
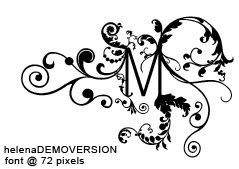
The last thing I do is get a really nifty swirly font and decorate my mask with them. My current favorite is a demo version of "Helena" called "helenaDEMOVERSION".
Example of font:
I can't remember where I got this demo version unfortunately. But there are lots of other really cool fonts that you can use to decorate your mask or you can use those swirly brushes that are everywhere.
Here's a few suggestions on good decorative fonts: Poesie_Noire, Porcelain, Ruritania, TURBO ripped. I think you can find all of them at www.daFont.com.
So I make a new layer between my ink splotches and my solid black layers. I select my font and set the size really big. Like 72 to 100 pt. Whatever you think looks best for the font you are using.
Put each letter you use on a new layer. Then you can move them around and position them where you think they look best. I used five letters for this mask.
Click to see image of layers and mask with fonts
Other suggestions to make your mask look really cool:
If you want you can use some tiny text on the edges of your mask.
Or you can make one of those swirly decorative fonts into a brush and using the eraser tool, stamp it to erase parts of the solid black area so you have white swirls in them or just type the font in white over the top of the solid black areas. Remember always on a new layer.
You can also try lowering the opacity on some of the black areas.
The idea is to have colors from parts of your graphic showing through in the black areas.
I think that's about it.
Always save your images/graphics as a .psd/layered file before you flatten them. That way if you want to go back and make changes you can.
Now flatten/merge all your layers together and save your mask. You're done.
Click to see an example of the mask used with a photograph.
Yes it's him again
If there are any questions or something that is not clear please ask in a comment. And please let me know if this tutorial was helpful.
Thanks for stopping by. :)
+ make an image into a brush in Photoshop
+ and how to use the "feather" option
...among other things.
This tutorial is dedicated to photoholic62 who taught me the first thing I learned about Photoshop. :)
I was going to try and duplicate one of the mask brushes I posted recently, but decided instead to just start from scratch to write this tutorial on how I make my mask brushes. We are going to make the Mask Brush below.
Click on the thumbnail to see the actual size of the mask

I apologize to you veteran Photoshop users. This tutorial is very detailed so that people who are new to using Photoshop will be able to follow it. And I am Ms. Wordy McWord evidently. :)
Stock images are your friends. The first thing I do when I'm thinking about making some Masks is I go hunting for stock images. www.stock.xchnge.com is a good place because the stock photos there are huge.
These are the stock images we will be using for this mask. I have already reduced them to the size I used them as in this tutorial.
Solid Black Rectangle
Ink Splotch
Grungy Wall Texture
images from stock.xchnge
Let's get started.
Part 1: The main part of your mask.
The first thing I do is decide how big I want my mask to be. This time I wanted a mask suitable for a header 800 x 400 pixels. So I opened up a new canvas File>New with a white background at 72 pixels in the demensions I decided upon. Then I grab my stock image that is the solid black rectangle and I start chopping it up. NOTE: You can use the solid black rectangle as is without cropping if you like, but I don't want my mask this tall so I'm cropping it
IMPORTANT: remember the steps to making a brush because you are going to do this throughout the tutorial
Make your first crop and then set it as a brush. Edit>define brush preset>click OK The reason for making it into a brush is so that you will be able to put things behind it. You'll see what I mean later in the tut.
Click to see The first crop
Go to your new 800x400 canvas and make a new layer. Stamp the brush you just made onto your new layer in black. Click to see the example image
Now go back to your original solid black rectangle. I'm going to assume that you know how to get it back to the way it originally looked. If not comment and I'll add an explanation to the tutorial
I cropped it and made brushes, two more times.
Crop 2
Do the same thing you did with the first crop you made from the solid black rectangle. Make it into a brush. Go to your new canvas and make another new layer. Stamp crop 2 onto the new layer.
Repeat for Crop 3. Now your new canvas should look like this.
Click to see All three cropped layers on your new canvas
There are two reasons for putting everything on a new layer. One is so that you can move them around if you want and the second is so that you can put things underneath them or between them.
Part 2: Those nifty Ink Splotches
Get your ink splotch and reduce it to the size you want it. Make it into a brush. You should be very familiar with how to make brushes by now.
Highlight your white background in your new canvas. Make a new layer. That's right, it should be underneath your solid black layers.
Stamp your ink blot in black. Once you've got it stamped on the new layer you can move it around and get it postioned where you think it looks best. I stamped it three times making a new layer each time. Then I moved and flipped them around.
Here's what I ended up with:
Click to see Mask with Ink Splots
Part 3: Grunge background
Open the Grungy Wall Texture. First thing you need to do is desaturate it. Image>adjustments>Hue/Saturation. Slide the middle saturation lever all the way to the left till it says -100. Click OK. Your texture should be shades of black, white and grey now.
Highlight the white background layer in your new canvas. Go back to the grungy texture you just desaturated and drag it onto your new canvas. It should now be below all your other layers.
Line it up the way you want it. Make sure your texture layer is highlighted/selected. Click on your Polygonal Lasso Tool

and make a selection all around your mask. If you've never used the Polygonal Lasso Tool before it takes a little getting used to. Try clicking your right mouse button everytime you make a turn.
Click to see what my selection looks like
Now go to Select>Inverse. Your selection will now be reversed.
Next go to Select>Feather. In the Feather Selection dialog box set the Feather Radius to about 10 to 20 pixels. I set mine to 20 pixels for this tutorial. You'll see your selection soften a little. Now on your keyboard tap the delete key.
Go to Select>Deselect to get rid of the moving ant lines. Now you should have something like this.
Click to see the grungy texture after it's been feathered
See those flat straight lines in my grungy background? You want to avoid those. So either make your selection closer to your solid black rectangle and further away from the edge or you can do what I do. I take a soft round brush and lightly erase those flat edges.
Part 4: Working with Fonts
The last thing I do is get a really nifty swirly font and decorate my mask with them. My current favorite is a demo version of "Helena" called "helenaDEMOVERSION".
Example of font:

I can't remember where I got this demo version unfortunately. But there are lots of other really cool fonts that you can use to decorate your mask or you can use those swirly brushes that are everywhere.
Here's a few suggestions on good decorative fonts: Poesie_Noire, Porcelain, Ruritania, TURBO ripped. I think you can find all of them at www.daFont.com.
So I make a new layer between my ink splotches and my solid black layers. I select my font and set the size really big. Like 72 to 100 pt. Whatever you think looks best for the font you are using.
Put each letter you use on a new layer. Then you can move them around and position them where you think they look best. I used five letters for this mask.
Click to see image of layers and mask with fonts
Other suggestions to make your mask look really cool:
If you want you can use some tiny text on the edges of your mask.
Or you can make one of those swirly decorative fonts into a brush and using the eraser tool, stamp it to erase parts of the solid black area so you have white swirls in them or just type the font in white over the top of the solid black areas. Remember always on a new layer.
You can also try lowering the opacity on some of the black areas.
The idea is to have colors from parts of your graphic showing through in the black areas.
I think that's about it.
Always save your images/graphics as a .psd/layered file before you flatten them. That way if you want to go back and make changes you can.
Now flatten/merge all your layers together and save your mask. You're done.
Click to see an example of the mask used with a photograph.
Yes it's him again
If there are any questions or something that is not clear please ask in a comment. And please let me know if this tutorial was helpful.
Thanks for stopping by. :)