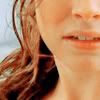
tutorial V: charlie & claire
marina (lil_angel91) asked me for a tutorial for my lastest lost icons.
here we go..
go from
to
made with PSCS.
includes selective coloring.
not translatable.
sorry!
01
take a picture. crop it. this is gonna be your base.
i used a picture from lost-media.com

02
dublicate your base. set it to screen. lower the opacity (mine was 71% but that depends on your base)

03
layer >> new adjustment layer >> selective color download @ sendspace
reds:
-100/+16/+100/0
yellows:
-47/0/-31/-22
neutrals:
17/-11/-18/-18

04
duplicate the selective color layer. (you might need to lower the opacity. on this picture i didn't have to)

05
layer >> new adjustment layer >> selective color download @ sendspace
(opacity with my base was 45%)
reds:
-70/-30/-27/22
yellow:
-60/-27/-27/-27
neutrals:
-16/-4/21/3

06
last but not least.
a new layer. fill it with yellow (#FFF006) set it to soft light and lower the opacity (mine was 9%)

07
and now you can add whatever you want.
i added a texture by loveicon
et voilà

download the psd-file @ sendspace
with slightly different settings (changing the opacities etc.) i also came up with the following:


as always i'd love to see what you come up with!
here we go..
go from

to

made with PSCS.
includes selective coloring.
not translatable.
sorry!
01
take a picture. crop it. this is gonna be your base.
i used a picture from lost-media.com

02
dublicate your base. set it to screen. lower the opacity (mine was 71% but that depends on your base)

03
layer >> new adjustment layer >> selective color download @ sendspace
reds:
-100/+16/+100/0
yellows:
-47/0/-31/-22
neutrals:
17/-11/-18/-18

04
duplicate the selective color layer. (you might need to lower the opacity. on this picture i didn't have to)

05
layer >> new adjustment layer >> selective color download @ sendspace
(opacity with my base was 45%)
reds:
-70/-30/-27/22
yellow:
-60/-27/-27/-27
neutrals:
-16/-4/21/3

06
last but not least.
a new layer. fill it with yellow (#FFF006) set it to soft light and lower the opacity (mine was 9%)

07
and now you can add whatever you want.
i added a texture by loveicon
et voilà

download the psd-file @ sendspace
with slightly different settings (changing the opacities etc.) i also came up with the following:
as always i'd love to see what you come up with!