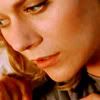
tutorial X: Peyton
9thsymphony asked for a tutorial for a couple of one tree hill icons from this batch.
from
to
001
crop your cap/picture. mine was from hilarie-burton.com

002
make a new adjustment layer -> curves
RGB; input:96 output:173

003
make a new adjustment layer -> selective color
Reds: -100 | 0 | +100 | 0
Yellows: 0 | 0 | -100 | 0
Neutrals: +10 | -10 | -5 | +10
!reduce the opacity to 50%

004
make a new adjustment layer -> color balance
Midtones: +15 | +10 | +25

005
make a color fill layer with #FCD45C. set it to soft light and reduce the opacity to 77%

006
make a new adjustment layer -> selective color.
Yellows: +33 | -12 | -34 | 0
Neutrals: +43 | 0 | -18 | -2
!reduce the opacity to 81%

007
add a new adjustment layer -> brighgtness/contrast
b: -15
c: +4

008
make a new adjustment layer -> curves
RGB
1st: move the lefthand corner point to; Input:21 (Output:0)
2nd: input: 150 output: 170

009
make a new adjustment layer -> colorbalance
Shadows: -5 | 0 | -19
Midtones: +11 | -3 | -8
Highlights: -1 | -1 | 0
!reduce the opacity to 28%

I'd love to see what you make out of it!
other icons made with this tutorial (with similar settings):


from

to

001
crop your cap/picture. mine was from hilarie-burton.com

002
make a new adjustment layer -> curves
RGB; input:96 output:173

003
make a new adjustment layer -> selective color
Reds: -100 | 0 | +100 | 0
Yellows: 0 | 0 | -100 | 0
Neutrals: +10 | -10 | -5 | +10
!reduce the opacity to 50%

004
make a new adjustment layer -> color balance
Midtones: +15 | +10 | +25

005
make a color fill layer with #FCD45C. set it to soft light and reduce the opacity to 77%

006
make a new adjustment layer -> selective color.
Yellows: +33 | -12 | -34 | 0
Neutrals: +43 | 0 | -18 | -2
!reduce the opacity to 81%

007
add a new adjustment layer -> brighgtness/contrast
b: -15
c: +4

008
make a new adjustment layer -> curves
RGB
1st: move the lefthand corner point to; Input:21 (Output:0)
2nd: input: 150 output: 170

009
make a new adjustment layer -> colorbalance
Shadows: -5 | 0 | -19
Midtones: +11 | -3 | -8
Highlights: -1 | -1 | 0
!reduce the opacity to 28%

I'd love to see what you make out of it!
other icons made with this tutorial (with similar settings):