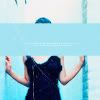
tutoral III: jennifer morrison
skaffa ask me for a tutorial, so here we go...
going from this:
to this:
in 7 esay steps.
i used this picture;
from jennifer morrison online
and now step by step:
#1: crop it
#2: add a darkblue layer
(# 01051C) set it to exclusion (100%)
#3: add a lightblue layer
(# C9F9FD) set it to color burn (100%)
now my picture looks like this:
after #4 it is going to look like this:
#4: here comes the "tricky" part (i'm not quite sure if the english names are correct, because i use a german verion...)
Layer >> New Adjustment Layer >> Hue/Saturation
standard(?): saturation; +50 looks like this
reds: saturation; +30 looks like this
yellows: saturation; -75 looks like this
greens: +33 looks like this
cyans: +33 looks like this
leave the rest.
these numbers depend a lot on your picture, so play with them.
#5: add an intensive lightblue layer
(# 8BE0FD) set to soft light (60%)
#6: add a pink layer
(# E2A5A0) set to overlay (100%)
#7: copy your base to the top and set it to soft light. play with the opacity (i used 80%)
that's it.
now i only added this mask
by ewanism
and i added some text (violation, size 18, # 0054BC).
et voilà:
my layertab looks like this
also made with this tutorial:


going from this:

to this:

in 7 esay steps.
i used this picture;

from jennifer morrison online
and now step by step:
#1: crop it

#2: add a darkblue layer

(# 01051C) set it to exclusion (100%)
#3: add a lightblue layer

(# C9F9FD) set it to color burn (100%)
now my picture looks like this:

after #4 it is going to look like this:

#4: here comes the "tricky" part (i'm not quite sure if the english names are correct, because i use a german verion...)
Layer >> New Adjustment Layer >> Hue/Saturation
standard(?): saturation; +50 looks like this
reds: saturation; +30 looks like this
yellows: saturation; -75 looks like this
greens: +33 looks like this
cyans: +33 looks like this
leave the rest.
these numbers depend a lot on your picture, so play with them.
#5: add an intensive lightblue layer

(# 8BE0FD) set to soft light (60%)
#6: add a pink layer

(# E2A5A0) set to overlay (100%)
#7: copy your base to the top and set it to soft light. play with the opacity (i used 80%)
that's it.
now i only added this mask

by ewanism
and i added some text (violation, size 18, # 0054BC).
et voilà:

my layertab looks like this
also made with this tutorial:
