V for Vendetta | Tutorial
- I'm in love with V for Vendetta so expect a lot of V graphics.
- Now just a note, I don't really think of this as a full icon tut as much as just a simple skills ones but hey, you choose.
- I use photoshop 5.5 but I'm sure this can be done in other programmes.
- I have to say I think this is one of my favourite tuts I've done :) I love the image and the colors are prettiful!
- Feedback is nice and I'll like to see what you can do :)
- Also anyone interested in V for Vendetta I have just created

vfv_lims and
vfv_stillness so if you would like to know when they open then leave a comment and I will tell you :) Also remember
lwordqaf_lims!

to

V for Vendetta
I started with this base.

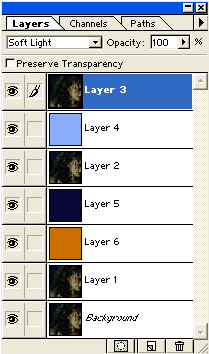
Screen 2x and sharpen the 2nd screened layer.

Now between screen layer 1 and 2 create a new layer and use this and set to Multiply 100%

Now on top of the multiply layer create another layer and fill it with #04084F and set it to exclusion at 43%

Now on top of the 2nd screened layer create another new layer and fill it with #9CC2FA and set it to color burn 100%

Ok now go back to the base, duplicate and then bring it to the top and set it on soft light.

And we’re finished. Quick and easy, right?

And here are the layers.

Friend Community | Other Tutorials