(no subject)

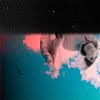
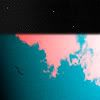
raysofcolour asked for a tutorial for this icon... so here it is! I had to recreate it so it's not exactly the same, but it's close. I use Photoshop Elements and you should know your way around PS fairly well to understand this.

Get your cloud image, and crop it into a 100x100 square. Duplicate it twice and set both to soft light, then merge. Apply these curves to it.

Create a new layer with a red (#FF0000) to transparent gradient and set it to linear burn.

Take this texture, crop part of it into a square, and paste it onto the icon. Cut off most of the bottom and then used a 10px soft eraser to blur the edge a little.

Take this texture and crop a peice of it and put it on your icon and erase the part that overlaps the black texture. Set it to soft light.

We'll start with our screencap. I intended to do something different with this icon, so I cropped a narrow rectangle of the image. I upped the saturation to about +30 then played with color adjustments.

Take the elliptical (circle) selection tool and select part of the image. It's okay if your image is too narrow to make a full circle, since you'll only need about half of it anyway. Crop it. Resize it so that it's 60px wide. Desaturate it and duplicate it twice. Set the first duplicated layer to screen (50% opacity) and the second to soft light (100% opacity). The bottom layer should still be normal. Rotate it 180 degrees then merge the layer.

Paste it onto the icon with the clouds and such just above the red gradient and below the whiteish texture. Set it to multiply and move it over to the side. You're done! PS- if you crop your clouds wrong they could end up eating Jess' face like mine. :O
And here is a super big layer palette if you get confused about the order! Textures and stock photography courtesy of peoplemachines. Amazing stuff there. Feel free to ask me any questions and leave feedback! I love feedback.