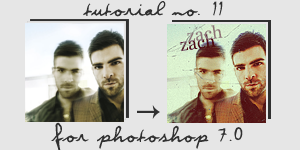
Tutorial no. 11
Finally I have another tutorial!
I was beginning to think I'd lost my mojo.

Other Examples:
12

Step 1. Prep your base. My image was fairly good so I only sharpened once.
result
Step 2. My image was pretty dull so I added a Hue/Saturation Layer with a Saturation of +37.
result
Step 3. Next add a Selective Color layer with these settings:
R: -100, +71, 0, +27
Y: -18, -17, 0, +10
G: +100, -100, -100, +100
C: +100, 0, -100, +100
B: +100, 0, -100, +100
N: -8, -13, -23, 0
B: 0, 0, 0, +21
result
Step 4. I wanted to make the image more red so I made a layer filled with #FF0000 and set it to Screen 23%.
result
Step 5. Now make a layer filled with #FDFF69 and set it to Darken 26%.
result
Step 6. Next I made another Selective Color layer to bring some more red back:
R: -35, +23, +27, +50
result
Step 7. Finally I added another layer filled with #180000 and set it on Exclusion, leaving the opacity at 100%.
result
Step 8. Add some text, textures, brushes, whatever and you’re done!

Credits here.
.PSD download here.
I was beginning to think I'd lost my mojo.
Other Examples:
12
Step 1. Prep your base. My image was fairly good so I only sharpened once.
result
Step 2. My image was pretty dull so I added a Hue/Saturation Layer with a Saturation of +37.
result
Step 3. Next add a Selective Color layer with these settings:
R: -100, +71, 0, +27
Y: -18, -17, 0, +10
G: +100, -100, -100, +100
C: +100, 0, -100, +100
B: +100, 0, -100, +100
N: -8, -13, -23, 0
B: 0, 0, 0, +21
result
Step 4. I wanted to make the image more red so I made a layer filled with #FF0000 and set it to Screen 23%.
result
Step 5. Now make a layer filled with #FDFF69 and set it to Darken 26%.
result
Step 6. Next I made another Selective Color layer to bring some more red back:
R: -35, +23, +27, +50
result
Step 7. Finally I added another layer filled with #180000 and set it on Exclusion, leaving the opacity at 100%.
result
Step 8. Add some text, textures, brushes, whatever and you’re done!
Credits here.
.PSD download here.