(no subject)
Snow White tutorial as requested by
valliegurl
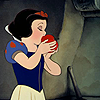
to
Program: Adobe Photoshop Elements 5.0
Uses: Hue/Saturation and Levels
Requires a basic knowledge of Photoshop
Somewhat translatable, steps can be skipped
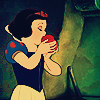
The image I started with was this one:
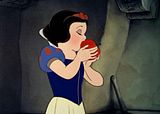
Crop it and sharpen it once. This is is your new and improved base layer.

Duplicate the base and bring it to the top, set it to soft light. Opacity 100%
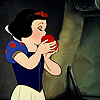
Add a Color Fill layer with #cefffa. It should be a light aqua blue. Set this layer to color burn. Opacity 100%

Add another Color Fill layer with #071634. This is a dark navy blue. Set this layer to exclusion. Opacity 100%
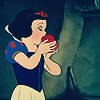
Duplicate the base twice. Bring both the layers to the top. Desaturate both and set both to soft light. Opacity 100% for both.

Now, for the fun part. Go to Layers>New Adjustment Layer> Levels. Here are the settings:
RBG
Input: 7 - 1.16 - 218
Out Put: 0 - 225
RED
Input: 0 - 1.00 - 175
Output: 0 - 255
GREEN
Input: 0 - 1.29 - 243
Output: 0 - 255
BLUE
Input: 0 - 1.00 - 223
Output: 0 - 225
Set the layer on normal. Opacity 100%
**If you do not have this option on your program skip this step. I checked a couple times and this step does not change the final image greatly.
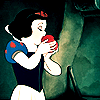
Duplicate the base and bring it to the top. Go to Enhance>Adjust Color>Adjust Hue/Saturation or press Ctrl+U. Set the saturation for this layer at 100. Set this layer to normal at opacity 41%.
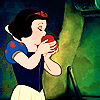
Make two color fill layers both with #070e2e as the color. Set both the layers to exclusion, Opacity 100%
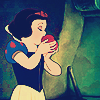
Make a new color fill layer with #f8e3b5. Set this layer to multiply at opactiy 100%.
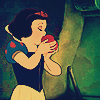
Duplicate the base and bring it to the top. Set the base to soft light at opacity 57%.
**The next step is optional.
Add this texture by ? and set to screen at opacity 100%
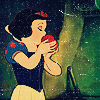
Add this gradiant by me and set it to multiply with an opacity of 100%.

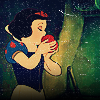
Duplicate the base and bring it to the top. Set this layer to soft light at an opacity of 57%.

ALL DONE!! Below are some varriation that you might have come up with.
If you chose not to use the scratchy texture this is you result:
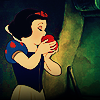
If you could not do the levels layer here the result:

I hope I explained everything clearly and that everyone understood this tutorial. If you have any questions please ask. If any edits need to be made just comment. Any advice is greatly apprciatated.
* Please do not copy this icon exactly, this tutorial is here to help you find a new coloring technique not so that there can be a million gazillion of the same icon floating around LJ.
** I would love to see your results!!
teh pimpin :
dmhg_icontest
dmhg_icontest
dmhg_icontest
dmhg_icontest
valliegurl

to

Program: Adobe Photoshop Elements 5.0
Uses: Hue/Saturation and Levels
Requires a basic knowledge of Photoshop
Somewhat translatable, steps can be skipped
The image I started with was this one:

Crop it and sharpen it once. This is is your new and improved base layer.

Duplicate the base and bring it to the top, set it to soft light. Opacity 100%

Add a Color Fill layer with #cefffa. It should be a light aqua blue. Set this layer to color burn. Opacity 100%

Add another Color Fill layer with #071634. This is a dark navy blue. Set this layer to exclusion. Opacity 100%

Duplicate the base twice. Bring both the layers to the top. Desaturate both and set both to soft light. Opacity 100% for both.

Now, for the fun part. Go to Layers>New Adjustment Layer> Levels. Here are the settings:
RBG
Input: 7 - 1.16 - 218
Out Put: 0 - 225
RED
Input: 0 - 1.00 - 175
Output: 0 - 255
GREEN
Input: 0 - 1.29 - 243
Output: 0 - 255
BLUE
Input: 0 - 1.00 - 223
Output: 0 - 225
Set the layer on normal. Opacity 100%
**If you do not have this option on your program skip this step. I checked a couple times and this step does not change the final image greatly.

Duplicate the base and bring it to the top. Go to Enhance>Adjust Color>Adjust Hue/Saturation or press Ctrl+U. Set the saturation for this layer at 100. Set this layer to normal at opacity 41%.

Make two color fill layers both with #070e2e as the color. Set both the layers to exclusion, Opacity 100%

Make a new color fill layer with #f8e3b5. Set this layer to multiply at opactiy 100%.

Duplicate the base and bring it to the top. Set the base to soft light at opacity 57%.

**The next step is optional.
Add this texture by ? and set to screen at opacity 100%


Add this gradiant by me and set it to multiply with an opacity of 100%.


Duplicate the base and bring it to the top. Set this layer to soft light at an opacity of 57%.

ALL DONE!! Below are some varriation that you might have come up with.
If you chose not to use the scratchy texture this is you result:

If you could not do the levels layer here the result:

I hope I explained everything clearly and that everyone understood this tutorial. If you have any questions please ask. If any edits need to be made just comment. Any advice is greatly apprciatated.
* Please do not copy this icon exactly, this tutorial is here to help you find a new coloring technique not so that there can be a million gazillion of the same icon floating around LJ.
** I would love to see your results!!
teh pimpin :
dmhg_icontest
dmhg_icontest
dmhg_icontest
dmhg_icontest