manga images & gradients
This is a really simple technique for changing the color of manga line art (or any black and white image for that matter). This tutorial was made in Photoshop 6.

First, choose the image you want to use. I picked this image by Hiromu Arakawa the creator of Fullmetal Alchemist. The full sized image can be found here. Granted, the image isn't black and white to begin with, but the same technique applies. I cropped it down to 100x100px to get this.

I then duplicated that base, desaturated the original, and set the duplicate to multiply. We get this.

I then created a new layer and flood filled it with #ED0075 (a fuscia). It's our very top layer at this time. The layer is then set to Screen 100%

I then add on a gradient. It looks like this and is set to Overlay 100%


Same thing as the previous step, Overlay 100%


I then duplicate our desaturated background and drag it to the very top. It's set on Multiply 100%

Our final gradient set on Screen at 100%. It's our very top layer.


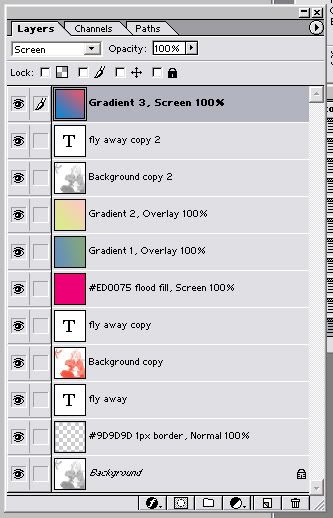
Now comes the text. It says 'fly away', but it's not meant to be read. It's Courier at 3px in black (#000000) and it's actually been duplicated twice. They were all set on Normal 100%. You can look at the layer pallet capture at the end of this tutorial for placement of the layers.

Final step. I put in a simple 1px border in #9D9D9D (a grey) to set the boundaries of the icon. It's right above the very bottom layer. That's all, our icon is now finished.

The layer pallet.
And finally, other icons using similar techniques:

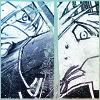


and finally, if you enjoyed this tutorial, and like making manga or anime icons, please check out my new community illustrated_tut

First, choose the image you want to use. I picked this image by Hiromu Arakawa the creator of Fullmetal Alchemist. The full sized image can be found here. Granted, the image isn't black and white to begin with, but the same technique applies. I cropped it down to 100x100px to get this.

I then duplicated that base, desaturated the original, and set the duplicate to multiply. We get this.

I then created a new layer and flood filled it with #ED0075 (a fuscia). It's our very top layer at this time. The layer is then set to Screen 100%

I then add on a gradient. It looks like this and is set to Overlay 100%


Same thing as the previous step, Overlay 100%


I then duplicate our desaturated background and drag it to the very top. It's set on Multiply 100%

Our final gradient set on Screen at 100%. It's our very top layer.


Now comes the text. It says 'fly away', but it's not meant to be read. It's Courier at 3px in black (#000000) and it's actually been duplicated twice. They were all set on Normal 100%. You can look at the layer pallet capture at the end of this tutorial for placement of the layers.

Final step. I put in a simple 1px border in #9D9D9D (a grey) to set the boundaries of the icon. It's right above the very bottom layer. That's all, our icon is now finished.

The layer pallet.

And finally, other icons using similar techniques:
and finally, if you enjoyed this tutorial, and like making manga or anime icons, please check out my new community illustrated_tut