[x] 3 Tutorials
This is using Photoshop 6, but is easy enough to be used in any program.
If anyone uses it, I'd love to see what they come up with.
Feel free to alter text/brushes/styles etc as this is only posted as a guide.
How To:

--->
01: Start with a 100x100 image like the one I got from its_base_ik1 - sharpen the image and the edges if needed.

02: Duplicate the image and set to soft light at 16%
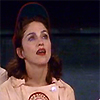
03: Make a color overlay with #CFCFCD

04: Set t Color Dodge at 23%
05: Make a color overlay with #FDFDA6

06: Set to Multiply at 55%
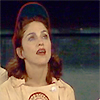
07: Make a color overlay with #033466

08: Set to Soft Light at 75%
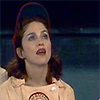
09: Make a color overlay with #FEB5F3

10: Set to Multiply at 55%
11: Add a texture or gradient

12: Set to Color 25%

13: Duplicate original image

14: Set to Screen at 70%
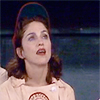
15: Make color overlay with #C6ECCC

16: Set to Multiply at 60%
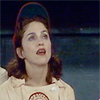
17: Add any text or brushes you want

and you're done
&&
How to:

--->
01: Start with a 100x100 image like the one that I got from its_base_ik1

02: Duplicate the image and set to Soft Light at 90%

03: Use a dark blue color filler. I used #011269

04: Set to Exclusion at 85%

05: Use a pinkish color filler. I used #E180B2

06: Set to Multiply at 25%

07: Use a yellow/orange filler. I used #E1C782

08: Set to Multiply at 45%

09: Use a white filler. (#FFFFFF)
10: Set to Soft Light at 70%

11: Merge all Layers
12: Copy the original image once again.

13: Set to Soft Light at 100%

14: (Optional): Add text or brushes to your icon

15: Add a border to your image and erase parts of it

and you're done!
&&
How To:

--->
01: Start with any 100x100 image. (I used one from its_base_ik1)

02: Duplicate the layer and set to Soft Light at 80%

03: Add a new color layer. I used #E57878

04: Set the layer to Soft Light at 70%

05: Add a gradient or texture.

06: Set the layer to Color at 35%

07: Add text and a brush. I used 100% for text and 30% for the brush. Of course these are up to you.

If anyone uses it, I'd love to see what they come up with.
Feel free to alter text/brushes/styles etc as this is only posted as a guide.
How To:

--->

01: Start with a 100x100 image like the one I got from its_base_ik1 - sharpen the image and the edges if needed.

02: Duplicate the image and set to soft light at 16%

03: Make a color overlay with #CFCFCD

04: Set t Color Dodge at 23%
05: Make a color overlay with #FDFDA6

06: Set to Multiply at 55%

07: Make a color overlay with #033466

08: Set to Soft Light at 75%

09: Make a color overlay with #FEB5F3

10: Set to Multiply at 55%
11: Add a texture or gradient

12: Set to Color 25%

13: Duplicate original image

14: Set to Screen at 70%

15: Make color overlay with #C6ECCC

16: Set to Multiply at 60%

17: Add any text or brushes you want

and you're done
&&
How to:

--->

01: Start with a 100x100 image like the one that I got from its_base_ik1

02: Duplicate the image and set to Soft Light at 90%

03: Use a dark blue color filler. I used #011269

04: Set to Exclusion at 85%

05: Use a pinkish color filler. I used #E180B2

06: Set to Multiply at 25%

07: Use a yellow/orange filler. I used #E1C782

08: Set to Multiply at 45%

09: Use a white filler. (#FFFFFF)
10: Set to Soft Light at 70%

11: Merge all Layers
12: Copy the original image once again.

13: Set to Soft Light at 100%

14: (Optional): Add text or brushes to your icon

15: Add a border to your image and erase parts of it

and you're done!
&&
How To:

--->

01: Start with any 100x100 image. (I used one from its_base_ik1)

02: Duplicate the layer and set to Soft Light at 80%

03: Add a new color layer. I used #E57878

04: Set the layer to Soft Light at 70%

05: Add a gradient or texture.

06: Set the layer to Color at 35%

07: Add text and a brush. I used 100% for text and 30% for the brush. Of course these are up to you.
