"Arbre mort" Photoshop Tutorial
I've been asked on several occasions how I create my digital prints, so, for the sake of education, I have compiled a nice little tutorial. I may plan to do more, but for now I'll start with the creation of one my more popular prints- "Arbre mort".

I realize, of course, that the final image shown here isn't the original image, but I can't give away all of my secrets, now can I? And feel free to play around after you get a grasp on what each tool does.
First of all, if you'd like to follow along, you'll need the following:
• A photo that looks good in grayscale (I used a scanned silver gelatin print)
• Context Free, the fractal creation software I use for my organic shapes. Don't worry, it's free.
• Photoshop, duh. I'm not sure how Elements compares, but it is cheaper. I'm just not sure if all the tools I use are included with it. If you use Elements, I'd be more than happy to know.
Step One: The Background Image
Open your desired photo in Photoshop, and this will become our Background layer. To avoid annoying discrepancies in the future, double click that layer in the Layers window and name it however you like- this will unlock the layer and make it more pliable for our needs.
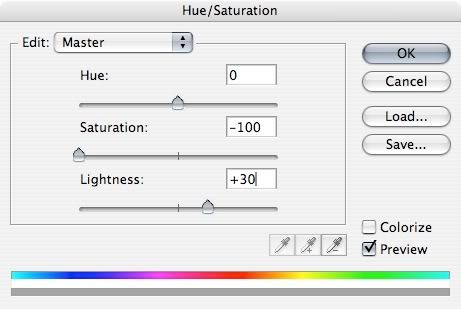
Next, go to Hue/Saturation [Image>Adjustments>Hue/Saturation... or Command-U] and if you're using a colored image, drag the Saturation slider all the way to -100 to make the image black and white. You can play with the saturation and keep some color, but I recommend simply keeping it grayscale.
And since we'll be overlaying other elements over it, we want to make the background image more subtle- so adjust the Lightness to something around 30.
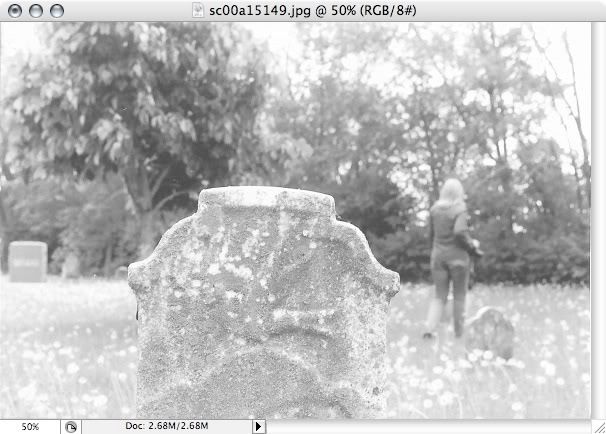
The final image should look something like this:
I'd save my work at this point if I were you (choose Save As so you don't overwrite the original file!). You never know. In fact, I'm not warning you again. So keep saving your work. Just keep hitting Control-S whenever you feel so moved.
Step Two: Adding the Texture
To create the "painted" texture that I use, we'll follow these steps:
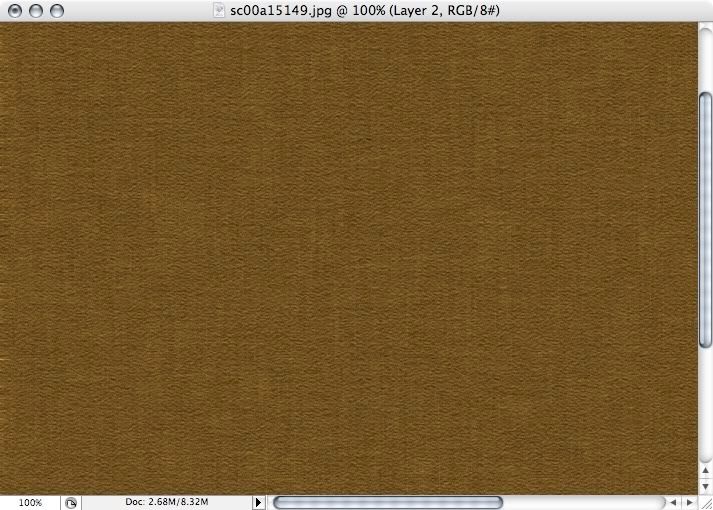
1. Create a new layer [Shift-Command-N] and fill it (using the paint bucket) with a solid color- I used a brown color. Apply about 5-6% of noise [Filter>Noise>Add noise]. Then use the Water Paper filter [Filter>Sketch>Water Paper] with these settings:
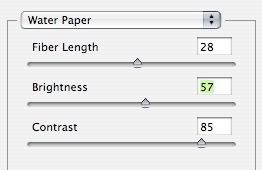
To mix the water paper effect with previous noise effect, hit Control-Shift-F (Fade) and set fade value to 50-60%.
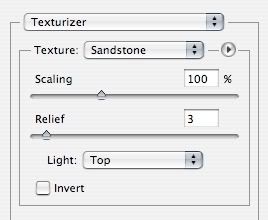
2. Go to the Texturizer filter [Filter>Texture>Texturizer...] and select the "Sandstone" texture. Scaling at 100% and Relief at 2 or 3.
3. Next, create a new layer and select the Brush tool (you can just hit the 'B' key) and from the resulting 'Brush' menu, go all the way to the bottom and select the 100 pixel Rough Round Bristle. Then (important!) set the opacity to 50% and the color to black.
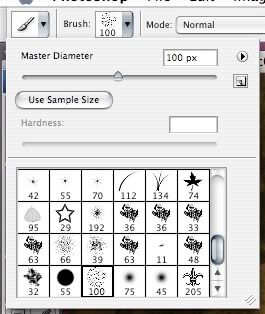
Now fill the entire layer with chaotic strokes. Go nuts, but don't overdo it. It should look something like this:

Now set the blend mode for that layer to Overlay with 50-60% opacity.
4. Repeat the previous steps using a white colored brush.

5. Now merge these three layers together- I simply hide the background image (click the little eye next to it so it disappears) and use Merge Visible [Layer>Merge Visible or Shift-Control-E], then make the background visible again, and set the blend mode to Multiply with an opacity of 90-95%.
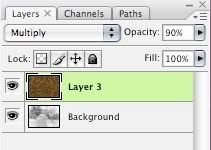
The result should be something like this:
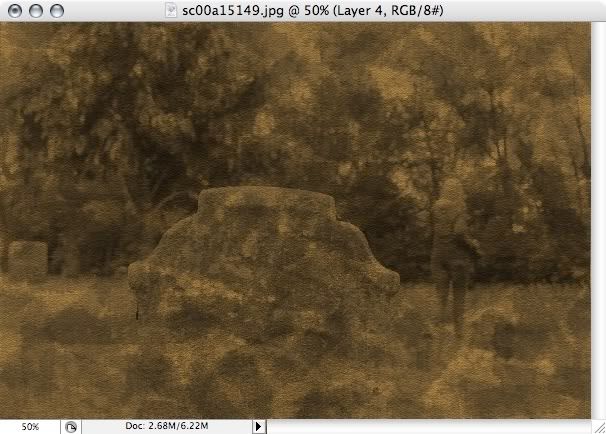
Step Three: Adding the "Tree"
Open up Context Free and create a new shape. I created my own code, but you can use one of the examples if you have no idea what to do. Find the shape you like and choose Render with Dimensions [Render>Render with Dimensions]. Choose dimensions that are appropriate for your image.
Open your new shape in Photoshop. And now we have to select only the black parts of the image. This seems daunting, but I'll share a secret that will take ten seconds flat:
1. Control-A (Select All)
2. Control-C (Copy)
3. Q (Enter Quick Mask Mode)
4. Control-V (Paste)
5. Q (Exit Quick Mask Mode)
6. Shift-Control-I (Invert Selection)
7. Control-C (Copy)
You've now selected and copied only the black parts of the image. Now go back to your original document and Paste [Control-V]. You now have a new layer containing the fractal you created.
Your image, however, still has some white pixels around the edge. To fix this, go to Hue/Saturation and set Lightness to -100.
Position the layer wherever you want it on the image. We're almost done, I promise.
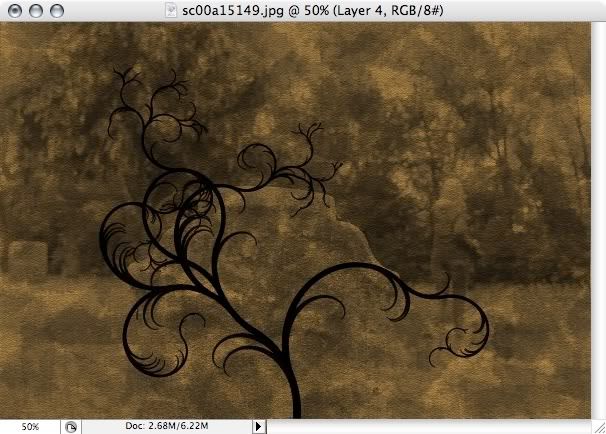
The image is a tad flat, so choose Outer Glow from the Layer Style menu at the bottom of the Layers window (It's the second one to the left). Opacity at 75%, glow color yellow, and (important!), set the Blend Mode to Overlay.

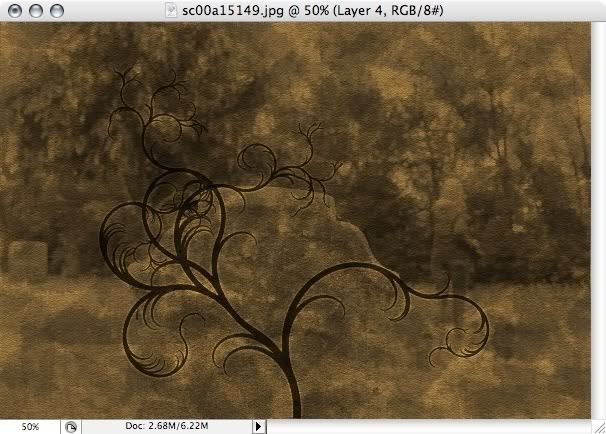
Finally, change the Opacity of the layer to about 70-75%. And that's the final step.
I hope that answered any questions. Now go forth and photoshop.

I realize, of course, that the final image shown here isn't the original image, but I can't give away all of my secrets, now can I? And feel free to play around after you get a grasp on what each tool does.
First of all, if you'd like to follow along, you'll need the following:
• A photo that looks good in grayscale (I used a scanned silver gelatin print)
• Context Free, the fractal creation software I use for my organic shapes. Don't worry, it's free.
• Photoshop, duh. I'm not sure how Elements compares, but it is cheaper. I'm just not sure if all the tools I use are included with it. If you use Elements, I'd be more than happy to know.
Step One: The Background Image
Open your desired photo in Photoshop, and this will become our Background layer. To avoid annoying discrepancies in the future, double click that layer in the Layers window and name it however you like- this will unlock the layer and make it more pliable for our needs.
Next, go to Hue/Saturation [Image>Adjustments>Hue/Saturation... or Command-U] and if you're using a colored image, drag the Saturation slider all the way to -100 to make the image black and white. You can play with the saturation and keep some color, but I recommend simply keeping it grayscale.
And since we'll be overlaying other elements over it, we want to make the background image more subtle- so adjust the Lightness to something around 30.

The final image should look something like this:

I'd save my work at this point if I were you (choose Save As so you don't overwrite the original file!). You never know. In fact, I'm not warning you again. So keep saving your work. Just keep hitting Control-S whenever you feel so moved.
Step Two: Adding the Texture
To create the "painted" texture that I use, we'll follow these steps:
1. Create a new layer [Shift-Command-N] and fill it (using the paint bucket) with a solid color- I used a brown color. Apply about 5-6% of noise [Filter>Noise>Add noise]. Then use the Water Paper filter [Filter>Sketch>Water Paper] with these settings:

To mix the water paper effect with previous noise effect, hit Control-Shift-F (Fade) and set fade value to 50-60%.
2. Go to the Texturizer filter [Filter>Texture>Texturizer...] and select the "Sandstone" texture. Scaling at 100% and Relief at 2 or 3.


3. Next, create a new layer and select the Brush tool (you can just hit the 'B' key) and from the resulting 'Brush' menu, go all the way to the bottom and select the 100 pixel Rough Round Bristle. Then (important!) set the opacity to 50% and the color to black.

Now fill the entire layer with chaotic strokes. Go nuts, but don't overdo it. It should look something like this:

Now set the blend mode for that layer to Overlay with 50-60% opacity.
4. Repeat the previous steps using a white colored brush.

5. Now merge these three layers together- I simply hide the background image (click the little eye next to it so it disappears) and use Merge Visible [Layer>Merge Visible or Shift-Control-E], then make the background visible again, and set the blend mode to Multiply with an opacity of 90-95%.

The result should be something like this:

Step Three: Adding the "Tree"
Open up Context Free and create a new shape. I created my own code, but you can use one of the examples if you have no idea what to do. Find the shape you like and choose Render with Dimensions [Render>Render with Dimensions]. Choose dimensions that are appropriate for your image.
Open your new shape in Photoshop. And now we have to select only the black parts of the image. This seems daunting, but I'll share a secret that will take ten seconds flat:
1. Control-A (Select All)
2. Control-C (Copy)
3. Q (Enter Quick Mask Mode)
4. Control-V (Paste)
5. Q (Exit Quick Mask Mode)
6. Shift-Control-I (Invert Selection)
7. Control-C (Copy)
You've now selected and copied only the black parts of the image. Now go back to your original document and Paste [Control-V]. You now have a new layer containing the fractal you created.
Your image, however, still has some white pixels around the edge. To fix this, go to Hue/Saturation and set Lightness to -100.
Position the layer wherever you want it on the image. We're almost done, I promise.

The image is a tad flat, so choose Outer Glow from the Layer Style menu at the bottom of the Layers window (It's the second one to the left). Opacity at 75%, glow color yellow, and (important!), set the Blend Mode to Overlay.

Finally, change the Opacity of the layer to about 70-75%. And that's the final step.

I hope that answered any questions. Now go forth and photoshop.