Tutorial #2
Go from 
to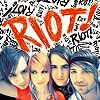
1. Sharpen your base once

--->
2. Duplicate your base and set opacity to Screen 100%

--->
3. Go to: Layer -> New Adjustment Layer -> Selective Color and use these settings:
Reds:
Cyan: -100%
Magenta: 0%
yellow: +100%
Black: 0%
Yellows:
Cyan: +100%
Magenta: 0%
Yellow: -100%
Black: 0%
Neutrals:
Cyan: +28%
Magenta: 0%
Yellow: -20%
Black: 0%

--->
4. Make another Selective Color Layer, now using these settings:
Reds:
Cyan: -100%
Magenta:0%
Yellow: +100%
Black: 0%
Yellows:
Cyan: -100%
Magenta: 0%
Yellow: +100%
Black: 0%
Neutrals:
Cyan: +15%
Magenta: 0%
Yellow: -15%
Black: 0%

--->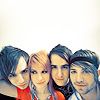
5. Go to: Layer -> New Adjustment Layer -> Brightness/Contrast and use these settings:
Brightness: +10
Contrast: +11

--->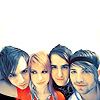
6. Merge all layers
7. Cut out your picture. I used the Magic Wand tool, but you can use whatever you like for this.
8. I took this wall paper from Paramore. net and cropped it so I had the big, red Riot! on top. And then I resised it to 100x100 px. Sharpen once. I also fiddled a bit with the colors to make the red Riot! come out brighter.

9. Then you take the Riot! texture and put it underneath the layer of your picture. Then you should have this:

Voilà. =)

to

1. Sharpen your base once

--->

2. Duplicate your base and set opacity to Screen 100%

--->

3. Go to: Layer -> New Adjustment Layer -> Selective Color and use these settings:
Reds:
Cyan: -100%
Magenta: 0%
yellow: +100%
Black: 0%
Yellows:
Cyan: +100%
Magenta: 0%
Yellow: -100%
Black: 0%
Neutrals:
Cyan: +28%
Magenta: 0%
Yellow: -20%
Black: 0%

--->

4. Make another Selective Color Layer, now using these settings:
Reds:
Cyan: -100%
Magenta:0%
Yellow: +100%
Black: 0%
Yellows:
Cyan: -100%
Magenta: 0%
Yellow: +100%
Black: 0%
Neutrals:
Cyan: +15%
Magenta: 0%
Yellow: -15%
Black: 0%

--->

5. Go to: Layer -> New Adjustment Layer -> Brightness/Contrast and use these settings:
Brightness: +10
Contrast: +11

--->

6. Merge all layers
7. Cut out your picture. I used the Magic Wand tool, but you can use whatever you like for this.
8. I took this wall paper from Paramore. net and cropped it so I had the big, red Riot! on top. And then I resised it to 100x100 px. Sharpen once. I also fiddled a bit with the colors to make the red Riot! come out brighter.

9. Then you take the Riot! texture and put it underneath the layer of your picture. Then you should have this:

Voilà. =)