TUTORIAL #51
Make the following icon. Turn:
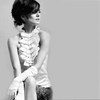
TO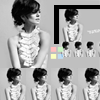
This tutorial was requested by the fabulous gets_it_faster!
This icon was part of my post that you can find RIGHT HERE
1. Open a new 100 x 100 image
2. Open your image and resize it. Drag it into your 100 x 100 image.
I got:

3. Now i duplicated my base and went to Edit> Transform > Free Transform. Resize it until you like the size. Move it ton the bottom left corner.
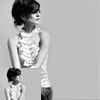
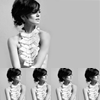
4. Now duplicate that little layer and move the pic over. Now duplicate it again and move it over again. Do this until the bottom is filled. It should look kind of like this:
I got:
5. Now I made a new layer and Copied the merged layers and pasted that onto the new layer (for me that is Ctrl + Alt + Shift + E). Resize it so it is half the size (Go to Free Transform - Ctrl + T). Move it to where you like it.
I got:
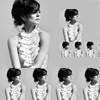
6. Now I made a new layer underneath the layer from step 5. Using the select tool, i made a rectangle and filled it with black.
I got:
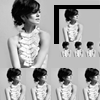
7. Now I added a small brush (I am so sorry I dont remember where I got it from - if anyone can help please let me know). I set it to screen.
Brush:
I got:
8. Now add any text or whatever else you want!!
And you are done!
Finished Product:

I also made these:
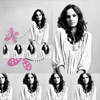
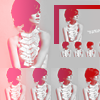
If you have any trouble at all, or need any help just let me know! I am more than happy to help!
I hope you liked this tut. If you did, feel free to check out the many others that can be found right HERE!!!
Have fun and please comment! Friend me!
TO
This tutorial was requested by the fabulous gets_it_faster!
This icon was part of my post that you can find RIGHT HERE
1. Open a new 100 x 100 image
2. Open your image and resize it. Drag it into your 100 x 100 image.
I got:
3. Now i duplicated my base and went to Edit> Transform > Free Transform. Resize it until you like the size. Move it ton the bottom left corner.
4. Now duplicate that little layer and move the pic over. Now duplicate it again and move it over again. Do this until the bottom is filled. It should look kind of like this:
I got:
5. Now I made a new layer and Copied the merged layers and pasted that onto the new layer (for me that is Ctrl + Alt + Shift + E). Resize it so it is half the size (Go to Free Transform - Ctrl + T). Move it to where you like it.
I got:
6. Now I made a new layer underneath the layer from step 5. Using the select tool, i made a rectangle and filled it with black.
I got:
7. Now I added a small brush (I am so sorry I dont remember where I got it from - if anyone can help please let me know). I set it to screen.
Brush:
I got:
8. Now add any text or whatever else you want!!
And you are done!
Finished Product:
I also made these:
If you have any trouble at all, or need any help just let me know! I am more than happy to help!
I hope you liked this tut. If you did, feel free to check out the many others that can be found right HERE!!!
Have fun and please comment! Friend me!