2 New Tutorials
2 new tutorials!!!
Make the following icons;
Turn:
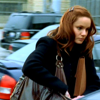
TO
requested by losty_ville
1. Open a new 100 x 100 image
2. Open your image and resize it. Drag it into your 100 x 100 image.
I got:

3. Duplicate your base and set to screen.

4. Make a new layer and fill with #161649. Set to Exclusion.
I got:

5. Make another new layer and fill with #c2d7c9. Set this Layer to Colour Burn.
I got:
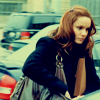
6. Duplicate your base layer and drag to the top. Set to screen.
I got:

7. Now go to Layer > New Adjustment Layer > Hue/Saturation. Set the Saturation to +21.
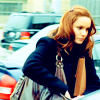
8. Now go to Layer > New Adjustment Layer > Selective Colour.
Set to:
REDS
C: -100
M: 0
Y: +20
B: 0
NEUTRALS
C: +51
M: 0
Y: -38
B: 0
And you are done!
Finished Product:

If you have any trouble at all, or need any help just let me know! I am more than happy to help!
I hope you liked this tut. If you did, feel free to check out the many others that can be found right HERE!!!
Have fun and please comment! Friend me
Also made using this method:
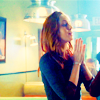

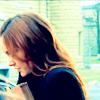
AND
Turn:
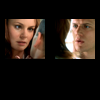
TO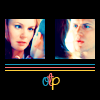
requested by sparkling_chan
1. Open a new 100 x 100 canvas.
2. Fill the background with black. Open your pictures and crop them to squares. I resized them to 40 x 40 and dragged them onto my canvas. Merge the two pictures into the one layer (Ctrl + E).
I got:

3. Duplicate the picture and set to screen.

4. Now I made a new layer and filled it with #161649. Delete where this layer covers the black background.
I got:
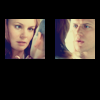
5. Now make a new layer and fill with #c2d7c9. Set to Colour Burn.
I got:
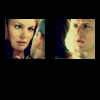
6. Duplicate the layer with the pictures and drag to the top. Set to screen.

7. Now go to Layer > New Adjustment Layer > Hue/Saturation. Set the Saturation to +37

8. Now go to Layer > New Adjustment Layer > Selective Colour.
Set to:
REDS
C: -100
M: 0
Y: +20
B: 0
NEUTRALS
C: +51
M: 0
Y: -38
B: 0.
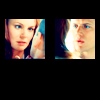
9. Duplicate the Selective Colour layer once.
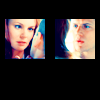
10. Now, using the Select tool, I made a small, long block and filled with #1399bd. I made two more that were parallel to the first and filled them with #f86f71 and #ffd13c. To get the best look, use the Eyedropper tool to select colours that are included in the original pics.
Stripes:

I got:
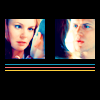
11. Now I added some text using the font CAC Pinafore, in the same colours that I used on the stripes.
And you are done!
Finished Product:

If you have any trouble at all, or need any help just let me know! I am more than happy to help!
I hope you liked this tut. If you did, feel free to check out the many others that can be found right HERE!!!
Have fun and please comment! Friend me
Also made using a similar method.
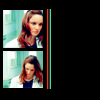
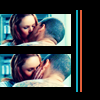
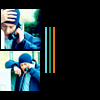
Make the following icons;
Turn:
TO
requested by losty_ville
1. Open a new 100 x 100 image
2. Open your image and resize it. Drag it into your 100 x 100 image.
I got:
3. Duplicate your base and set to screen.
4. Make a new layer and fill with #161649. Set to Exclusion.
I got:
5. Make another new layer and fill with #c2d7c9. Set this Layer to Colour Burn.
I got:
6. Duplicate your base layer and drag to the top. Set to screen.
I got:
7. Now go to Layer > New Adjustment Layer > Hue/Saturation. Set the Saturation to +21.
8. Now go to Layer > New Adjustment Layer > Selective Colour.
Set to:
REDS
C: -100
M: 0
Y: +20
B: 0
NEUTRALS
C: +51
M: 0
Y: -38
B: 0
And you are done!
Finished Product:
If you have any trouble at all, or need any help just let me know! I am more than happy to help!
I hope you liked this tut. If you did, feel free to check out the many others that can be found right HERE!!!
Have fun and please comment! Friend me
Also made using this method:
AND
Turn:
TO
requested by sparkling_chan
1. Open a new 100 x 100 canvas.
2. Fill the background with black. Open your pictures and crop them to squares. I resized them to 40 x 40 and dragged them onto my canvas. Merge the two pictures into the one layer (Ctrl + E).
I got:
3. Duplicate the picture and set to screen.
4. Now I made a new layer and filled it with #161649. Delete where this layer covers the black background.
I got:
5. Now make a new layer and fill with #c2d7c9. Set to Colour Burn.
I got:
6. Duplicate the layer with the pictures and drag to the top. Set to screen.
7. Now go to Layer > New Adjustment Layer > Hue/Saturation. Set the Saturation to +37
8. Now go to Layer > New Adjustment Layer > Selective Colour.
Set to:
REDS
C: -100
M: 0
Y: +20
B: 0
NEUTRALS
C: +51
M: 0
Y: -38
B: 0.
9. Duplicate the Selective Colour layer once.
10. Now, using the Select tool, I made a small, long block and filled with #1399bd. I made two more that were parallel to the first and filled them with #f86f71 and #ffd13c. To get the best look, use the Eyedropper tool to select colours that are included in the original pics.
Stripes:
I got:
11. Now I added some text using the font CAC Pinafore, in the same colours that I used on the stripes.
And you are done!
Finished Product:
If you have any trouble at all, or need any help just let me know! I am more than happy to help!
I hope you liked this tut. If you did, feel free to check out the many others that can be found right HERE!!!
Have fun and please comment! Friend me
Also made using a similar method.