(no subject)
4 Tutorials!
in Photoshop 7.0
These icons were part of this post.
Turn:

TO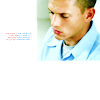
Tutorial requested by sweet_smile21 and newexistence.
1. Open a new 100 x 100 image
2. Open your image and resize it. Drag it into your 100 x 100 image. Place it towards the top.
I got:

3. Duplicate your base and set it to screen.

4. Now go to Layer > New Adjustment Layer > Hue/Saturation
Set the Saturation to +10
I got:

5. Now go to Layer > New Adjustment Layer > Brightness/Contrast
Set to:
Brightness: +15
Contrast: +15
I got:

6. Now go to Layer > New Adjustment Layer > Curves
Set to:
RGB:
Point One
I:119
O:146
I got:

7. Go to Layer > New Adjustment Layer > Selective Colour
Neutrals:
C: 0
M: 0
Y: 0
B: +7
Blacks:
C: 0
M: 0
Y: 0
B: +100
I got:

8. Go to Layer > New Adjustment Layer > Selective Colour
Neutrals:
C: 0
M: 0
Y: +50
B: 0
I got:

9. Go to Layer > New Adjustment Layer > Selective Colour
Reds:
C: -41
M: +28
Y: 0
B: +33
Yellows:
C: 0
M: 0
Y: +40
B: -31
I got:

10. Now duplicate your base, drag it to the top and set to Soft light. Desaturate it (Image > Adjustments > Desaturate).
I got:

11. I then added a texture by brasaremean, and set to screen.
I got:

12. Then I added a brush by _chokeanddie and toxxxicgurl and coloured it to suit my icon.
And you are done!
Finished Product:

Turn:
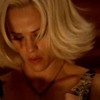
TO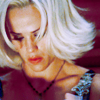
Tutorial requested by xg3n
1. Open a new 100 x 100 image
2. Open your image and resize it. Drag it into your 100 x 100 image.
I got:

3. Now go to Layer > New Adjustment Layer > Curves
Set to:
RGB:
Point One
I: 64
O: 146
Point Two
I: 160
O: 230
I got:
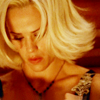
4. Now again to Layer > New Adjustment Layer > Curves
Set to:
RGB:
Point One
I: 149
O: 156
RED:
Point One
I: 175
O: 136
GREEN:
Point One
I: 148
O: 140
BLUE:
Point One
I: 117
O: 206
I got:
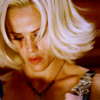
5. Go to Layer > New Adjustment Layer > Selective Colour
Reds:
C: -36
M: +12
Y: +100
B: 0
Neutrals:
C: +71
M: 0
Y: -44
B: 0
I got:
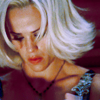
6. Now go to Layer > New Adjustment Layer > Curves
Set to:
RGB:
Point One
I: 161
O: 189
And you are done!
Finished Product:

Turn:
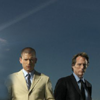
TO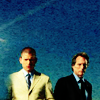
Tutorial requested by newexistence
1. Open a new 100 x 100 image
2. Open your image and resize it. Drag it into your 100 x 100 image.
I got:

3. Duplicate your base and set it to screen, opacity: 50%
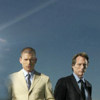
4. Now go to Layer > New Adjustment Layer > Curves
Set to:
RGB:
Point One
I: 79
O: 111
Point One
I: 180
O: 214
I got:
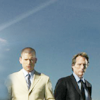
5. Duplicate your base, drag it to the top and set to soft light.
I got:
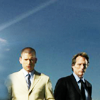
6. Now go to Layer > New Adjustment Layer > Hue/Saturation
Set the Saturation to:
Master: +22
Reds: +10
Yellows: +3
Greens: +19
Cyans: +25
Blues: +25
I got:
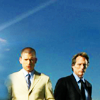
7. Make a new layer and fill with #88AB36. Set to Colour Burn at 20% opacity.
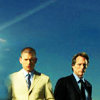
8. Go to Layer > New Adjustment Layer > Selective Colour
Reds:
C: -37
M: 0
Y: -21
B: 0
Yellows:
C: 0
M: 0
Y: -29
B: 0
I got:
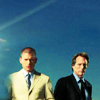
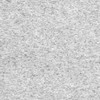
9. I then added a texture by brasaremean, and set to Colour Burn, 80 % opacity.
Texture:
And you are done!
Finished Product:

Turn:
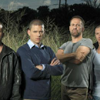
and
TO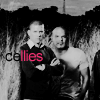
Tutorial requested by lady_devon
1. Open a new 100 x 100 image
2. Open your first image. Drag it into your 100 x 100 image. Open the second image and drag it to where you want it in relation to the first image. Then use the eraser tool to erase where the second image overlaps the first one. Do this until you are happy with the look of the pictures together.
I got:
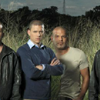
3. Now I got part of the original picture (the grass) and selected a chunk with the select tool. Right click and go to Feather > Set to 3. Then I copied and pasted the bit of grass and paste it so it covered up Dominic's arm.
I got:
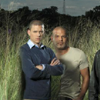
4. Now make a new layer and fill with white. Set to saturation.
I got:
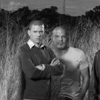
Now the next few steps are a little fiddly - but necessary to get the look of the original icon. Sorry!
5. Now go to Layer > New Adjustment Layer > Levels
Set to:
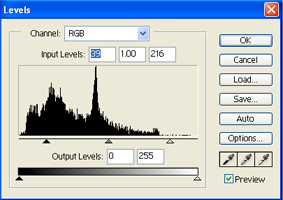
I got:
6. Now go to Layer > New Adjustment Layer > Brightness/Contrast
Set to:
Brightness: -21
Contrast: -20
I got:
7. Go to Layer > New Adjustment Layer > Selective Colour
Whites:
C: 0
M: 0
Y: 0
B: +46
Blacks:
C: 0
M: 0
Y: 0
B: +27
I got:
8. Now go to Layer > New Adjustment Layer > Curves
Set to:
RGB:
Point One
I: 44
O: 101
Point Two
I: 165
O: 192
I got:

9. Now I added some text ('Cellies' in font "Arial" Size "15" Colours: "Black" and "#EE2F6E")
And you are done!
Finished Product:

If you have any trouble at all, or need any help just let me know! I am more than happy to help!
I hope you liked these tutorials.
Feel free to check out the many others that can be found right HERE!!!
Have fun and please comment! Friend me
in Photoshop 7.0
These icons were part of this post.
Turn:

TO

Tutorial requested by sweet_smile21 and newexistence.
1. Open a new 100 x 100 image
2. Open your image and resize it. Drag it into your 100 x 100 image. Place it towards the top.
I got:

3. Duplicate your base and set it to screen.

4. Now go to Layer > New Adjustment Layer > Hue/Saturation
Set the Saturation to +10
I got:

5. Now go to Layer > New Adjustment Layer > Brightness/Contrast
Set to:
Brightness: +15
Contrast: +15
I got:

6. Now go to Layer > New Adjustment Layer > Curves
Set to:
RGB:
Point One
I:119
O:146
I got:

7. Go to Layer > New Adjustment Layer > Selective Colour
Neutrals:
C: 0
M: 0
Y: 0
B: +7
Blacks:
C: 0
M: 0
Y: 0
B: +100
I got:

8. Go to Layer > New Adjustment Layer > Selective Colour
Neutrals:
C: 0
M: 0
Y: +50
B: 0
I got:

9. Go to Layer > New Adjustment Layer > Selective Colour
Reds:
C: -41
M: +28
Y: 0
B: +33
Yellows:
C: 0
M: 0
Y: +40
B: -31
I got:

10. Now duplicate your base, drag it to the top and set to Soft light. Desaturate it (Image > Adjustments > Desaturate).
I got:

11. I then added a texture by brasaremean, and set to screen.
I got:

12. Then I added a brush by _chokeanddie and toxxxicgurl and coloured it to suit my icon.
And you are done!
Finished Product:

Turn:

TO

Tutorial requested by xg3n
1. Open a new 100 x 100 image
2. Open your image and resize it. Drag it into your 100 x 100 image.
I got:

3. Now go to Layer > New Adjustment Layer > Curves
Set to:
RGB:
Point One
I: 64
O: 146
Point Two
I: 160
O: 230
I got:

4. Now again to Layer > New Adjustment Layer > Curves
Set to:
RGB:
Point One
I: 149
O: 156
RED:
Point One
I: 175
O: 136
GREEN:
Point One
I: 148
O: 140
BLUE:
Point One
I: 117
O: 206
I got:

5. Go to Layer > New Adjustment Layer > Selective Colour
Reds:
C: -36
M: +12
Y: +100
B: 0
Neutrals:
C: +71
M: 0
Y: -44
B: 0
I got:

6. Now go to Layer > New Adjustment Layer > Curves
Set to:
RGB:
Point One
I: 161
O: 189
And you are done!
Finished Product:

Turn:

TO

Tutorial requested by newexistence
1. Open a new 100 x 100 image
2. Open your image and resize it. Drag it into your 100 x 100 image.
I got:

3. Duplicate your base and set it to screen, opacity: 50%

4. Now go to Layer > New Adjustment Layer > Curves
Set to:
RGB:
Point One
I: 79
O: 111
Point One
I: 180
O: 214
I got:

5. Duplicate your base, drag it to the top and set to soft light.
I got:

6. Now go to Layer > New Adjustment Layer > Hue/Saturation
Set the Saturation to:
Master: +22
Reds: +10
Yellows: +3
Greens: +19
Cyans: +25
Blues: +25
I got:

7. Make a new layer and fill with #88AB36. Set to Colour Burn at 20% opacity.

8. Go to Layer > New Adjustment Layer > Selective Colour
Reds:
C: -37
M: 0
Y: -21
B: 0
Yellows:
C: 0
M: 0
Y: -29
B: 0
I got:

9. I then added a texture by brasaremean, and set to Colour Burn, 80 % opacity.
Texture:

And you are done!
Finished Product:

Turn:

and

TO

Tutorial requested by lady_devon
1. Open a new 100 x 100 image
2. Open your first image. Drag it into your 100 x 100 image. Open the second image and drag it to where you want it in relation to the first image. Then use the eraser tool to erase where the second image overlaps the first one. Do this until you are happy with the look of the pictures together.
I got:

3. Now I got part of the original picture (the grass) and selected a chunk with the select tool. Right click and go to Feather > Set to 3. Then I copied and pasted the bit of grass and paste it so it covered up Dominic's arm.
I got:

4. Now make a new layer and fill with white. Set to saturation.
I got:

Now the next few steps are a little fiddly - but necessary to get the look of the original icon. Sorry!
5. Now go to Layer > New Adjustment Layer > Levels
Set to:

I got:

6. Now go to Layer > New Adjustment Layer > Brightness/Contrast
Set to:
Brightness: -21
Contrast: -20
I got:

7. Go to Layer > New Adjustment Layer > Selective Colour
Whites:
C: 0
M: 0
Y: 0
B: +46
Blacks:
C: 0
M: 0
Y: 0
B: +27
I got:

8. Now go to Layer > New Adjustment Layer > Curves
Set to:
RGB:
Point One
I: 44
O: 101
Point Two
I: 165
O: 192
I got:

9. Now I added some text ('Cellies' in font "Arial" Size "15" Colours: "Black" and "#EE2F6E")
And you are done!
Finished Product:

If you have any trouble at all, or need any help just let me know! I am more than happy to help!
I hope you liked these tutorials.
Feel free to check out the many others that can be found right HERE!!!
Have fun and please comment! Friend me