TUTORIAL #1
>>>

For Photoshop
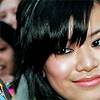
Here' s the base I started out with. I usually crop the original image, sharpen, fade sharpen around 70%, and then smooth out the skin with the blur tool.

Then copy the base three times.
Set the first layer to screen at 100%.
Then set the middle layer to screen at 50%.
And set the top layer to soft light at 100%

Then above the two screen layers, but below the soft light layer, fill a new layer with #081A2A (dark blue) and set it to exclusion 100%.
Then create a new layer, and fill it with #FFE9E0 (light pinky beige) set to multiply 100%.
Duplicate the multiply layer and set it to 30% opacity.

Create another new layer and fill it with #E0FFFE (light bluish green), and set it to color burn 100%.
Duplicate the color burn layer two times. (Three color burn layers total.)

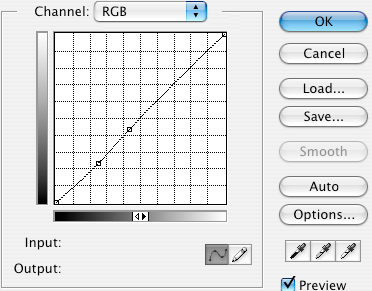
Then create a curves layer. (Layer > New Adjustment Layer > Curves)
First make sure the channel is set first to RGB, and then adjust the line in the middle.
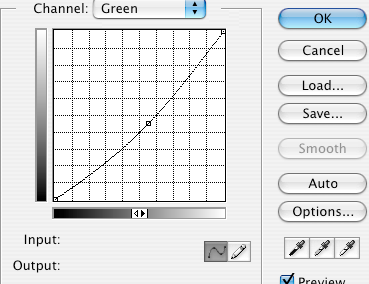
Then switch the channel to red and adjust the line again.

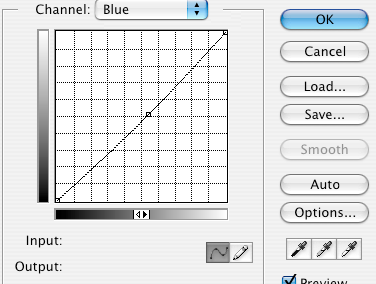
Do the same for green and blue.
Then copy your Curves layer twice.
Set the middle layer to luminosity at 15%.
And set the top layer to color at 50%.

Then go to Layers > New Adjustment Layers > Brightness/Contrast.
Brightness: +10
Contrast: +15

Then go to your base layer, and copy it once.
Set it to multiply at 100%.
Erase the backgound, leaving the face.

Duplicate this layer once, and set it to soft light 100%.

And you're done! I've used this general technique on several of my icon sets. But remember that the settings change depending on the original picture.
Examples: