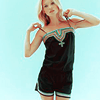
Jessica Stam Colouring
Made in Photoshop CS2. This tutorial was made specifically for images for a white or very light background so be careful when selecting your picture.
Go from
to

Find a good image, crop and resize. I got mine from stam-fan.org

Even though the image was already very bright I lightened it even more to stop the colouring picking out obvious contrasts
Layer > New Adjustment Layer> Brightness/Contrast
Brightness: +9
Contrast: 0

Layer > New Adjustment Layer > Channel Mixer
Red: +80 -10 -10
Green: -30 +70 +80
Blue: -50 +50 +100
Set this layer to 50% opacity or whatever looks best for your icon.

Layer > New Adjustment Layer > Selective Colour
Reds: -100 0 +100 0
Yellows: -100 0 +100 0
Cyans: +100 +100 +100 +100
Whites: -100 0 -100 -30

Layer > New Adjustment Layer > Selective Colour
Reds: -100 0 +100 0
Yellows: +100 0 -100 0
Cyans: +100 +0 +100 0
Whites: +100 0 0 0

You may or may not this layer depending on your image, it is just to correct the whites.
Layer > New Adjustment Layer > Selective Colour
Whites: +30
Here are some other examples. Remember. White!


Go from

to


Find a good image, crop and resize. I got mine from stam-fan.org

Even though the image was already very bright I lightened it even more to stop the colouring picking out obvious contrasts
Layer > New Adjustment Layer> Brightness/Contrast
Brightness: +9
Contrast: 0

Layer > New Adjustment Layer > Channel Mixer
Red: +80 -10 -10
Green: -30 +70 +80
Blue: -50 +50 +100
Set this layer to 50% opacity or whatever looks best for your icon.

Layer > New Adjustment Layer > Selective Colour
Reds: -100 0 +100 0
Yellows: -100 0 +100 0
Cyans: +100 +100 +100 +100
Whites: -100 0 -100 -30

Layer > New Adjustment Layer > Selective Colour
Reds: -100 0 +100 0
Yellows: +100 0 -100 0
Cyans: +100 +0 +100 0
Whites: +100 0 0 0

You may or may not this layer depending on your image, it is just to correct the whites.
Layer > New Adjustment Layer > Selective Colour
Whites: +30
Here are some other examples. Remember. White!


