Icon Tutorial #001
Icon Tutorial 001
Sam Winchester
Translatable!
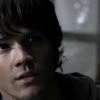
to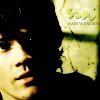
or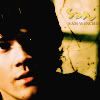
DISCLAIMER
*** All tutorials belong to me and are created and written by me; credit is not required, but do not claim as your own! If you have any questions, please do not hesitate to email me: leleah[at]keepitpumpin.net
*** Please also note that while I've created this tutorial, it's not guaranteed to work for everyone. It will most likely vary from picture to person; I've simply created a good color scheme that I hope people will like. A slight adjustment in Hue/Saturation, Brightness/Constrast and even the layers themselves might help for the people who didn't get the result. Also, it helps if your image at least somewhat good quality, although this can fixed. Enjoy! ;)
*** (Tutorial 1; Icon 1) Please make sure that while you're trying out this tutorial, that your image as some sort of screencap and has a lot of blue/grey (and make sure you note it is a Supernatural screencap, so it varies for other, much more brighter, screencaps). Else, it would be pointless to try it. Like I've said many times before, it'd also help a whole lot if you play around with the settings. It's always different for everybody. xD
CREDIT
*** Credit goes to gabilha for parts of this tutorial! The first part was from her, just to let you know. I mean no copying or infringement!
TUTORIAL #001
STEP 001

Duplicate your base, set it to screen, duplicate that layer.
STEP 002

Create a new layer (Layers>>New Raster Layer OR Layer>>New Layer), fill it with (#092682) and set it to Exclusion. Create a new layer, fill it with (#EBF785) and set it to Soft Light.
STEP 003
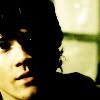
Duplicate your base, drag it to the top and set it to Screen. Duplicate your screen layer (the one on top), set it to Burn with an opacity of 80%. Duplicate your base again, drag it to the top and set it to Screen. Duplicate that layer and set it to Burn with an opacity of 12%. Create a new layer, fill it with (#F2DEBE) and set it to Burn/Color Burn with an opacity of 30%.
STEP 004
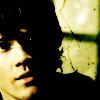
Take this texture below (from Afterglow), copy and paste it into a new layer, set it to Burn and erase the parts covering his face.
STEP 005
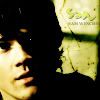
Time for the text! You don't have to do this (and most of the time I don't) but I chose the font Enya and wrote Sam's name. =] The tiny text was with Georgia and said a simple Sam Winchester.
TIPS AND TRICKS
STEP 006
Too Green/Yellow? Follow the tutorial, and merge all. Then - Go to Layers>>New Adjustment Layer>>Hue/Saturation/Lightness (Hue -6 and Saturation 40) with an opacity of 50. Create a new raster layer, fill it with (#E4548E), set the blend mode to mutiply with an opacity of 10. Go to Layers>>New Adjustment Layer>>Brightness/Contrast (Brightness 12 and Constrast 3) and finally go to Layers>>New Adjustment Layer>>Hue/Saturation/Lightness (Hue -9, Saturation -12 and Lightness of -6) with an opacity of 40%.
EXAMPLE ICONS
ICON 1
ICON 2
ICON 3
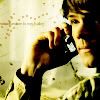

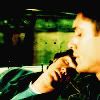
OTHER OPTIONS
1.) .PSD FILE
2.) .TXT FILE
Sam Winchester
Translatable!

to

or

DISCLAIMER
*** All tutorials belong to me and are created and written by me; credit is not required, but do not claim as your own! If you have any questions, please do not hesitate to email me: leleah[at]keepitpumpin.net
*** Please also note that while I've created this tutorial, it's not guaranteed to work for everyone. It will most likely vary from picture to person; I've simply created a good color scheme that I hope people will like. A slight adjustment in Hue/Saturation, Brightness/Constrast and even the layers themselves might help for the people who didn't get the result. Also, it helps if your image at least somewhat good quality, although this can fixed. Enjoy! ;)
*** (Tutorial 1; Icon 1) Please make sure that while you're trying out this tutorial, that your image as some sort of screencap and has a lot of blue/grey (and make sure you note it is a Supernatural screencap, so it varies for other, much more brighter, screencaps). Else, it would be pointless to try it. Like I've said many times before, it'd also help a whole lot if you play around with the settings. It's always different for everybody. xD
CREDIT
*** Credit goes to gabilha for parts of this tutorial! The first part was from her, just to let you know. I mean no copying or infringement!
TUTORIAL #001
STEP 001

Duplicate your base, set it to screen, duplicate that layer.
STEP 002

Create a new layer (Layers>>New Raster Layer OR Layer>>New Layer), fill it with (#092682) and set it to Exclusion. Create a new layer, fill it with (#EBF785) and set it to Soft Light.
STEP 003

Duplicate your base, drag it to the top and set it to Screen. Duplicate your screen layer (the one on top), set it to Burn with an opacity of 80%. Duplicate your base again, drag it to the top and set it to Screen. Duplicate that layer and set it to Burn with an opacity of 12%. Create a new layer, fill it with (#F2DEBE) and set it to Burn/Color Burn with an opacity of 30%.
STEP 004

Take this texture below (from Afterglow), copy and paste it into a new layer, set it to Burn and erase the parts covering his face.
STEP 005

Time for the text! You don't have to do this (and most of the time I don't) but I chose the font Enya and wrote Sam's name. =] The tiny text was with Georgia and said a simple Sam Winchester.
TIPS AND TRICKS
STEP 006
Too Green/Yellow? Follow the tutorial, and merge all. Then - Go to Layers>>New Adjustment Layer>>Hue/Saturation/Lightness (Hue -6 and Saturation 40) with an opacity of 50. Create a new raster layer, fill it with (#E4548E), set the blend mode to mutiply with an opacity of 10. Go to Layers>>New Adjustment Layer>>Brightness/Contrast (Brightness 12 and Constrast 3) and finally go to Layers>>New Adjustment Layer>>Hue/Saturation/Lightness (Hue -9, Saturation -12 and Lightness of -6) with an opacity of 40%.
EXAMPLE ICONS
ICON 1
ICON 2
ICON 3


OTHER OPTIONS
1.) .PSD FILE
2.) .TXT FILE