Tutorial #1: Peach Aurora
As requested by helenbutterfly, a tutorial for this icon effect. It's a b&w manga icon tutorial, but it can be used for any picture with a bit of tweaking I'm sure. :) Please DO NOT DIRECTLY COPY, the tutorial is here as guide, so please try not to duplicate the icon 100%, and don't reuse my examples in the tutorial, they are just there for examples only. ♥ Now have fun with it!
Today we'll be turning:
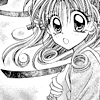
into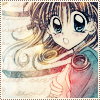
For Photoshop CS2, translatable (I hope XD).
I started out with a lovely picture of Maron from the Kamikaze Kaitou Jeanne manga. By playing around with sharpening, and brightness/contrast, I got it too look the way I wanted for iconing.
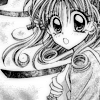
1. Duplicate your base, and Gaussion Blur it to a 1.0 radius. Now set it to Linear Burn at 50% opacity.

>
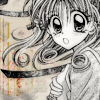
2. Now take this lovely texture by 77words, and set it to Multiply. Erase the parts that are blocking the focus of your icon.
>
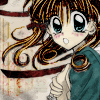
3. Now it's time to color our image! (If you're not using a manga base, you may skip this part.) Make a new layer (shift + ctrl + n), and using a round anti-aliased brush, color in your image with the colors of your choice. Don't forget to use variant colors for shadows & shines, it gives it a more dimensional effect! Now set that layer to Multiply. For her hair, I made a new layer, colored it in, and set it to Color Burn instead (to give it more of a dimensional look), but I've found that this doesn't work for all manga images. Your image should now look something like this:
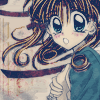
4. New layer, fill it with a dark blue. I choose #14274d, and set it to Exclusion at 60% opacity. Duplicate that same color layer, and set it to Screen (still at 60% opacity).

>
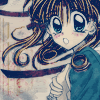
5. New layer, fill it with a light blue. I choose #ceecf9, and set it to Color Burn at 60% opacity.

>
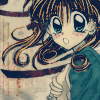
6. New layer, fill it with a cocoa brown. I choose #83734f, and set it to Soft Light.
>
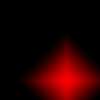
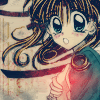
7. Now set this light texture I (ignored_tears) made to Screen. The place I put it might not be convenient for your particular picture, so you can also do this by setting your front-color to a bright red and your back-color to #000000 on your...um, tools-thingy, and experimenting with your Diamond Gradient tool. :)
>
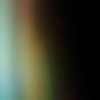
8. Now set this light texture by 77words to Screen.
>
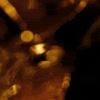
9. Now set this light texture by colorfilter to Screen.
>
10. Now take your base, duplicate it, drag it ontop, and set it to Soft Light.

>
Add your border, brushes, text of choice, and anything else you might like to add -- and voila, all done!
This was my first tutorial, so please let me know if you get any use out of it! Hopefully it wasn't too complicated to follow. ^^; I'd also love to see your outcomes. ^_^
(Like what you see? Then consider friending me for fresh updates! :)
Today we'll be turning:
into
For Photoshop CS2, translatable (I hope XD).
I started out with a lovely picture of Maron from the Kamikaze Kaitou Jeanne manga. By playing around with sharpening, and brightness/contrast, I got it too look the way I wanted for iconing.
1. Duplicate your base, and Gaussion Blur it to a 1.0 radius. Now set it to Linear Burn at 50% opacity.
>
2. Now take this lovely texture by 77words, and set it to Multiply. Erase the parts that are blocking the focus of your icon.
>
3. Now it's time to color our image! (If you're not using a manga base, you may skip this part.) Make a new layer (shift + ctrl + n), and using a round anti-aliased brush, color in your image with the colors of your choice. Don't forget to use variant colors for shadows & shines, it gives it a more dimensional effect! Now set that layer to Multiply. For her hair, I made a new layer, colored it in, and set it to Color Burn instead (to give it more of a dimensional look), but I've found that this doesn't work for all manga images. Your image should now look something like this:
4. New layer, fill it with a dark blue. I choose #14274d, and set it to Exclusion at 60% opacity. Duplicate that same color layer, and set it to Screen (still at 60% opacity).
>
5. New layer, fill it with a light blue. I choose #ceecf9, and set it to Color Burn at 60% opacity.
>
6. New layer, fill it with a cocoa brown. I choose #83734f, and set it to Soft Light.
>
7. Now set this light texture I (ignored_tears) made to Screen. The place I put it might not be convenient for your particular picture, so you can also do this by setting your front-color to a bright red and your back-color to #000000 on your...um, tools-thingy, and experimenting with your Diamond Gradient tool. :)
>
8. Now set this light texture by 77words to Screen.
>
9. Now set this light texture by colorfilter to Screen.
>
10. Now take your base, duplicate it, drag it ontop, and set it to Soft Light.
>
Add your border, brushes, text of choice, and anything else you might like to add -- and voila, all done!
This was my first tutorial, so please let me know if you get any use out of it! Hopefully it wasn't too complicated to follow. ^^; I'd also love to see your outcomes. ^_^
(Like what you see? Then consider friending me for fresh updates! :)