Tutorial #2: Midnight Daydream (coloring)
Well, my last tutorial went off pretty well, and it was fun to do, so I've decided to try another for this coloring I personally like. ^^ I hope someone likes it too and uses it. XD Again, try not to duplicate 100%. Experimentation is good! Also, please don't try to re-do my icon (i.e. reusing my examples), they're just there for examples only. :) Now have fun!
Today we'll be turning:
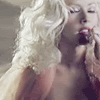
into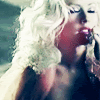
For Photoshop CS2, translatable, and very easy.
I took screencaps from Christina Aguilera's beautiful "Hurt" video, and they were terrible quality, so after a lot of blurring, sharpening, & screening -- I was able to get this. It's not the best base in the world, but it'll work. Hopefully your image will be better. ;)
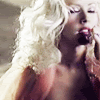
1. Duplicate your base, and set it to Overlay.

>
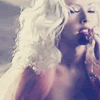
2. New layer, fill it with a very dark, navy blue. I choose #0d1739, and set it to Exclusion. Now duplicate that same blue color, and set it to Screen.

>
3. New layer, fill it with a soft brown. I choose #c7b299, and set it to Soft Light.

>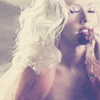
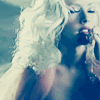
4. New layer, fill it with a bright, turquoise blue. I choose #85dfe4, and set it to Color Burn.

>
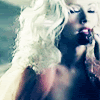
5. Now duplicate your base, drag it on top of your layers, and set it to Overlay.

>
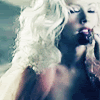
6. Duplicate your base again, drag it on top, and Desaturate it. Now set it to Color Burn at 20% Opacity (or whatever opacity looks good on your icon).

>
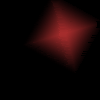
7. Now, if you're happy with your result, you can stop here. :) Or you can take it a step further like I did, and add this red diamond texture (because I just love doing this too much myself, lol) that I made, and set it to Screen on your icon wherever you see fit.
>
That's it, you're all done! Hope you enjoyed it, and if you tried it out, I'd love to see your result. :D
(Like what you see? Then consider friending me for fresh updates! :)
Today we'll be turning:
into
For Photoshop CS2, translatable, and very easy.
I took screencaps from Christina Aguilera's beautiful "Hurt" video, and they were terrible quality, so after a lot of blurring, sharpening, & screening -- I was able to get this. It's not the best base in the world, but it'll work. Hopefully your image will be better. ;)
1. Duplicate your base, and set it to Overlay.
>
2. New layer, fill it with a very dark, navy blue. I choose #0d1739, and set it to Exclusion. Now duplicate that same blue color, and set it to Screen.
>
3. New layer, fill it with a soft brown. I choose #c7b299, and set it to Soft Light.
>
4. New layer, fill it with a bright, turquoise blue. I choose #85dfe4, and set it to Color Burn.
>
5. Now duplicate your base, drag it on top of your layers, and set it to Overlay.
>
6. Duplicate your base again, drag it on top, and Desaturate it. Now set it to Color Burn at 20% Opacity (or whatever opacity looks good on your icon).
>
7. Now, if you're happy with your result, you can stop here. :) Or you can take it a step further like I did, and add this red diamond texture (because I just love doing this too much myself, lol) that I made, and set it to Screen on your icon wherever you see fit.
>
That's it, you're all done! Hope you enjoyed it, and if you tried it out, I'd love to see your result. :D
(Like what you see? Then consider friending me for fresh updates! :)