photoshop basics tutorial: hand colouring 3
part 3: hand colouring a dingbat or b/w pattern
(feel free to use finished icons with credit)
because this is another artistic technique tutorial, this is going to be more vague than some of my previous tutorials. i'm going to assume that you've read those so if something is confusing and you haven't read those, check there first.
for this tutorial, i'm using "art nouveau flowers", a dingbat font available at dafont at 500pt on a 400x400 document (all examples are cropped and/or resized).
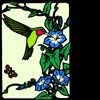
for the first effect, i'm going to use a stark white background with true black for the font colour. in order to do any colouring, the text needs to be rasterized (see next step). i use a fairly large image area for hand colouring, usually 300x300-400x400 and zoom in a lot for detail work:
after rasterizing (Layer > Rasterize > Type), use a round brush on Overlay to colour the void areas of the dingbat (i.e., on the text layer). add other brush effects as necessary:

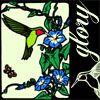
for the second effect, use #000000 for the background and a lighter colour for the dingbat (in this case, i've used #73B2C4). if you try to use Overlay on your brush here, it will overlay the dingbat outlines. remember that overlay will overlay ever colour but black and white. in this case, you want to change your brush to Darken and colour on the background layer rather than the text layer. i left one at the original size so you can see some of my brush effects. obviously for icons, these effects are lost during the resize, but for larger graphics, it adds a nice depth:
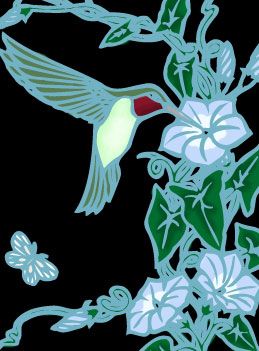

for the third effect, i've used a charcoal grey for the background and #000000 for the dingbat (and i kind of like the jacquard effect of this tone on tone):
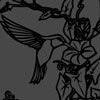
(actually, i have no idea why i did this to begin with or why i'm showing it to you now, except that it's an example of thinking outside the confines of digital art)
use the Overlay brush again, using vibrant colours. when you finish, add a little bit of noise with the noise filter and you have.... well... a black velvet painting:
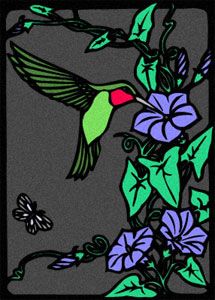
at least it's not elvis, right?
(feel free to use finished icons with credit)
because this is another artistic technique tutorial, this is going to be more vague than some of my previous tutorials. i'm going to assume that you've read those so if something is confusing and you haven't read those, check there first.
for this tutorial, i'm using "art nouveau flowers", a dingbat font available at dafont at 500pt on a 400x400 document (all examples are cropped and/or resized).
for the first effect, i'm going to use a stark white background with true black for the font colour. in order to do any colouring, the text needs to be rasterized (see next step). i use a fairly large image area for hand colouring, usually 300x300-400x400 and zoom in a lot for detail work:
after rasterizing (Layer > Rasterize > Type), use a round brush on Overlay to colour the void areas of the dingbat (i.e., on the text layer). add other brush effects as necessary:
for the second effect, use #000000 for the background and a lighter colour for the dingbat (in this case, i've used #73B2C4). if you try to use Overlay on your brush here, it will overlay the dingbat outlines. remember that overlay will overlay ever colour but black and white. in this case, you want to change your brush to Darken and colour on the background layer rather than the text layer. i left one at the original size so you can see some of my brush effects. obviously for icons, these effects are lost during the resize, but for larger graphics, it adds a nice depth:
for the third effect, i've used a charcoal grey for the background and #000000 for the dingbat (and i kind of like the jacquard effect of this tone on tone):
(actually, i have no idea why i did this to begin with or why i'm showing it to you now, except that it's an example of thinking outside the confines of digital art)
use the Overlay brush again, using vibrant colours. when you finish, add a little bit of noise with the noise filter and you have.... well... a black velvet painting:
at least it's not elvis, right?