Sleepy Hollow Tutorial
This is my first tut. ^^
Please comment =)
I'd like to see your results.
-Join realmofsilence and I'll love you forever
Go from
to
Made with PS CS2
1st step:
Prepare your base as you like:
I duplicated it twice and put the first one to Screen with an Opacity of 60% and the second to Soft Light 100%
Now my icon looks like this:
2nd step:
New Fill Layer: #0a1d3d - set to Soft Light - Opacity 100%

3rd step:
New Selective Color Layer:
Reds:
C 0
M 0
Y +100
B 0
Yellows:
C 0
M 0
Y 0
B -100
Blues:
C 0
M -100
Y -100
B 50
Whites:
C +30
M 0
Y 0
B +70

4th step:
New Hue/Saturation Layer: drag your Saturation to +20
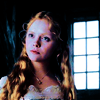
5th step:
New Selective Color Layer:
Reds:
C -30
M 0
Y +20
B 0
Cyans:
C 0
M 0
Y 0
B -30
Whites:
C +35
M 0
Y 0
B 0
Neutrals:
C 0
M 0
Y 0
B +10

6th step:
take this texture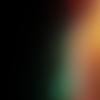
by 77words and set it to Lighten 100%
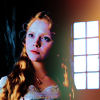
7th step:
take this texture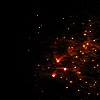
by me and set it to Lighten 100%
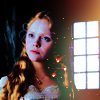
8th step:
take this texture
by dusty_memories and set it to Linear Burn 70%

Other icons made with this technics:

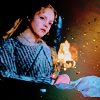
Please credit me, when taking the example icons. =)
Click here for the psd =)
Please comment =)
I'd like to see your results.
-Join realmofsilence and I'll love you forever
Go from

to

Made with PS CS2
1st step:
Prepare your base as you like:
I duplicated it twice and put the first one to Screen with an Opacity of 60% and the second to Soft Light 100%
Now my icon looks like this:

2nd step:
New Fill Layer: #0a1d3d - set to Soft Light - Opacity 100%

3rd step:
New Selective Color Layer:
Reds:
C 0
M 0
Y +100
B 0
Yellows:
C 0
M 0
Y 0
B -100
Blues:
C 0
M -100
Y -100
B 50
Whites:
C +30
M 0
Y 0
B +70

4th step:
New Hue/Saturation Layer: drag your Saturation to +20

5th step:
New Selective Color Layer:
Reds:
C -30
M 0
Y +20
B 0
Cyans:
C 0
M 0
Y 0
B -30
Whites:
C +35
M 0
Y 0
B 0
Neutrals:
C 0
M 0
Y 0
B +10

6th step:
take this texture

by 77words and set it to Lighten 100%

7th step:
take this texture

by me and set it to Lighten 100%

8th step:
take this texture

by dusty_memories and set it to Linear Burn 70%

Other icons made with this technics:


Please credit me, when taking the example icons. =)
Click here for the psd =)