A new cap
So. As I think I've mentioned before I really don't like the aesthetic of day caps in general. Especially for the 1812 period. I made a cap that I've posted about before but I'm not really satisfied with the way it looks.
So I made another one, also from Fitting and Proper. I hated it too.
blah cap.

more blah.
I started looking for various cap designs and I came across this picture. I really liked the look of it and tracked down an original source that contributed to its design.
That cap is based off of instructions in The Workwoman's Guide by A Lady. Published in 1840, the contents are diverse. It contains instructions and recommendations on what seems like an amazing array of clothing items for men, women, children, and infants as well as home furnishings and many other textile household items. The caps alone are an interesting exercise in anthropology as they are labeled for an old women, servants, for day or night wear with only minute differences in design and construction. The practicality of this source cannot be disputed. It includes instructions on bulk production, recommending how many caps can be cut out of a single width of fabric - usually a dozen or so at a time. It's available on google books if any of you are interested.
I selected a cap that I thought resembled the one in the flickr image I linked to above. It is titled "Another Shape" and the notes for it are as follows:
"This is a very simple shape, and for washing and making up is equally convenient with Fig. 10. It answers well for a bonnet cap for ladies, in which case is might be made of net or tulle. with a quilling or lace border.
Best width of material
yds. nls.
1..2
Width of cap without runners
4
Length of cap down the selvage
9
Sloped off at the bottom from C to A
1/2
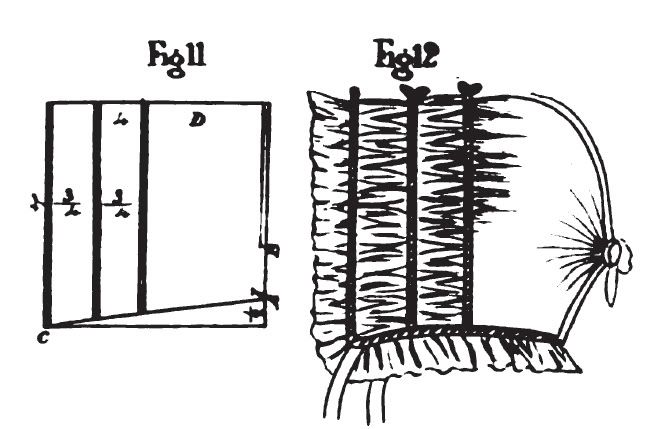
Fold the cap in half its length, making D the doubled part (see Fig. 11). Sew and fell from A to B, to the depth of 1 nail, and hem in front, to admit of tape or narrow ribbon. THe border must depend upon the purpose for which the cap is intended: if for a night-cap, a double border in front and single behind will be required: if for a bonnet-cap, a double border or quiling only, in front will be sufficient. It may be as well also to remark, that if it is meant for a night-cap, the length of the cap down the selvage should be greater say 11 or 12 nails: and the width of the material, to cut to the best advantage, must, of course, be wither exactly the same or double."1
This is the image that accompanies the description:
So I started by making a pattern like the instructions said. I converted the nails to the modern measurement of 2 1/4 inches and then to centimentres, since I'm most comfortable with them. I re-drew the given diagram with my notes and measurements.
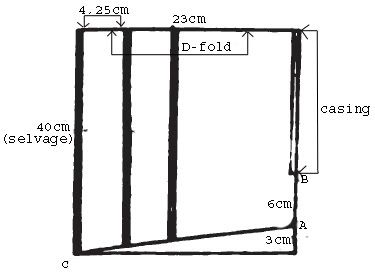
I transferred this to paper and got to work.

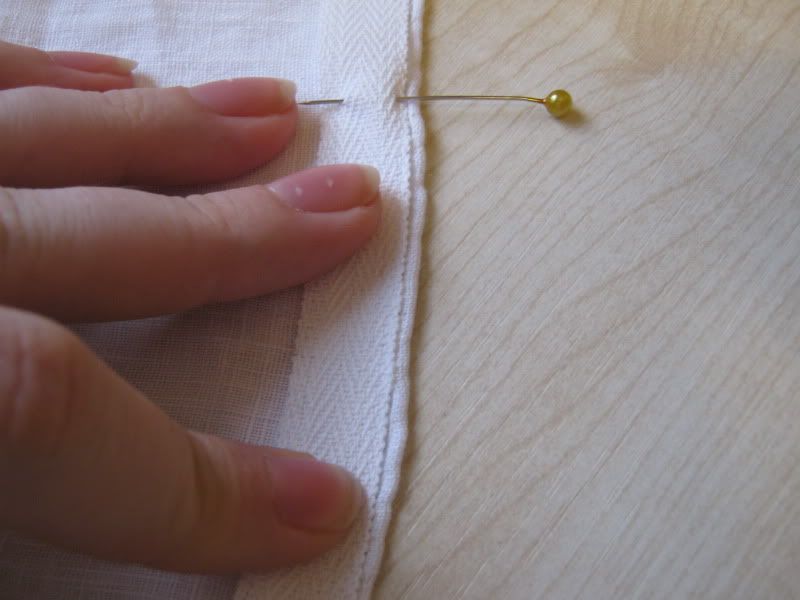
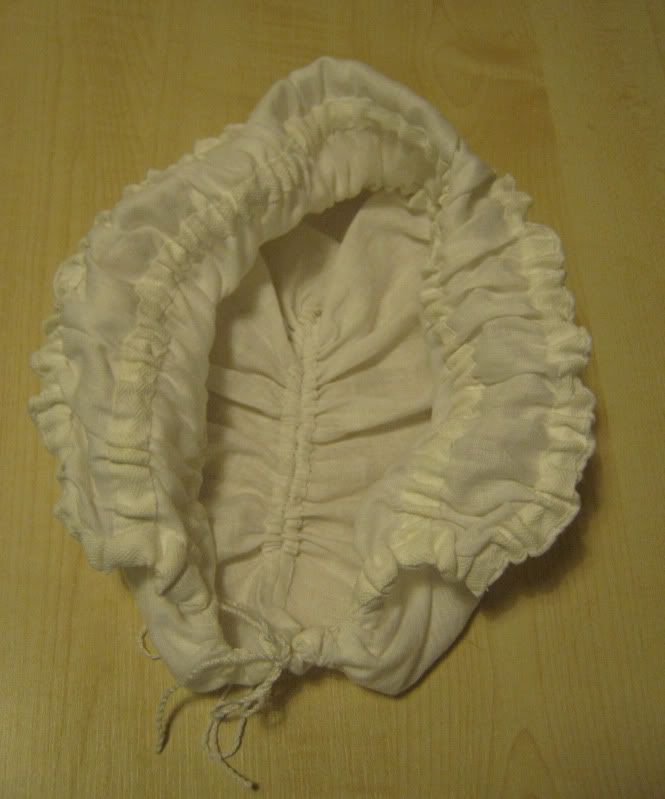
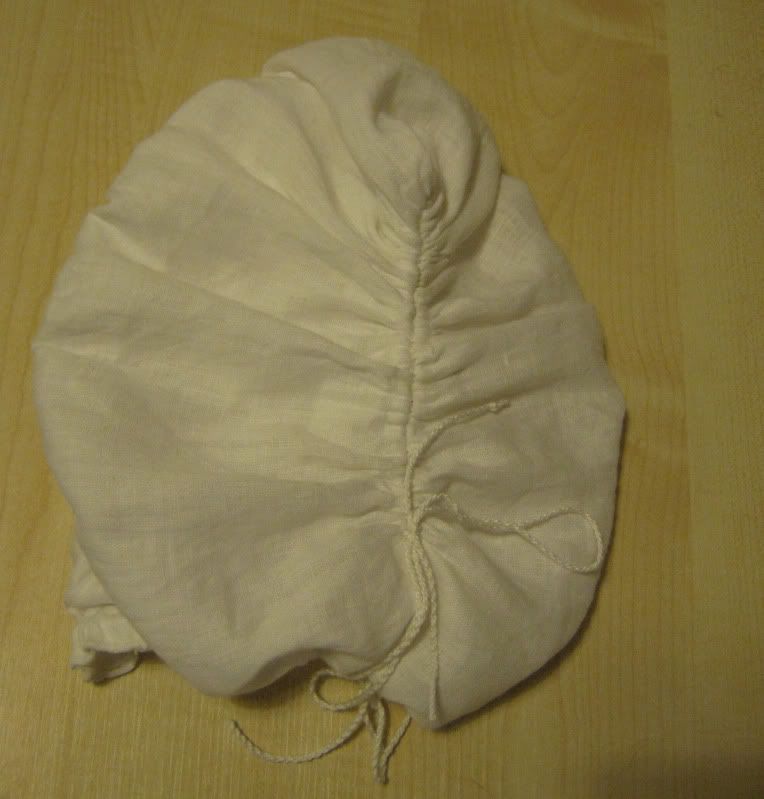
I then ran some fairly thick purchased cotton cord through the casings around the brim.
I pinned them in place and fitted is a couple of times until I was happy and secured the cords at either end with some stitches.
I finished the hem and created another casing all at once using another piece of twill tape. In this case I worked the eyelets at the nape of the neck
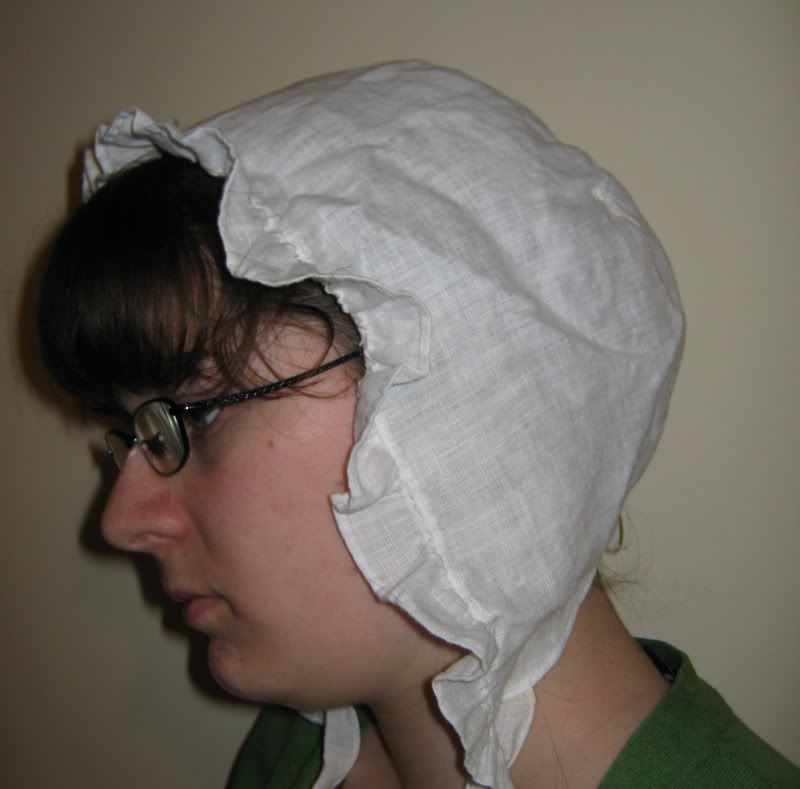
I'm really happy with the result. It's nicely fitted and won't slide around. The instructions call for the addition of a frill around the face edge but I'm not sure I feel like adding one. The rolled hem curls up prettily and I'm not sure how I would attach one anyway.
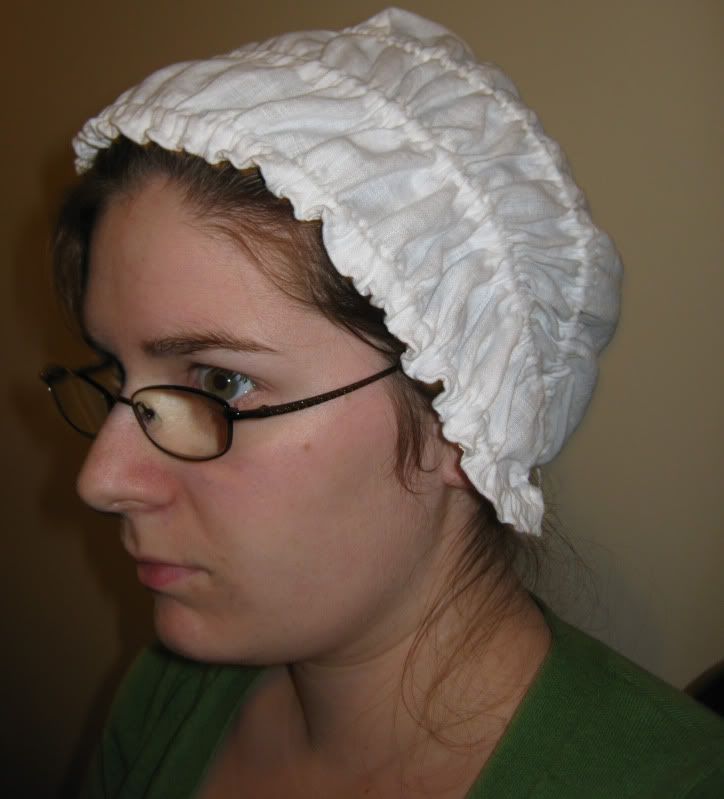
Below you can see how there's a little bit of a point at the back. This can easily be fixed by curving the corner of the pattern a bit. I'll probably do this if I make up this pattern again but I doesn't bother me that much.
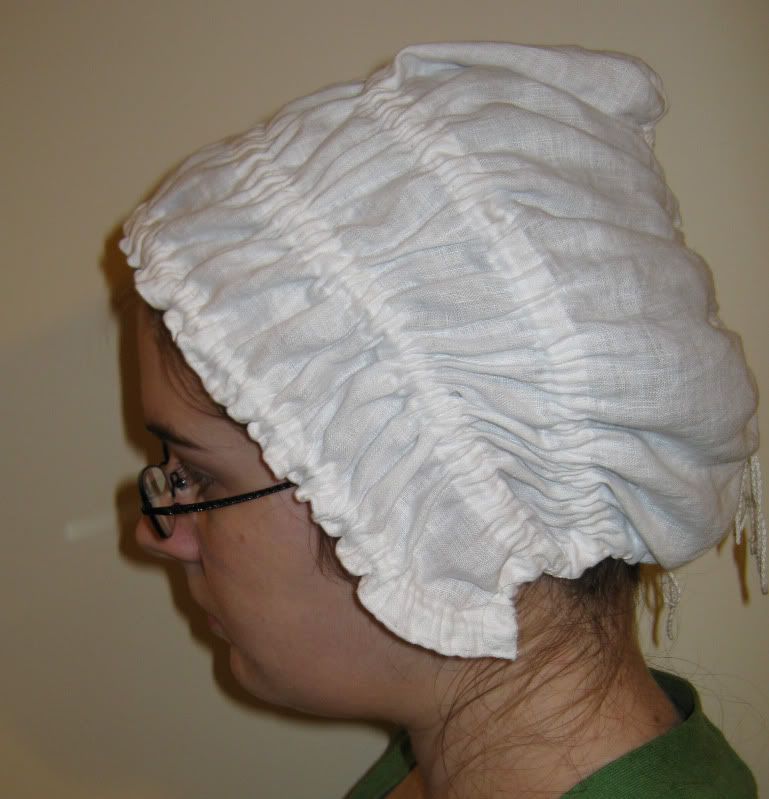
So I departed from the original instructions in a few places but I'm really happy with this piece! I now have a couple of caps that are no longer "good enough", anyone want one?
1. This passage can be found on page 81 of the google books pdf or page 64 of the printed version
So I made another one, also from Fitting and Proper. I hated it too.

blah cap.

more blah.
I started looking for various cap designs and I came across this picture. I really liked the look of it and tracked down an original source that contributed to its design.
That cap is based off of instructions in The Workwoman's Guide by A Lady. Published in 1840, the contents are diverse. It contains instructions and recommendations on what seems like an amazing array of clothing items for men, women, children, and infants as well as home furnishings and many other textile household items. The caps alone are an interesting exercise in anthropology as they are labeled for an old women, servants, for day or night wear with only minute differences in design and construction. The practicality of this source cannot be disputed. It includes instructions on bulk production, recommending how many caps can be cut out of a single width of fabric - usually a dozen or so at a time. It's available on google books if any of you are interested.
I selected a cap that I thought resembled the one in the flickr image I linked to above. It is titled "Another Shape" and the notes for it are as follows:
"This is a very simple shape, and for washing and making up is equally convenient with Fig. 10. It answers well for a bonnet cap for ladies, in which case is might be made of net or tulle. with a quilling or lace border.
Best width of material
yds. nls.
1..2
Width of cap without runners
4
Length of cap down the selvage
9
Sloped off at the bottom from C to A
1/2
Fold the cap in half its length, making D the doubled part (see Fig. 11). Sew and fell from A to B, to the depth of 1 nail, and hem in front, to admit of tape or narrow ribbon. THe border must depend upon the purpose for which the cap is intended: if for a night-cap, a double border in front and single behind will be required: if for a bonnet-cap, a double border or quiling only, in front will be sufficient. It may be as well also to remark, that if it is meant for a night-cap, the length of the cap down the selvage should be greater say 11 or 12 nails: and the width of the material, to cut to the best advantage, must, of course, be wither exactly the same or double."1
This is the image that accompanies the description:

So I started by making a pattern like the instructions said. I converted the nails to the modern measurement of 2 1/4 inches and then to centimentres, since I'm most comfortable with them. I re-drew the given diagram with my notes and measurements.

I transferred this to paper and got to work.
- I cut the cap out of handkerchief linen
- The instructions call to use the selvage on the face edge but the selvage on my fabric was very wide and unattractive so I sewed a rolled hem instead.

- I then sewed down some 1/2 inch twill tape as casings. I decided to use twill tape despite its stiffness because I had it on hand and because I was curious to see how the stiffness would shape the cap.
- I sewed down both edges of the tape creating a casing.

- I sewed the centre back seam, with right sides together
- I turned under the seam allowance twice to create a casing
- I then worked two eyelets about 6cm up from the bottom edge in either side of the casing and then ran a tie through the casing. This was a huge pain and I had to unpick a section at the top of the seam to get my needle to thread through. In hindsight I should have created the casing and eyelets, threaded the string and then whipstitched the back seam together.


I then ran some fairly thick purchased cotton cord through the casings around the brim.
I pinned them in place and fitted is a couple of times until I was happy and secured the cords at either end with some stitches.
I finished the hem and created another casing all at once using another piece of twill tape. In this case I worked the eyelets at the nape of the neck
I'm really happy with the result. It's nicely fitted and won't slide around. The instructions call for the addition of a frill around the face edge but I'm not sure I feel like adding one. The rolled hem curls up prettily and I'm not sure how I would attach one anyway.

Below you can see how there's a little bit of a point at the back. This can easily be fixed by curving the corner of the pattern a bit. I'll probably do this if I make up this pattern again but I doesn't bother me that much.

So I departed from the original instructions in a few places but I'm really happy with this piece! I now have a couple of caps that are no longer "good enough", anyone want one?
1. This passage can be found on page 81 of the google books pdf or page 64 of the printed version