Two Jack Sparrow Tutorials
I haven't done a tutorial in a long time! These two icons are from my latest batch. I'd love to hear your feedback on the tutorial! :)
A. Go from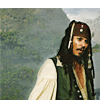
to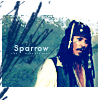
1) Crop your base and go to filter>sharpen>unsharp mask (I cropped the base so that it was a bit less than 100px tall). Duplicate the base and set it to Soft Light, opacity 35%.
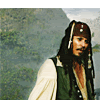
2) Make a new layer and fill with #d7f9fb, set to Color, Burn, opacity 100%.
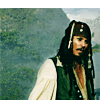
3) Create another new layer fill with #021656, and set to Exclusion 100%. On the layer mask I erased a bit over Jack’s sleeve with the brush set to around 50% opacity.
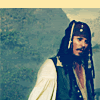
4) Just to make it a little more interesting, I played around with the Levels and Color Balance a bit. I got Input levels of 0 - 1.00 - 220 for the levels and -15 - 0 - +22 for the Color Balance layer. Also for the levels I erased the part over the background so that the levels only affected Jack.
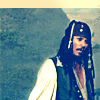
5) Next, I took this brush (by wickedful) painted in black and flipped it vertically. I positioned the brush so that it cut off some of the bottom of the icon.

--->
6) Merge what you have, duplicate it, and set it to Soft light, opacity 100%. Alternatively if you don’t like to merge (flatten) your layers, you can always Stamp Visible by pressing Ctrl+Shift+Alt+E and set that layer to Soft Light. Then with the pencil tool make a two pixel white border on either side of the icon (but not on the top and bottom).

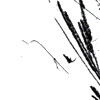
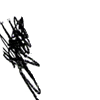
7) Now it’s time for some more brushes. I chose these two brushes by _hakanaidreams. I flipped/rotated them and resized them a bit, and painted them in #01275b.
---->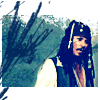
8) Last, I added text and a bit of tiny text. The larger text was Tw Cen MT in #d8f1fc, size 9 with 75pt kerning.

And there you have it! :)
-------------------------------------------------------------------------------------
B. Go from
to
1) Crop the base and unsharp mask it (filter>sharpen>unsharp mask).

2) Create a new raster layer and fill with #46899c. Set that to Overlay 100%. Then go to Color Balance and set the settings to 0 - +17 - +56 to add some more blue and green into the icon.

3) Create another layer and fill with #020221. Set to Exclusion 100%. Then make yet another layer, set to lighten, and fill with #042b36. On this layer I erased a bit over his face and head.

4) Next, merge all (or Stamp Visible using Cntr+Alt+Shift+E). Duplicate and set to Soft Light 100%. Again, on a layer mask I erased a bit over the lighter areas of the icon - Jack’s face, head, and hand. Create another layer and fill with #6374C0; set to Soft Light 100%.

5) Using the paint bucket fill a new layer with black and set it to lighten. Then using a soft paintbrush (size around 65px) paint a circle near Jack’s shoulder so it overlaps on him a bit. I used a bright reddish color, not sure exactly which one though.

6) Now for we need some Exclusion to soften it a bit. I used #001155 with the opacity at 100%.

7) I then chose this brush by sanami276 painted in white. I rotated it clockwise and placed it at the top of the icon.
---->
8) Last step, yaayy! :) To finish it off, I added some text and some tiny text underneath. The larger text is Trebuchet 8pt with 75pt kerning. I chose a navy blue color as well. And it’s done. :)

Join Community | Watch Community | memories
A. Go from

to

1) Crop your base and go to filter>sharpen>unsharp mask (I cropped the base so that it was a bit less than 100px tall). Duplicate the base and set it to Soft Light, opacity 35%.

2) Make a new layer and fill with #d7f9fb, set to Color, Burn, opacity 100%.

3) Create another new layer fill with #021656, and set to Exclusion 100%. On the layer mask I erased a bit over Jack’s sleeve with the brush set to around 50% opacity.

4) Just to make it a little more interesting, I played around with the Levels and Color Balance a bit. I got Input levels of 0 - 1.00 - 220 for the levels and -15 - 0 - +22 for the Color Balance layer. Also for the levels I erased the part over the background so that the levels only affected Jack.

5) Next, I took this brush (by wickedful) painted in black and flipped it vertically. I positioned the brush so that it cut off some of the bottom of the icon.

--->

6) Merge what you have, duplicate it, and set it to Soft light, opacity 100%. Alternatively if you don’t like to merge (flatten) your layers, you can always Stamp Visible by pressing Ctrl+Shift+Alt+E and set that layer to Soft Light. Then with the pencil tool make a two pixel white border on either side of the icon (but not on the top and bottom).

7) Now it’s time for some more brushes. I chose these two brushes by _hakanaidreams. I flipped/rotated them and resized them a bit, and painted them in #01275b.


---->

8) Last, I added text and a bit of tiny text. The larger text was Tw Cen MT in #d8f1fc, size 9 with 75pt kerning.

And there you have it! :)
-------------------------------------------------------------------------------------
B. Go from

to

1) Crop the base and unsharp mask it (filter>sharpen>unsharp mask).

2) Create a new raster layer and fill with #46899c. Set that to Overlay 100%. Then go to Color Balance and set the settings to 0 - +17 - +56 to add some more blue and green into the icon.

3) Create another layer and fill with #020221. Set to Exclusion 100%. Then make yet another layer, set to lighten, and fill with #042b36. On this layer I erased a bit over his face and head.

4) Next, merge all (or Stamp Visible using Cntr+Alt+Shift+E). Duplicate and set to Soft Light 100%. Again, on a layer mask I erased a bit over the lighter areas of the icon - Jack’s face, head, and hand. Create another layer and fill with #6374C0; set to Soft Light 100%.

5) Using the paint bucket fill a new layer with black and set it to lighten. Then using a soft paintbrush (size around 65px) paint a circle near Jack’s shoulder so it overlaps on him a bit. I used a bright reddish color, not sure exactly which one though.

6) Now for we need some Exclusion to soften it a bit. I used #001155 with the opacity at 100%.

7) I then chose this brush by sanami276 painted in white. I rotated it clockwise and placed it at the top of the icon.

---->

8) Last step, yaayy! :) To finish it off, I added some text and some tiny text underneath. The larger text is Trebuchet 8pt with 75pt kerning. I chose a navy blue color as well. And it’s done. :)

Join Community | Watch Community | memories