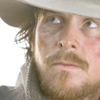
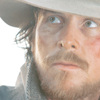
Tutorial - Christian Bale in 3:10 to Yuma
Requested by
lightgrenadess
from this batch
from
to
in 7 steps
Program: Photoshop CS2
Includes: Curves, Selective Colors
Not translatable, i'm afraid.
THIS is my base. I guess I got it from
bale_daily, the Bale crack is all there XD
We def need to lighten up this cowboy, don't we?
Curves layer:
1st (I:51, O:78)
2nd (I:122, O:156)

Selective Color:
R: -85, 16, 100, 19
Y: -73, 0, -24, -25
N: 17, -7, -18, -17
Lower the opacity to 75%

Selective Color:
R: -100, 52, 100, 0
Y: -100, -45, -100, -68
N: 19, -7, -6, 8
Lower the opacity to 56%

Selective Color:
R: -100, 31, 78, 5
W: 95, -89, -100, 3
Lower the opacity to 67%

Color fill layer: #ece7c9 set to multiply 26%

Color fill layer: #4f1703 set to exclusion 48%

Final touch: Brightness/contrast : -22, 29
duplicate this layer and up the contrast to 25, then lower the opacity of this layer to 57%
Of course you may change the opacities and stuff according to your image and tastes.

And you're done!
For any problems, doubts, just ask ;) (but don't ask for the PSD, mmkay? )
and show me what you got, if you want ^^
JOIN // Tags // Awards // Resources
lightgrenadess
from this batch
from

to

in 7 steps
Program: Photoshop CS2
Includes: Curves, Selective Colors
Not translatable, i'm afraid.
THIS is my base. I guess I got it from
bale_daily, the Bale crack is all there XD
We def need to lighten up this cowboy, don't we?
Curves layer:
1st (I:51, O:78)
2nd (I:122, O:156)

Selective Color:
R: -85, 16, 100, 19
Y: -73, 0, -24, -25
N: 17, -7, -18, -17
Lower the opacity to 75%

Selective Color:
R: -100, 52, 100, 0
Y: -100, -45, -100, -68
N: 19, -7, -6, 8
Lower the opacity to 56%

Selective Color:
R: -100, 31, 78, 5
W: 95, -89, -100, 3
Lower the opacity to 67%

Color fill layer: #ece7c9 set to multiply 26%

Color fill layer: #4f1703 set to exclusion 48%

Final touch: Brightness/contrast : -22, 29
duplicate this layer and up the contrast to 25, then lower the opacity of this layer to 57%
Of course you may change the opacities and stuff according to your image and tastes.

And you're done!
For any problems, doubts, just ask ;) (but don't ask for the PSD, mmkay? )
and show me what you got, if you want ^^
JOIN // Tags // Awards // Resources