tutorial 8
Hello!
I made the tutorial how from
this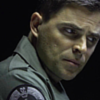
go to this
Sorry for my English.
The original picture you can find there.
1. This is a really big picture. Crop and resize it.

2. Duplicate the base three times. Desaturate all three copies. Use Sharpen filter on some copies if you need in it.
- Screen 100%
- Screen 100%
- Soft Light 100%
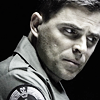
3. Use this gradient.

Set it to Hard Light 100%
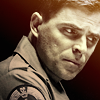
4. Duplicate the gradient. Set it on Hard Light 75%
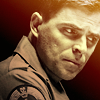
5. Duplicate the gradient again and set it on Multiply 50%
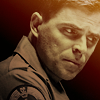
6. Duplicate desaturated base, drag to top and set it on Soft light 46%.

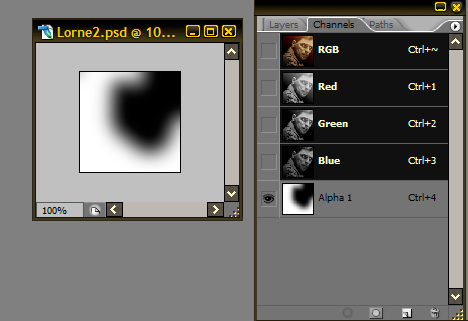
7. Now switch on the channels. Create a new channel. Use the Lasso tool to select the parts of picture you want. Then fill it with white color using the Paint Bucket tool. Deselect. Filters --> Blur --> Guassian Blur. Radius 7-8, as you want. And you must get something like this.
8. Switch on layers. Select --> Load selection. Channel: Name of your channel (Alpha 1), New Selection. Then Edit --> Copy. Edit --> Paste. Filter --> Blur --> Motion Blur. Distance around 23 pixels, angle around -48. Opacity 85%. And you get this.

9. Duplicate the last layer. Set on Screen Opacity 63%.

10. Create a new layer. Use Rectangle tool. Color - black.

11. New layer. Edit --> Stroke --> Black, 1 px, Inside.
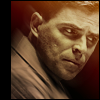
12. Now add some tiny text. It is Arial Black, 1,5 pt, smooth, spacing between letters - 700, color - white. Picture’s resolution is 72.

13. Create a new layer. Use Brush tool. Size - 2, spacing - 184.
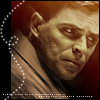
14. Filter --> Sharpen --> Sharpen. Opacity 66%. Layer --> Layer Mask. Use the gradient from the bottom of picture.

We’ve got it! Enjoy!
If you have any questions - ask me. I will try to help.
I made the tutorial how from
this

go to this

Sorry for my English.
The original picture you can find there.
1. This is a really big picture. Crop and resize it.

2. Duplicate the base three times. Desaturate all three copies. Use Sharpen filter on some copies if you need in it.
- Screen 100%
- Screen 100%
- Soft Light 100%

3. Use this gradient.

Set it to Hard Light 100%

4. Duplicate the gradient. Set it on Hard Light 75%

5. Duplicate the gradient again and set it on Multiply 50%

6. Duplicate desaturated base, drag to top and set it on Soft light 46%.

7. Now switch on the channels. Create a new channel. Use the Lasso tool to select the parts of picture you want. Then fill it with white color using the Paint Bucket tool. Deselect. Filters --> Blur --> Guassian Blur. Radius 7-8, as you want. And you must get something like this.

8. Switch on layers. Select --> Load selection. Channel: Name of your channel (Alpha 1), New Selection. Then Edit --> Copy. Edit --> Paste. Filter --> Blur --> Motion Blur. Distance around 23 pixels, angle around -48. Opacity 85%. And you get this.

9. Duplicate the last layer. Set on Screen Opacity 63%.

10. Create a new layer. Use Rectangle tool. Color - black.

11. New layer. Edit --> Stroke --> Black, 1 px, Inside.

12. Now add some tiny text. It is Arial Black, 1,5 pt, smooth, spacing between letters - 700, color - white. Picture’s resolution is 72.

13. Create a new layer. Use Brush tool. Size - 2, spacing - 184.

14. Filter --> Sharpen --> Sharpen. Opacity 66%. Layer --> Layer Mask. Use the gradient from the bottom of picture.

We’ve got it! Enjoy!
If you have any questions - ask me. I will try to help.