tutorial 2
this tutorial was requested by mscreations, and it has taken me forever to get to it and i apologize for that. i didn't save the psp version of the original icon, so the product of this tutorial will look slightly different.
going from this to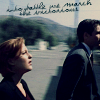
PART 1:
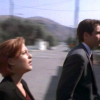
select whatever part of the image is of most interest to you, obviously for me it was mulder and scully. in icons, i find it has more effect if the points of interest are not so dully centered but off to the side to give an artistic effect to the WHOLE icon, not just the center.
RESIZE your image down to 100x100, SHARPEN it however many times is necessary (once for me). now duplicate you image and set it to SCREEN at 50%. duplicate you base image again, bring it to the top, DESATURATE and set to SOFT LIGHT at 50%.
//you should now have//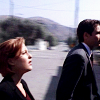
PART 2:
now for gradients.
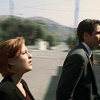
1)create a new layer and fill with #E5B289 and set to MULTIPLY at 40%.
2)now create another new layer and fill with #517951 and set to OVERLAY at 50%.

+
=
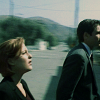
3)another new layer, fill with #008080 and set to SOFT LIGHT at 60%.
4)another new layer, fill with #BBB1AD and set to MULTIPLY at 45%.

+
=
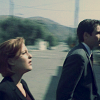
5)another new layer, fill with #000040 and set to EXCLUSION at 35%.
6)another new layer, fill with #FFC0C0 and set to SOFT LIGHT at 34%.

+
=
PART 3:
burn layers.
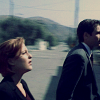
7)another new layer, fill with #FFC0C0 (same color) and set to BURN at 12%.
8)another new layer, fill with #8080FF and set to BURN at 13%

+
=
9)another new layer, fill with #C0C0C0 and set to BURN at 13%.
PART 4:
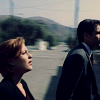
go back to your base, duplicate it and bring it to the top. set to SOFT LIGHT at 50%. remember that each image and icon is different with different lighting and colors so each of the previously mentioned gradients should be set to benefit YOUR icon, not copied directly from this tutorial.

+ SOFT LIGHT
=
PART 5:
after all the gradients have been added, merge all layers. add whatever text or brushes you like. i added a text brush, the font is called "violation" in size 6 in #4B6C77. the text reads 'into battle we march, the victorious'.
and i'm done. you may add borders if you like, but i tend not to use them. you can see the product of this tutorial is slightly different colored than the original icon, but i like it anyway. hey, i had to do this from scratch!
//tutorial//
//original//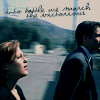
view this icon post
or you can see my other tutorial:
if you liked this tutorial, please feel free to friend me
comments are much appreciated. XD
going from this to

PART 1:
select whatever part of the image is of most interest to you, obviously for me it was mulder and scully. in icons, i find it has more effect if the points of interest are not so dully centered but off to the side to give an artistic effect to the WHOLE icon, not just the center.
RESIZE your image down to 100x100, SHARPEN it however many times is necessary (once for me). now duplicate you image and set it to SCREEN at 50%. duplicate you base image again, bring it to the top, DESATURATE and set to SOFT LIGHT at 50%.

//you should now have//

PART 2:
now for gradients.
1)create a new layer and fill with #E5B289 and set to MULTIPLY at 40%.
2)now create another new layer and fill with #517951 and set to OVERLAY at 50%.

+

=

3)another new layer, fill with #008080 and set to SOFT LIGHT at 60%.
4)another new layer, fill with #BBB1AD and set to MULTIPLY at 45%.

+

=

5)another new layer, fill with #000040 and set to EXCLUSION at 35%.
6)another new layer, fill with #FFC0C0 and set to SOFT LIGHT at 34%.

+

=

PART 3:
burn layers.
7)another new layer, fill with #FFC0C0 (same color) and set to BURN at 12%.
8)another new layer, fill with #8080FF and set to BURN at 13%

+

=

9)another new layer, fill with #C0C0C0 and set to BURN at 13%.
PART 4:
go back to your base, duplicate it and bring it to the top. set to SOFT LIGHT at 50%. remember that each image and icon is different with different lighting and colors so each of the previously mentioned gradients should be set to benefit YOUR icon, not copied directly from this tutorial.

+ SOFT LIGHT

=

PART 5:
after all the gradients have been added, merge all layers. add whatever text or brushes you like. i added a text brush, the font is called "violation" in size 6 in #4B6C77. the text reads 'into battle we march, the victorious'.

and i'm done. you may add borders if you like, but i tend not to use them. you can see the product of this tutorial is slightly different colored than the original icon, but i like it anyway. hey, i had to do this from scratch!
//tutorial//

//original//
view this icon post
or you can see my other tutorial:

if you liked this tutorial, please feel free to friend me
comments are much appreciated. XD