Tutorial 06: Lights
First of all, I would like to apologize to m1ch1ru because I couldn't find the .psd for the second icon she requested to be tutorialed. You can choose another one, because of that, if you want. :) But for the moment, here's your other request:
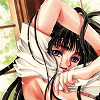
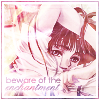
-->
Base by clamp_visual
01. Sharpen and prettify your base as much as you want. I didn't do it this time because clamp_visual bases are pretty much high quality, so it wasn't necessary this time. XD
02. Take a gradient in pastel tones that somewhat match the general coloring of your base and set it to Exclusion on LOW Opacity. For this case I used a gradient by crumblingwalls at 17%. Gradient Maps should produce a similar result.
//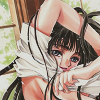
03. Kinda yucky... So we have to work more on the coloring. Think on what kind of colors you would like your final icon to have. I wanted it pink, so I used another gradient by crumblingwalls at Soft Light, Opacity 100%.

//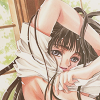
04. Now you need to make 2 copies of your original base. The first you need to half-desaturate it (use something like 30-60% Saturation on the Hue and Saturation window), and the second one, which should go right on top, will be fully desaturated. Set the first copy to Overlight - 59% and the second (the fully desaturated one) to Soft Light - 50%.
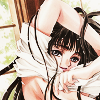
05. Yay !! That looks so much brighter than before !! Now go between the two desaturated layers (the partially desat and fully desat) and we'll use the help of two textures. I lost the credit for the first one (it should be on my Resources post), which should be set to Pin Light - 34% and the second one is by blimey_icons, worked at Soft Light - 50%.
+
=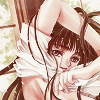
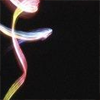
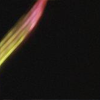
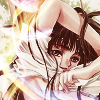
06. Not bad, but we're not done by a long run yet. From this moment on, we'll be working on top of every layer. Now comes the fun part (for me). I really like shiny things, so I got three spiral-thingies by graphicjunkie and set the first two Screen - 100%, and to avoid making the icon too bright just now, use the last texture at Soft Light - 100%.
+
+
=
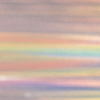
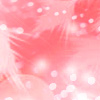
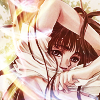
07. What now ? You guessed it, more pinkness !! This time it's two textures by colorfilter. The first one goes on Soft Light - 62% and the second one to Color Burn - 20%. If anything is making her face blurry or anything, Erase the texture around her face. You can also use Mask Layers.
+
=
08. More lights now, this time by anais_dirge and . Here's the setting in order of layers:
Soft Light - 30
Pin Light - 100

+
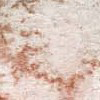
09. So, forgetting the lights for a moment, we'll take a texture by ___candyrain (Anyone knows where she went to ? I never know who to credit). Anyway, set this one to Soft Light - 78%
10. I swear we're almost done, I'll get it finished in this step to avoid masses of bricks. XD So add the following three textures in this order:

by siannastar on Soft Light - 52%
by crumblingwalls on Saturation - 44%
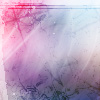
by ___candyrain on Overlay - 72%
You can also add border, text, brushes, etc to make your icon look more spiffy and cool !! My final result was:

I hope this tut was helpful, and sorry for the longness of it. *dies* Have fun trying it for yourself !! ♥

-->
Base by clamp_visual
01. Sharpen and prettify your base as much as you want. I didn't do it this time because clamp_visual bases are pretty much high quality, so it wasn't necessary this time. XD
02. Take a gradient in pastel tones that somewhat match the general coloring of your base and set it to Exclusion on LOW Opacity. For this case I used a gradient by crumblingwalls at 17%. Gradient Maps should produce a similar result.

//

03. Kinda yucky... So we have to work more on the coloring. Think on what kind of colors you would like your final icon to have. I wanted it pink, so I used another gradient by crumblingwalls at Soft Light, Opacity 100%.

//

04. Now you need to make 2 copies of your original base. The first you need to half-desaturate it (use something like 30-60% Saturation on the Hue and Saturation window), and the second one, which should go right on top, will be fully desaturated. Set the first copy to Overlight - 59% and the second (the fully desaturated one) to Soft Light - 50%.

05. Yay !! That looks so much brighter than before !! Now go between the two desaturated layers (the partially desat and fully desat) and we'll use the help of two textures. I lost the credit for the first one (it should be on my Resources post), which should be set to Pin Light - 34% and the second one is by blimey_icons, worked at Soft Light - 50%.

+

=

06. Not bad, but we're not done by a long run yet. From this moment on, we'll be working on top of every layer. Now comes the fun part (for me). I really like shiny things, so I got three spiral-thingies by graphicjunkie and set the first two Screen - 100%, and to avoid making the icon too bright just now, use the last texture at Soft Light - 100%.

+

+

=

07. What now ? You guessed it, more pinkness !! This time it's two textures by colorfilter. The first one goes on Soft Light - 62% and the second one to Color Burn - 20%. If anything is making her face blurry or anything, Erase the texture around her face. You can also use Mask Layers.

+

=

08. More lights now, this time by anais_dirge and . Here's the setting in order of layers:
Soft Light - 30
Pin Light - 100

+

09. So, forgetting the lights for a moment, we'll take a texture by ___candyrain (Anyone knows where she went to ? I never know who to credit). Anyway, set this one to Soft Light - 78%

10. I swear we're almost done, I'll get it finished in this step to avoid masses of bricks. XD So add the following three textures in this order:

by siannastar on Soft Light - 52%

by crumblingwalls on Saturation - 44%

by ___candyrain on Overlay - 72%
You can also add border, text, brushes, etc to make your icon look more spiffy and cool !! My final result was:
I hope this tut was helpful, and sorry for the longness of it. *dies* Have fun trying it for yourself !! ♥