(no subject)
Hello kids !! I have another tutorial for you !! I hope it's useful for you, and as usual, it's done using PSE, but easily adaptable to PS or PSP. XD Today we're going to learn how to go from:
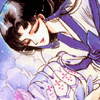
to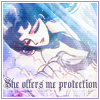
01. Crop the original image in the way you prefer. (Check out this one). I always use the Auto Contrast tool to make the colors brighter, but you can choose not to do it.
02. Duplicate the original base and set to blending mode Soft Light at 100%. You can do it using the Layer Palette like this. You will get this result:
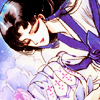
03. Paste the following gradient (by crumblingwalls, I believe) between the original layer, and the duplica:

Set it to blending mode Lighten at 83%. Duplicate the gradient and set it to Color Burn at 33%. Your base should now look like this:
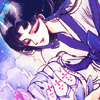
04. And here's where the real fun starts... TEXTURES !!! First take this texture (by amore) and paste it over the two gradients.
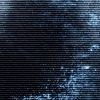
Change the blending mode to Screen at 100%, to get this result:
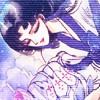
05. Now, take the follwing texture (by ___candyrain) and paste it on a new layer over the starry texture in the last step.
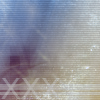
You should get a result similar to this, by setting the blending mode to Screen at 100%:
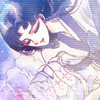
06. Next texture is this one (by colorfilter), and you will paste it over the layer created in the previous step.

The blending mode should be Color Burn at 100%. (I know it seems harsh, but trust me, it works). You'll get something like this:
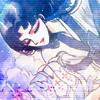
07. I really like light textures, so I couldn't help myself. I used the following one (by colorfilter).
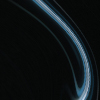
Use the Screen blending mode at 100%, and you'll get a similar result:
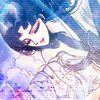
08. Shapes are fun too, and useful for adding text. I used the rectangle tool to create this rectangle, with the settings Feather: 3 px (click on the link to see where the Feather tool is located in PSE, it appears when you have the selection tool chosen):

and you will get this result: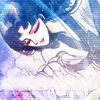
(The shape still goes under the Soft Light duplicated base)
09. Now two more light textures (both by colorfilter), that will paste over EVERYTHING else in this order:
&
Set the blending mode of both layers to Screen at 100%, and it will look like this:
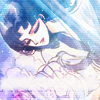
10. Finally, you just add some text, and a pretty border and you're all set !! This should be the final result:

Other icons made using a similar method:
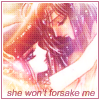
Have fun trying this out, I hope it helps you guys !!! *waves* See you soon with an all new tutorial !!

to
01. Crop the original image in the way you prefer. (Check out this one). I always use the Auto Contrast tool to make the colors brighter, but you can choose not to do it.
02. Duplicate the original base and set to blending mode Soft Light at 100%. You can do it using the Layer Palette like this. You will get this result:

03. Paste the following gradient (by crumblingwalls, I believe) between the original layer, and the duplica:

Set it to blending mode Lighten at 83%. Duplicate the gradient and set it to Color Burn at 33%. Your base should now look like this:

04. And here's where the real fun starts... TEXTURES !!! First take this texture (by amore) and paste it over the two gradients.

Change the blending mode to Screen at 100%, to get this result:

05. Now, take the follwing texture (by ___candyrain) and paste it on a new layer over the starry texture in the last step.

You should get a result similar to this, by setting the blending mode to Screen at 100%:

06. Next texture is this one (by colorfilter), and you will paste it over the layer created in the previous step.

The blending mode should be Color Burn at 100%. (I know it seems harsh, but trust me, it works). You'll get something like this:

07. I really like light textures, so I couldn't help myself. I used the following one (by colorfilter).

Use the Screen blending mode at 100%, and you'll get a similar result:

08. Shapes are fun too, and useful for adding text. I used the rectangle tool to create this rectangle, with the settings Feather: 3 px (click on the link to see where the Feather tool is located in PSE, it appears when you have the selection tool chosen):

and you will get this result:

(The shape still goes under the Soft Light duplicated base)
09. Now two more light textures (both by colorfilter), that will paste over EVERYTHING else in this order:

&

Set the blending mode of both layers to Screen at 100%, and it will look like this:

10. Finally, you just add some text, and a pretty border and you're all set !! This should be the final result:
Other icons made using a similar method:
Have fun trying this out, I hope it helps you guys !!! *waves* See you soon with an all new tutorial !!