Icon Tutorial #6 - Tifa Lockhart (FF7: Advent Children)
Despite the fact that I have a lot of things to do today, I made a new tutorial! ^-^ This is my... heh I can't even count. XD This has got to be my sixth tutorial... maybe?
We'll be going from here to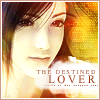
. :D Yes, we're using a tutorial featuring Tifa Lockhart of Final Fantasy 7: Advent Children. ^_^ The level would be pretty easy, unless of course you're not willing on using a lot of textures, or expirementing. The program I used is once again, Adobe Photoshop Elements 3.0. I am serious, I love that one way better than 7.0. XD 7.0's just sitting here... I don't know why, I'm weird. XDD;
Anyhow, click the cut and let's begin! :3
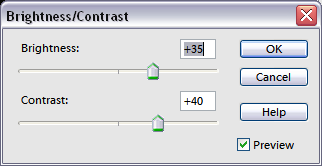
Step 1: First off we're going to start with our cap and fix it's lighting. (Cap was gotten from me. :D) The cap's not in very good quality, but when it's cropped it'll be pretty good. So let's take this and go to Layer >> New Adjustment Layer >> Brightness/Contrast We're going to fix the image, as for me, since the cap is a bit too dark and a bit pixelated, I put this for both Brightness and Contrast:
From there the image is now fixed:

It's not cropped yet, so we'll crop it. Crop it down to whatever size you'd like. I cropped it down to 100 x 100 pixels for an icon. =] When you're done cropping go to Filter >> Sharpen >> Sharpen From there I get this:
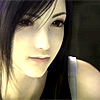
*Make sure you cropped her face leaving space for some text! :D
Step 2: You can get the Sharpen tool and sharpen her eyes a bit, but that's only optional, you really don't have to do that. As for me, I did anyway. :D Next we'll take this texture by ??? (If anyone knows, pelase tell me! ^^;;) and set it to Screen; 100% Opacity. After that put this texture by awmpdotnet and set it to Screen; 85% Opacity. From there you get this:
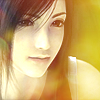
Step 3: Next we'll take this texture by awmpdotnet, yet again, and set it to Hard Light; 100% Opacity. You might want to rotate the texture to the left so that more of the light is off Tifa's face. Take the eraser tool and erase some light off of Tifa's face so it'll look clean. Duplicate our base and drag it all the way to the very top and set it to Soft Light; 100% Opacity.
From there we get this:
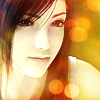
*If you'd like to see how the order of the layers are as of now then please click here. =]
Step 4: Our icon is not nearly done. ^^;; Make a new layer and let's take this brush by 77words and put it to the very right using the color white (#FFFFFF). Set it to Overlay: 100% Opacity. Duplicate that layer so that the tinytext can be seen very brightly. From there we get this:

Step 5: Now let's duplicate the base again and bring it to the very top once more. But this time go to Image >> Rotate >> Flip Layer Horizontal. Now it's been flipped. Set that layer to Soft Light; 100% Opacity. Move the layer a bit more to the right so that it shows Tifa's face. Take the eraser tool and erase some of the image that's blocking Tifa's face, from the base. From there we get this:
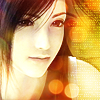
You see Tifa's face? It's hiding, but it's there. XD
Step 6: Now we're going to make a place for some text! :D Take this brush by ewanism, reisize it to 45 px and lower the opacity to 65%. Make a new layer and place that brush with it's opacity lowered to the right of Tifa. Add a few strokes until you think that there's enough space for text. From that, I get this:
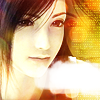
Step 7: Now we're going to add some text! =] Take the eye dropper tool and select a color from the icon that's dark. As for me I got #9B380E. Now using that color I'll be taking the font Times New Roman in the size 6 pt I'll be adding the text "T H E D E S T I N E D" (Make sure there's a doulble space in between The and Destined. XD) Place that somewhere on the top of the space for text. Then next we'll take Times New Roman again, and using the size 11 pt, type in "L O V E R" and place it somewhere at the bottom of the "The Destined". :D Which says "The Destined Lover". Then make a new layer and take the same color and take this brush by 77words and place it under "L O V E R". Make sure the brush settings are back to the normal way (100 % Opacity) :D If some of the text is too long then take the eraser tool and erase some. Which gives us:
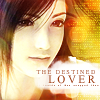
Step 8: We're almost done! We just need to add a border. XD Merge all of your layers. Then go to Edit >> Stroke (Outline) Selection A window will pop up and you settings should look like this:
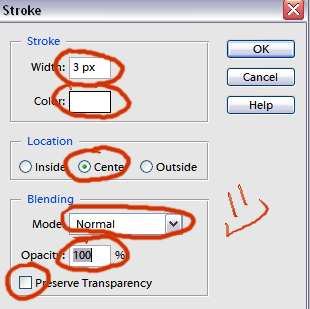
Then press okay. You'll see that you know have a border by the size of 3 pixels. Now we're going to go to Edit >> Stroke (Outline) Selection again but this time your settings should look like this:
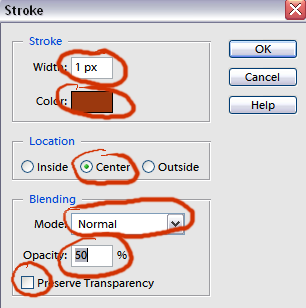
Then press okay. Now your icon is officially done. XD From all of those steps we get this:

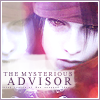
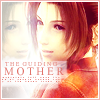
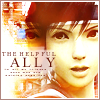
Other icons using that type of style are like these:
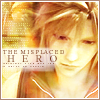
//
//
//
And that's it. =] I'd love to see what you got and feedbacks are love. (: ♥
We'll be going from here to
. :D Yes, we're using a tutorial featuring Tifa Lockhart of Final Fantasy 7: Advent Children. ^_^ The level would be pretty easy, unless of course you're not willing on using a lot of textures, or expirementing. The program I used is once again, Adobe Photoshop Elements 3.0. I am serious, I love that one way better than 7.0. XD 7.0's just sitting here... I don't know why, I'm weird. XDD;
Anyhow, click the cut and let's begin! :3
Step 1: First off we're going to start with our cap and fix it's lighting. (Cap was gotten from me. :D) The cap's not in very good quality, but when it's cropped it'll be pretty good. So let's take this and go to Layer >> New Adjustment Layer >> Brightness/Contrast We're going to fix the image, as for me, since the cap is a bit too dark and a bit pixelated, I put this for both Brightness and Contrast:

From there the image is now fixed:

It's not cropped yet, so we'll crop it. Crop it down to whatever size you'd like. I cropped it down to 100 x 100 pixels for an icon. =] When you're done cropping go to Filter >> Sharpen >> Sharpen From there I get this:

*Make sure you cropped her face leaving space for some text! :D
Step 2: You can get the Sharpen tool and sharpen her eyes a bit, but that's only optional, you really don't have to do that. As for me, I did anyway. :D Next we'll take this texture by ??? (If anyone knows, pelase tell me! ^^;;) and set it to Screen; 100% Opacity. After that put this texture by awmpdotnet and set it to Screen; 85% Opacity. From there you get this:

Step 3: Next we'll take this texture by awmpdotnet, yet again, and set it to Hard Light; 100% Opacity. You might want to rotate the texture to the left so that more of the light is off Tifa's face. Take the eraser tool and erase some light off of Tifa's face so it'll look clean. Duplicate our base and drag it all the way to the very top and set it to Soft Light; 100% Opacity.
From there we get this:

*If you'd like to see how the order of the layers are as of now then please click here. =]
Step 4: Our icon is not nearly done. ^^;; Make a new layer and let's take this brush by 77words and put it to the very right using the color white (#FFFFFF). Set it to Overlay: 100% Opacity. Duplicate that layer so that the tinytext can be seen very brightly. From there we get this:

Step 5: Now let's duplicate the base again and bring it to the very top once more. But this time go to Image >> Rotate >> Flip Layer Horizontal. Now it's been flipped. Set that layer to Soft Light; 100% Opacity. Move the layer a bit more to the right so that it shows Tifa's face. Take the eraser tool and erase some of the image that's blocking Tifa's face, from the base. From there we get this:

You see Tifa's face? It's hiding, but it's there. XD
Step 6: Now we're going to make a place for some text! :D Take this brush by ewanism, reisize it to 45 px and lower the opacity to 65%. Make a new layer and place that brush with it's opacity lowered to the right of Tifa. Add a few strokes until you think that there's enough space for text. From that, I get this:

Step 7: Now we're going to add some text! =] Take the eye dropper tool and select a color from the icon that's dark. As for me I got #9B380E. Now using that color I'll be taking the font Times New Roman in the size 6 pt I'll be adding the text "T H E D E S T I N E D" (Make sure there's a doulble space in between The and Destined. XD) Place that somewhere on the top of the space for text. Then next we'll take Times New Roman again, and using the size 11 pt, type in "L O V E R" and place it somewhere at the bottom of the "The Destined". :D Which says "The Destined Lover". Then make a new layer and take the same color and take this brush by 77words and place it under "L O V E R". Make sure the brush settings are back to the normal way (100 % Opacity) :D If some of the text is too long then take the eraser tool and erase some. Which gives us:

Step 8: We're almost done! We just need to add a border. XD Merge all of your layers. Then go to Edit >> Stroke (Outline) Selection A window will pop up and you settings should look like this:

Then press okay. You'll see that you know have a border by the size of 3 pixels. Now we're going to go to Edit >> Stroke (Outline) Selection again but this time your settings should look like this:

Then press okay. Now your icon is officially done. XD From all of those steps we get this:
Other icons using that type of style are like these:
//
//
//
And that's it. =] I'd love to see what you got and feedbacks are love. (: ♥