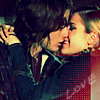
Tutorial # 1
Ok first tutorial so please be nice poeple
I made this for Djonie because she wanted a tutorial..i hope this ok joni!
- Made in ps7
- Not translatable because it has selective coloring
- It really isnt as complicated as it looks.
So we'll go from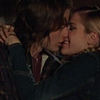
to this
1)Crop your pic, duplicate it twice (Ctrl+J), Set the first duplicate on softlight and the second on screen. Merge together (shft + ctrl+ E)
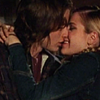
2)Duplicate again (Ctrl+J). Go to Filter > blur > Guassian blur = radius 2.2 px
Go back to your base, duplicate it (Ctrl+J), and drag it to the top and set it on overlay 100%
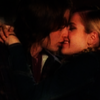
3)It’s still quite blurry and dark so duplicate your base again (Ctrl+J), drag it to the top and set it to linear dodge, opacity 81%
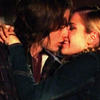
4)Go to layer > New fill layer> solid colour and fill with # 05115A. Set this to exclusion on 70%

to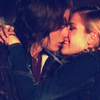
5)Go to layer > New fill layer> solid colour and fill with # 82D4EF. Set this to color burn on 100%

to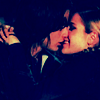
6)Duplicate your base (ctrl + J) and drag it to the top and set this on screen 60%

7)Go to Layer> New adjustment layer>Selective color, and put these settings
Reds
C: 0
M: +100
Y: +100
B: +100
Yellows
C: 0
M: +91
Y: +100
B: +100
Neutrals
C: +29
M: +22
Y: +28
B: +12
Set that layer on lighten at 100%
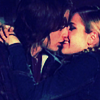
8)Go to layer > New fill layer> solid colour and fill with # F59DAF. Set this to soft light on 63%

to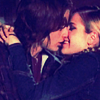
9)Go to layer > New fill layer> solid colour and fill with # 797F81. Set this to soft light on 100%

to
10)Duplicate your base (ctrl + J) and drag it to the top and set this on screen 22%
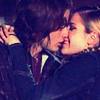
11)Go to Layer> New adjustment layer>color balance, and put these settings
Midtones
C: -41
M: +35
Y: -24
Shadows
C: +17
M: +6
Y: -22
Make sure you’ve ticked preserve luminosity . Leave this layer on Normal 100%
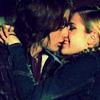
12)Go to layer > New fill layer> solid colour and fill with # E7E097. Set this to darken on 30%

to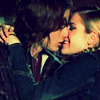
13)Take this texture
(by Kheronai) and set it on lighten 71%

14)Go to Layer> new> layer (shft + ctrl + N). I used a love brush by _cinjudes_)
Merge all layers (shft + ctrl+ E) go to Filter> sharpen> unsharp mask .. use these settings
Amount 35%
Radius 1.0 px
Threshold 0 levels
And TADA!! you’re done!
I made this for Djonie because she wanted a tutorial..i hope this ok joni!
- Made in ps7
- Not translatable because it has selective coloring
- It really isnt as complicated as it looks.
So we'll go from

to this

1)Crop your pic, duplicate it twice (Ctrl+J), Set the first duplicate on softlight and the second on screen. Merge together (shft + ctrl+ E)

2)Duplicate again (Ctrl+J). Go to Filter > blur > Guassian blur = radius 2.2 px
Go back to your base, duplicate it (Ctrl+J), and drag it to the top and set it on overlay 100%

3)It’s still quite blurry and dark so duplicate your base again (Ctrl+J), drag it to the top and set it to linear dodge, opacity 81%

4)Go to layer > New fill layer> solid colour and fill with # 05115A. Set this to exclusion on 70%

to

5)Go to layer > New fill layer> solid colour and fill with # 82D4EF. Set this to color burn on 100%

to

6)Duplicate your base (ctrl + J) and drag it to the top and set this on screen 60%

7)Go to Layer> New adjustment layer>Selective color, and put these settings
Reds
C: 0
M: +100
Y: +100
B: +100
Yellows
C: 0
M: +91
Y: +100
B: +100
Neutrals
C: +29
M: +22
Y: +28
B: +12
Set that layer on lighten at 100%

8)Go to layer > New fill layer> solid colour and fill with # F59DAF. Set this to soft light on 63%

to

9)Go to layer > New fill layer> solid colour and fill with # 797F81. Set this to soft light on 100%

to

10)Duplicate your base (ctrl + J) and drag it to the top and set this on screen 22%

11)Go to Layer> New adjustment layer>color balance, and put these settings
Midtones
C: -41
M: +35
Y: -24
Shadows
C: +17
M: +6
Y: -22
Make sure you’ve ticked preserve luminosity . Leave this layer on Normal 100%

12)Go to layer > New fill layer> solid colour and fill with # E7E097. Set this to darken on 30%

to

13)Take this texture

(by Kheronai) and set it on lighten 71%

14)Go to Layer> new> layer (shft + ctrl + N). I used a love brush by _cinjudes_)
Merge all layers (shft + ctrl+ E) go to Filter> sharpen> unsharp mask .. use these settings
Amount 35%
Radius 1.0 px
Threshold 0 levels
And TADA!! you’re done!
