[tutorial] daisuke - bright textured look
New tutorial!
I was playing around with some effects in Photoshop, and I found this one to look really pretty. And well...my third tutorial, be nice.
Learn how to go from this to this:
Using PS 7.0, easy level of difficulty, and should be transferrable to most programs.
01. After cropping the base of Daisuke to icon size (100x100px), Sharpen the base once (Filter > Sharpen > Sharpen).

02. Duplicate the base, and set to Soft light, 100% opacity.

02. Now, apply this green gradient by moorka:

and set to Screen, 77% opacity.

03. Apply this pink gradient, also by moorka:

and set the layer to Color Burn, 33% opacity.

04. And with this yellow gradient by moorka:

apply to the image and set the layer to Soft light, 44% opacity.

05. Next, using a light texture by fangirls_inc:

Apply it to the image, set it to Lighten, 100% opacity. Depending on the image though, you may need to set it to Flip horizontal (Edit > Transform > Flip Horizontal). But we'll leave it the way it is so it's not covering Daisuke's face.

06. With this light gradient from cdg (?):

Apply and set it to Soft light, 25% opacity.

07. Duplicate the base layer (activate the layer, Layer > Duplicate Layer...), drag it to the top of the layer palette. Then desaturate it (Image > Adjustments > Desaturate). Set the layer to Color burn, 100% opacity.

08. Finally, with this texture from cdg:
Apply and set it to Soft light, 100% opacity.

And you're done!
You can add text, a border and other things to it if you wish. I've decided to leave it plain, to prove that you don't need too many effects to make an icon look really nice (I hope).
Comment if you like it please!
I was playing around with some effects in Photoshop, and I found this one to look really pretty. And well...my third tutorial, be nice.
Learn how to go from this to this:

Using PS 7.0, easy level of difficulty, and should be transferrable to most programs.
01. After cropping the base of Daisuke to icon size (100x100px), Sharpen the base once (Filter > Sharpen > Sharpen).

02. Duplicate the base, and set to Soft light, 100% opacity.

02. Now, apply this green gradient by moorka:

and set to Screen, 77% opacity.

03. Apply this pink gradient, also by moorka:

and set the layer to Color Burn, 33% opacity.

04. And with this yellow gradient by moorka:

apply to the image and set the layer to Soft light, 44% opacity.

05. Next, using a light texture by fangirls_inc:

Apply it to the image, set it to Lighten, 100% opacity. Depending on the image though, you may need to set it to Flip horizontal (Edit > Transform > Flip Horizontal). But we'll leave it the way it is so it's not covering Daisuke's face.

06. With this light gradient from cdg (?):

Apply and set it to Soft light, 25% opacity.

07. Duplicate the base layer (activate the layer, Layer > Duplicate Layer...), drag it to the top of the layer palette. Then desaturate it (Image > Adjustments > Desaturate). Set the layer to Color burn, 100% opacity.

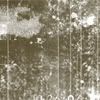
08. Finally, with this texture from cdg:

Apply and set it to Soft light, 100% opacity.

And you're done!
You can add text, a border and other things to it if you wish. I've decided to leave it plain, to prove that you don't need too many effects to make an icon look really nice (I hope).
Comment if you like it please!