[tutorial] setsuna - deepened colours
Since I had a nice response to my last icon post (thanks guys!), which used this particular method to make the icons, I have relented and decided to share how I did this. It's a simplistic tutorial, using only gradients primarily, but it can possibly bring out some great results.
Learn how to go from this to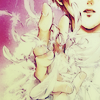
Using PS 7.0, with EASY level of difficulty (just textures and colour layers), definitely transferable to other programs.
01. Crop the base to the size that you want. I decided to focus on Setsuna's hand and the feathers in this case.
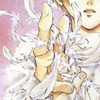
02. Duplicate the layer, sharpen if necessary. Then apply a Gaussian Blur (Filter > Blur > Gaussian Blur), make the size around 2.0. Then set the layer to Overlay, 100% opacity.
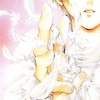
03. Next, some fun with gradients! Take this pinkyellow gradient (from unknown, let me know who did this one please), and drag onto the image. Set this gradient layer to Hard Light, 50% opacity.
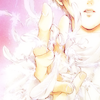
04. Now we'll add a light texture (from inxsomniax). Set this layer to Lighten, 66%. I also rotated this texture 180 degrees, but it can be left like this, depending on the placement of the image.
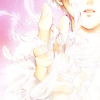
05. Next, a brown gradient (_ravenwing) is added, set this gradient to Soft Light, 100%. This gives the icon a bit of depth.
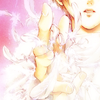
06. This blue-purple gradient (from unknown) is next, set it to Color Burn, 100%. The lines are more defined now.
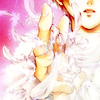
07. Copy the base, and desaturate it (Image > Adjustments > Desaturate). Drag this new layer to the top of the palette, and set it to Color Burn, 70% opacity. This makes the image darker but still retain some subtleness.
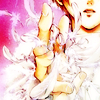
08. Our last gradient is this navy blue black one (from nocturnelorelei), set it to Exclusion, 100%.
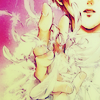
09. Finally, to soften a bit of the yellowness of the exclusion layer and to make the colours more subtle, fill a new layer with #000000 (black). Set this layer to Color, 25% opacity.

That's it! Now you can add text, borders, whatever to the icon, or just leave it as it is. I am aware that this won't necessarily work for all images though, mainly with light to mid coloured manga images, however this comes out really nicely. Just play around with the settings a bit to your liking. ^^
Comments and examples of icons you made with this tut are love.~
Learn how to go from this to

Using PS 7.0, with EASY level of difficulty (just textures and colour layers), definitely transferable to other programs.
01. Crop the base to the size that you want. I decided to focus on Setsuna's hand and the feathers in this case.

02. Duplicate the layer, sharpen if necessary. Then apply a Gaussian Blur (Filter > Blur > Gaussian Blur), make the size around 2.0. Then set the layer to Overlay, 100% opacity.

03. Next, some fun with gradients! Take this pinkyellow gradient (from unknown, let me know who did this one please), and drag onto the image. Set this gradient layer to Hard Light, 50% opacity.

04. Now we'll add a light texture (from inxsomniax). Set this layer to Lighten, 66%. I also rotated this texture 180 degrees, but it can be left like this, depending on the placement of the image.

05. Next, a brown gradient (_ravenwing) is added, set this gradient to Soft Light, 100%. This gives the icon a bit of depth.

06. This blue-purple gradient (from unknown) is next, set it to Color Burn, 100%. The lines are more defined now.

07. Copy the base, and desaturate it (Image > Adjustments > Desaturate). Drag this new layer to the top of the palette, and set it to Color Burn, 70% opacity. This makes the image darker but still retain some subtleness.

08. Our last gradient is this navy blue black one (from nocturnelorelei), set it to Exclusion, 100%.

09. Finally, to soften a bit of the yellowness of the exclusion layer and to make the colours more subtle, fill a new layer with #000000 (black). Set this layer to Color, 25% opacity.

That's it! Now you can add text, borders, whatever to the icon, or just leave it as it is. I am aware that this won't necessarily work for all images though, mainly with light to mid coloured manga images, however this comes out really nicely. Just play around with the settings a bit to your liking. ^^
Comments and examples of icons you made with this tut are love.~