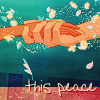
Pocahontas "this peace" icon tutorial
A five-layer tutorial. Sorry this took so long, backwardsclock!

A couple of things you should know:
1) I make all of my icons in Paint Shop Pro 8, and any animations are made in Adobe ImageReady.
2) This tutorial is basically a copy of my layer palette. The topmost image is my topmost layer, and descending pictures correspond with the ones in my .pspimage (PSP equivalent of a .psd).
3) All layers are shown at 100% opacity.
4) Any white brushes or text are placed on a black background for easy-viewing purposes. Keep in mind that the black background is not present in the icon.
5) All bases have been resized and sharpened.
6) This tutorial is modeled after tutorials made by grrliz_icons. I feel compelled to give credit.

Text Layer - blend mode: normal, opacity: 100%, Bonnie's Font, size: 9, color: #FBEACC.

Text Drop Shadow Layer - blend mode: overlay, opacity: 100%, color: #525252.

Image Layer - Desaturate your base. blend mode: soft light, opacity: 100%.

Gradient Layer - blend mode: multiply, opacity: 100%.

Image Layer - blend mode: overlay, opacity: 100%; The texture is from inxsomniax.

Image Layer - blend mode: normal, opacity: 100%, cap is by dj43; The white area is transparent.

Image Layer - blend mode: normal, opacity: 100%; The image is the desaturated and flipped form of inxsomniax's texture.

If you have any questions, I'll do my best to answer them. Please let me know if this helps you in any way. :)
A couple of things you should know:
1) I make all of my icons in Paint Shop Pro 8, and any animations are made in Adobe ImageReady.
2) This tutorial is basically a copy of my layer palette. The topmost image is my topmost layer, and descending pictures correspond with the ones in my .pspimage (PSP equivalent of a .psd).
3) All layers are shown at 100% opacity.
4) Any white brushes or text are placed on a black background for easy-viewing purposes. Keep in mind that the black background is not present in the icon.
5) All bases have been resized and sharpened.
6) This tutorial is modeled after tutorials made by grrliz_icons. I feel compelled to give credit.

Text Layer - blend mode: normal, opacity: 100%, Bonnie's Font, size: 9, color: #FBEACC.

Text Drop Shadow Layer - blend mode: overlay, opacity: 100%, color: #525252.

Image Layer - Desaturate your base. blend mode: soft light, opacity: 100%.

Gradient Layer - blend mode: multiply, opacity: 100%.

Image Layer - blend mode: overlay, opacity: 100%; The texture is from inxsomniax.

Image Layer - blend mode: normal, opacity: 100%, cap is by dj43; The white area is transparent.

Image Layer - blend mode: normal, opacity: 100%; The image is the desaturated and flipped form of inxsomniax's texture.
If you have any questions, I'll do my best to answer them. Please let me know if this helps you in any way. :)