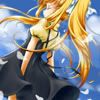
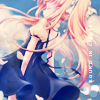
#1 Icon tutorial. [Requested by Nikki VK~<3]
This tutorial was requested by my wifey Nikki VK. This icon is no good but o.o;;
From
to
Made in Photoshop 7. Uses no selective coloring, curves, etc. Just basic coloring.
So o.o *cough* .__. mm. I took this base from miseryymachine's batch. Do not duplicate it :D weird, yeah. So, anyway...
Make a new layer and fill with with #000c38 and set it to Exclusion and leave it at 100%.
Now, make another fill layer and flood fill it with #0036ff and set it to Exclusion at 40%.
Now, if your icon looks too bright or uneven, duplicate the base, destasturate it (Ctrl+Shift+U) and bring it to the top at Softlight 100% (or whatever is good for your image).
Looking good? Alright, we're almost done. Next take this texture made by ???? and paste it on your image and set it to Overlay 100%.
Add some brushes or some text, whatever it is you like ^.^
There you go! I hope I was helpful! Please show me your creations ^^;;
From

to
Made in Photoshop 7. Uses no selective coloring, curves, etc. Just basic coloring.
So o.o *cough* .__. mm. I took this base from miseryymachine's batch. Do not duplicate it :D weird, yeah. So, anyway...
Make a new layer and fill with with #000c38 and set it to Exclusion and leave it at 100%.
Now, make another fill layer and flood fill it with #0036ff and set it to Exclusion at 40%.
Now, if your icon looks too bright or uneven, duplicate the base, destasturate it (Ctrl+Shift+U) and bring it to the top at Softlight 100% (or whatever is good for your image).
Looking good? Alright, we're almost done. Next take this texture made by ???? and paste it on your image and set it to Overlay 100%.
Add some brushes or some text, whatever it is you like ^.^
There you go! I hope I was helpful! Please show me your creations ^^;;