TUTORIAL #8
KRISTEN KREUK
tutorial #8
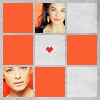
we'll be making this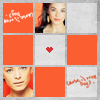
(idea from whitestroke)
using
- photoshop cs 2
- lot's of cropping and cutting
step 001
first take a neutral texture for background. i use this one by pildas
step 002
then i made 9 squares in size 30x30px
reqtangular marquee tool >> style >> fixed size >> w: 30/h: 30

step 003
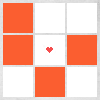
then i selected 4 of those squares with a magic wand tool and filled them with a red-ish colour (i used #fb5e30)
edit >> fill

step 004
now i took a little hart made by _excentric_ (
) and pasted it in the middle sqare and deleted the gray stuff around it
step 005
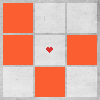
now i duplicated the background texture and brought it to the very top and set it to linear burn
layer >> duplicate layer
layer >> arrange >> bring to front
and then i used the magic want tool again to select the coloured boxes and then delete them from the background copy layer
step 006
now it's time for the pictures.
choose whatever images you like and prepare them. it's up to you really what colouring and stuff you use on them, but if you need some help, feel free take a look at a few other tutorials i have made, which specify on colouring.
now resize your image(s), selext a white square with the magic wand tool and paste the picture into the selection
edit >> paste into
repeat that with the same picture or choose another one
step 007
now it's time for text. i used tiny text made by forwardshuffle (link)
i pasted it in white to one of the coloured boxes and in red on one of the white boxes.
when that's done, just flatten the image and that's all!

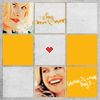
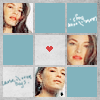
other icons made with this tutorial
- this tutorial is a guideline, do not follow it step by step!!
- i'd like to get feedback on this tutorial and also see what others can do with this
- feel free to ask, if something is unclear
- if you like this, feel free to join this journal
tutorial #8
we'll be making this

(idea from whitestroke)
using
- photoshop cs 2
- lot's of cropping and cutting
step 001
first take a neutral texture for background. i use this one by pildas

step 002
then i made 9 squares in size 30x30px
reqtangular marquee tool >> style >> fixed size >> w: 30/h: 30

step 003
then i selected 4 of those squares with a magic wand tool and filled them with a red-ish colour (i used #fb5e30)
edit >> fill

step 004
now i took a little hart made by _excentric_ (

) and pasted it in the middle sqare and deleted the gray stuff around it

step 005
now i duplicated the background texture and brought it to the very top and set it to linear burn
layer >> duplicate layer
layer >> arrange >> bring to front
and then i used the magic want tool again to select the coloured boxes and then delete them from the background copy layer

step 006
now it's time for the pictures.
choose whatever images you like and prepare them. it's up to you really what colouring and stuff you use on them, but if you need some help, feel free take a look at a few other tutorials i have made, which specify on colouring.
now resize your image(s), selext a white square with the magic wand tool and paste the picture into the selection
edit >> paste into
repeat that with the same picture or choose another one

step 007
now it's time for text. i used tiny text made by forwardshuffle (link)
i pasted it in white to one of the coloured boxes and in red on one of the white boxes.
when that's done, just flatten the image and that's all!

other icons made with this tutorial


- this tutorial is a guideline, do not follow it step by step!!
- i'd like to get feedback on this tutorial and also see what others can do with this
- feel free to ask, if something is unclear
- if you like this, feel free to join this journal