Tsubasa Manga Colouring Tutorial
Go from this to this:
Photoshop 7, maybe transferable..
Sorry for the delay in posting this tutorial! I've been a tad busy lately with some crazy huge cases and other things. But, SUCCESS! I'm posting this on basic manga colouring. It's pretty simple, though maybe will take a few tried to get down. Enjoy! And if you have any questions, feel free to comment below!
<3
-----------
Step 1: Crop your image to your desired size. I am using a manga scan from Tsubasa.
Image:

Step 2: Change the Image Mode from Index to RGB Color. (Image-->Mode-->RGB Color)
If you do not do this, all the colours will appear in grey shade. screenshot
Step 3: With the ERASER tool (set Hard Round, 3px), erase anything in the background that you do not want in the picture ie: words and the such. (Bonus Tip* With some manga scans, the background may NOT be solid white like the one I'm using. To prevent streaks and having to colour/erase the whole background.. click on the BACKGROUND colour grid and EYEDROP an area of the background colour. This way, when you use the ERASER tool, the background colour matches.) screenshot
Image:
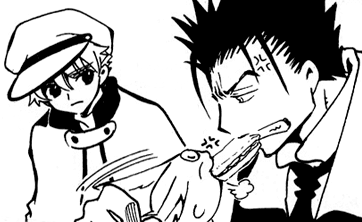
Step 4: Keeping your ERASER tool selected, ZOOM your image to about 700% (or which ever size your comfortable with. I tend to zoom into pixelation since it's easier for me to see and erasing isn't so choppy. *has a shaky hand. lol.*).. Erase any out-of-place pixels (pixels that don't match the background or are not part of the actual image.) screenshot
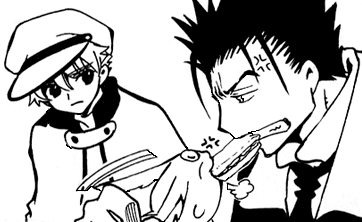
Step 5: Switch to the PENCIL tool (Hard Round, 1px) Select colour to BLACK (#000000) and fill any blotches and black spots that are missing. Draw lines to any "gaps" that you may see, like around Kurogane'e mouth and the air swip on Syaoran's cloak. (This is pretty imporant to do if you want your colours to place properly. The lines don't have to be completely perfect since they will be fixed later.) screenshot
Image:
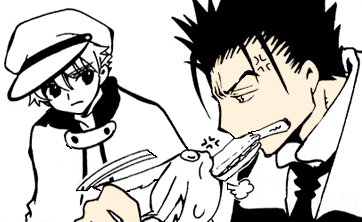
Step 6: FOREGROUND Colour select #FFDA9F and select the PAINT BUCKET tool. Click the area, which in this picture will be be starting with Kurogane's face. Select FADE PAINT BUCKET in the EDIT section of the upper menu. Fade to 36%. To make the next colourings even, change the OPACITY level of the PAINT BUCKET tool to the same number, 36%. Fill the rest of the areas you want to use with this colour ie: the rest of Kurogane's face, his hand. Once the major areas are filled, you'll notice some of the smaller ares may have been missed. Just ZOOM to a comfortable level and fill as ususal. (Further zooming is easier in my opinion.) Screenshot A:Screenshot B
Image:
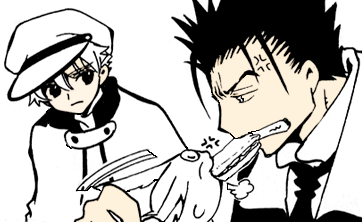
Step 7: Contiune with the PAINT BUCKET to fill Syaoran's face. To change the colour shades, simple change the FADE PAINT BUCKET level. What I did here was lower the level to 26%. Make sure to change the OPACITY to match!
Image:
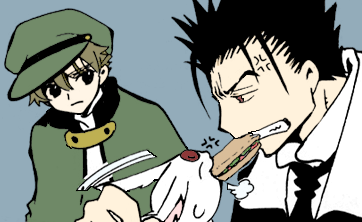
Step 8: Keep on going with your colouring. Here's a list of colours I used for this image.
Syaoran's Cloak and Hat - #224A15, FADE to 65%
Cloak buckle - #A38F08, FADE 70%
Hair - #4C4303, FADE 60%
Mokona's Gem - #720606, FADE 80%
Inside of Mokona's Ear - #FFB3B3, FADE 40%
Kurogane's Eye - # 8E3838, FADE 80%
Sandwich Bread - #A15B00, FADE 40%
Sandwich Inside - #216C03, FADE 60% & #DF2F38, FADE 60%
Air Puff and Swip - #E1F9FF, FADE 25%
Background - #0F4666, FADE 45%
Image:
Step 9: Once the colours are in place, we will now fix the lines we made back in Setp 5. To do this, we'll start with Syaoran. Select the BACKGROUND colour and then EYEDROP to select the colour of Syaoran's Cloak. Sreenshot
Step 10: Select the ERASER tool (Hard round, 3px) and erase the lines that were drawn earlier on the GREEN side ONLY. You may have to swap BG colour with the air swip to even out anything.. but this is a basic step I use to get everything straight. Repeat this process with any other lines to remove. ie: Kurogane's face, Mokona.. etc. Screenshot
Image:
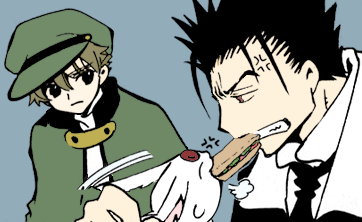
-Repeat any various steps until you are satisfied with your image!
------
Well, there you have the basic manga colouring that I use. There are probably other ways, but I seem to find this one the easiest and most effective way without taking too much time. It'll probably take awhile to get used to the erasing and such, but it works. For use of darker colours (FADE 80% and above), you would need to blend the outlines with either the SMUDGE tool or a light SOFT BRUSH or PENCIL tool.
*I noticed I screwed up on Syaoran's cloak towards the bottom. MY bad. lol.
I hope this was helpful! And enjoy your creating!
Photoshop 7, maybe transferable..
Sorry for the delay in posting this tutorial! I've been a tad busy lately with some crazy huge cases and other things. But, SUCCESS! I'm posting this on basic manga colouring. It's pretty simple, though maybe will take a few tried to get down. Enjoy! And if you have any questions, feel free to comment below!
<3
-----------
Step 1: Crop your image to your desired size. I am using a manga scan from Tsubasa.
Image:

Step 2: Change the Image Mode from Index to RGB Color. (Image-->Mode-->RGB Color)
If you do not do this, all the colours will appear in grey shade. screenshot
Step 3: With the ERASER tool (set Hard Round, 3px), erase anything in the background that you do not want in the picture ie: words and the such. (Bonus Tip* With some manga scans, the background may NOT be solid white like the one I'm using. To prevent streaks and having to colour/erase the whole background.. click on the BACKGROUND colour grid and EYEDROP an area of the background colour. This way, when you use the ERASER tool, the background colour matches.) screenshot
Image:

Step 4: Keeping your ERASER tool selected, ZOOM your image to about 700% (or which ever size your comfortable with. I tend to zoom into pixelation since it's easier for me to see and erasing isn't so choppy. *has a shaky hand. lol.*).. Erase any out-of-place pixels (pixels that don't match the background or are not part of the actual image.) screenshot
Step 5: Switch to the PENCIL tool (Hard Round, 1px) Select colour to BLACK (#000000) and fill any blotches and black spots that are missing. Draw lines to any "gaps" that you may see, like around Kurogane'e mouth and the air swip on Syaoran's cloak. (This is pretty imporant to do if you want your colours to place properly. The lines don't have to be completely perfect since they will be fixed later.) screenshot
Image:

Step 6: FOREGROUND Colour select #FFDA9F and select the PAINT BUCKET tool. Click the area, which in this picture will be be starting with Kurogane's face. Select FADE PAINT BUCKET in the EDIT section of the upper menu. Fade to 36%. To make the next colourings even, change the OPACITY level of the PAINT BUCKET tool to the same number, 36%. Fill the rest of the areas you want to use with this colour ie: the rest of Kurogane's face, his hand. Once the major areas are filled, you'll notice some of the smaller ares may have been missed. Just ZOOM to a comfortable level and fill as ususal. (Further zooming is easier in my opinion.) Screenshot A:Screenshot B
Image:

Step 7: Contiune with the PAINT BUCKET to fill Syaoran's face. To change the colour shades, simple change the FADE PAINT BUCKET level. What I did here was lower the level to 26%. Make sure to change the OPACITY to match!
Image:

Step 8: Keep on going with your colouring. Here's a list of colours I used for this image.
Syaoran's Cloak and Hat - #224A15, FADE to 65%
Cloak buckle - #A38F08, FADE 70%
Hair - #4C4303, FADE 60%
Mokona's Gem - #720606, FADE 80%
Inside of Mokona's Ear - #FFB3B3, FADE 40%
Kurogane's Eye - # 8E3838, FADE 80%
Sandwich Bread - #A15B00, FADE 40%
Sandwich Inside - #216C03, FADE 60% & #DF2F38, FADE 60%
Air Puff and Swip - #E1F9FF, FADE 25%
Background - #0F4666, FADE 45%
Image:

Step 9: Once the colours are in place, we will now fix the lines we made back in Setp 5. To do this, we'll start with Syaoran. Select the BACKGROUND colour and then EYEDROP to select the colour of Syaoran's Cloak. Sreenshot
Step 10: Select the ERASER tool (Hard round, 3px) and erase the lines that were drawn earlier on the GREEN side ONLY. You may have to swap BG colour with the air swip to even out anything.. but this is a basic step I use to get everything straight. Repeat this process with any other lines to remove. ie: Kurogane's face, Mokona.. etc. Screenshot
Image:

-Repeat any various steps until you are satisfied with your image!
------
Well, there you have the basic manga colouring that I use. There are probably other ways, but I seem to find this one the easiest and most effective way without taking too much time. It'll probably take awhile to get used to the erasing and such, but it works. For use of darker colours (FADE 80% and above), you would need to blend the outlines with either the SMUDGE tool or a light SOFT BRUSH or PENCIL tool.
*I noticed I screwed up on Syaoran's cloak towards the bottom. MY bad. lol.
I hope this was helpful! And enjoy your creating!