Zachary Quinto Tutorial
Go from this: 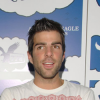
to this:
or this:
in 9 [or 11] steps!
Program Used: Paint Shop Pro 8
Translatable: Yes!
Involves: Curves, Color Balance, Color Layers, Hue/Saturation/Lightness
[NOTE 1] Outcomes will vary.
[NOTE 2] You don't have to follow this step by step. If you need to add or remove something, go ahead and play around. But I'm sure you all know this already. :)
I started with a picture of the oh so sexy Zachary Quinto and resized it to 100x100.
1. Duplicate the base 2 times.
Set the first one (closest to the base) to Screen 80% and the other to Soft Light 100%
2. [New Raster Layer]
#B403C9 > Exclusion 45%
[Gross, right? Don't worry, I know what I'm doing.]
3. [New Raster Layer]
#D8F6EE > Burn 100%
4. [New Raster Layer]
#F5CDD6 > Softlight 100%
5. Duplicate layer 4 and change opacity to 50%
6. Duplicate base and drag to top.
Set to Softlight 100%
7. [Color Balance]
Midtones: 30 55 55
Shadows: -82 -5 -56
Highlights: 50 0 20
[IF IT'S TOO REDDISH, CHANGE HIGHLIGHTS TO "50 0 50"]
[Preserve Luminance = CHECKED]
6. [Hue/Saturation/Lightness]
Saturation > 30-50
[Whatever your image permits. I used 30.]
8. Merge All.
9. Sharpen [if you want].
I like to use Unsharp Mask.
Duplicate image.
Radius: 1.00; Strength: 55; Clipping: 0
You can adjust the opacity, if needed.
10. [Text]
I used "The Maple Origins", size 28.
11. While on the text layer, take the lasso/freehand selection tool and outline his head, or wherever you don't want the text covering, and then press delete.
And you're done!
Other icons made using this tutorial:
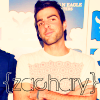
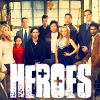

Comments would be nice. I'd love to see your results. :)
If you use example icons, please credit either heymadeline or shadyavenue. Thanks.

to this:

or this:

in 9 [or 11] steps!
Program Used: Paint Shop Pro 8
Translatable: Yes!
Involves: Curves, Color Balance, Color Layers, Hue/Saturation/Lightness
[NOTE 1] Outcomes will vary.
[NOTE 2] You don't have to follow this step by step. If you need to add or remove something, go ahead and play around. But I'm sure you all know this already. :)
I started with a picture of the oh so sexy Zachary Quinto and resized it to 100x100.
1. Duplicate the base 2 times.
Set the first one (closest to the base) to Screen 80% and the other to Soft Light 100%
2. [New Raster Layer]
#B403C9 > Exclusion 45%
[Gross, right? Don't worry, I know what I'm doing.]
3. [New Raster Layer]
#D8F6EE > Burn 100%
4. [New Raster Layer]
#F5CDD6 > Softlight 100%
5. Duplicate layer 4 and change opacity to 50%
6. Duplicate base and drag to top.
Set to Softlight 100%
7. [Color Balance]
Midtones: 30 55 55
Shadows: -82 -5 -56
Highlights: 50 0 20
[IF IT'S TOO REDDISH, CHANGE HIGHLIGHTS TO "50 0 50"]
[Preserve Luminance = CHECKED]
6. [Hue/Saturation/Lightness]
Saturation > 30-50
[Whatever your image permits. I used 30.]
8. Merge All.
9. Sharpen [if you want].
I like to use Unsharp Mask.
Duplicate image.
Radius: 1.00; Strength: 55; Clipping: 0
You can adjust the opacity, if needed.
10. [Text]
I used "The Maple Origins", size 28.
11. While on the text layer, take the lasso/freehand selection tool and outline his head, or wherever you don't want the text covering, and then press delete.
And you're done!
Other icons made using this tutorial:


Comments would be nice. I'd love to see your results. :)
If you use example icons, please credit either heymadeline or shadyavenue. Thanks.